The mage class in Dragon Age: The Veilguard is a bit odd. You can stick to the tried and true staff combat that has been a Dragon Age staple since the start of the franchise (beard and pointy hat optional), but you also can choose to wield the novel orb and mageknife weapons. The mage has often has an alternative to the stave, thanks to various melee-focused specializations in other Dragon Age games, but unusual athleticism and a penchant for melee seems baked into Rook’s persona. Even if you don’t care to take the Spellblade specialization you can still competently employ the orb and mageknife to make gameplay faster and more action-oriented. If you decide to fully embrace the orb and mageknife, however, and want to blast enemies with potent spells and arcane bombs, the Arcane Bomb Spellblade Build will help you dominate anything that dares stand in your way!
Page Breakdown
Arcane Bomb Spellblade Playstyle and Abilities
The main focus and damage-dealer of the Arcane Bomb build is, of course, Arcane Bomb. At least at the start of the game. Since Arcane Bombs are just a function of the orb and mageknife, this build is available from the very start of the game and it’ll evolve several times over the course of a playthrough as you gain access to more skill points, gear and, of course, the Spellblade specialization.
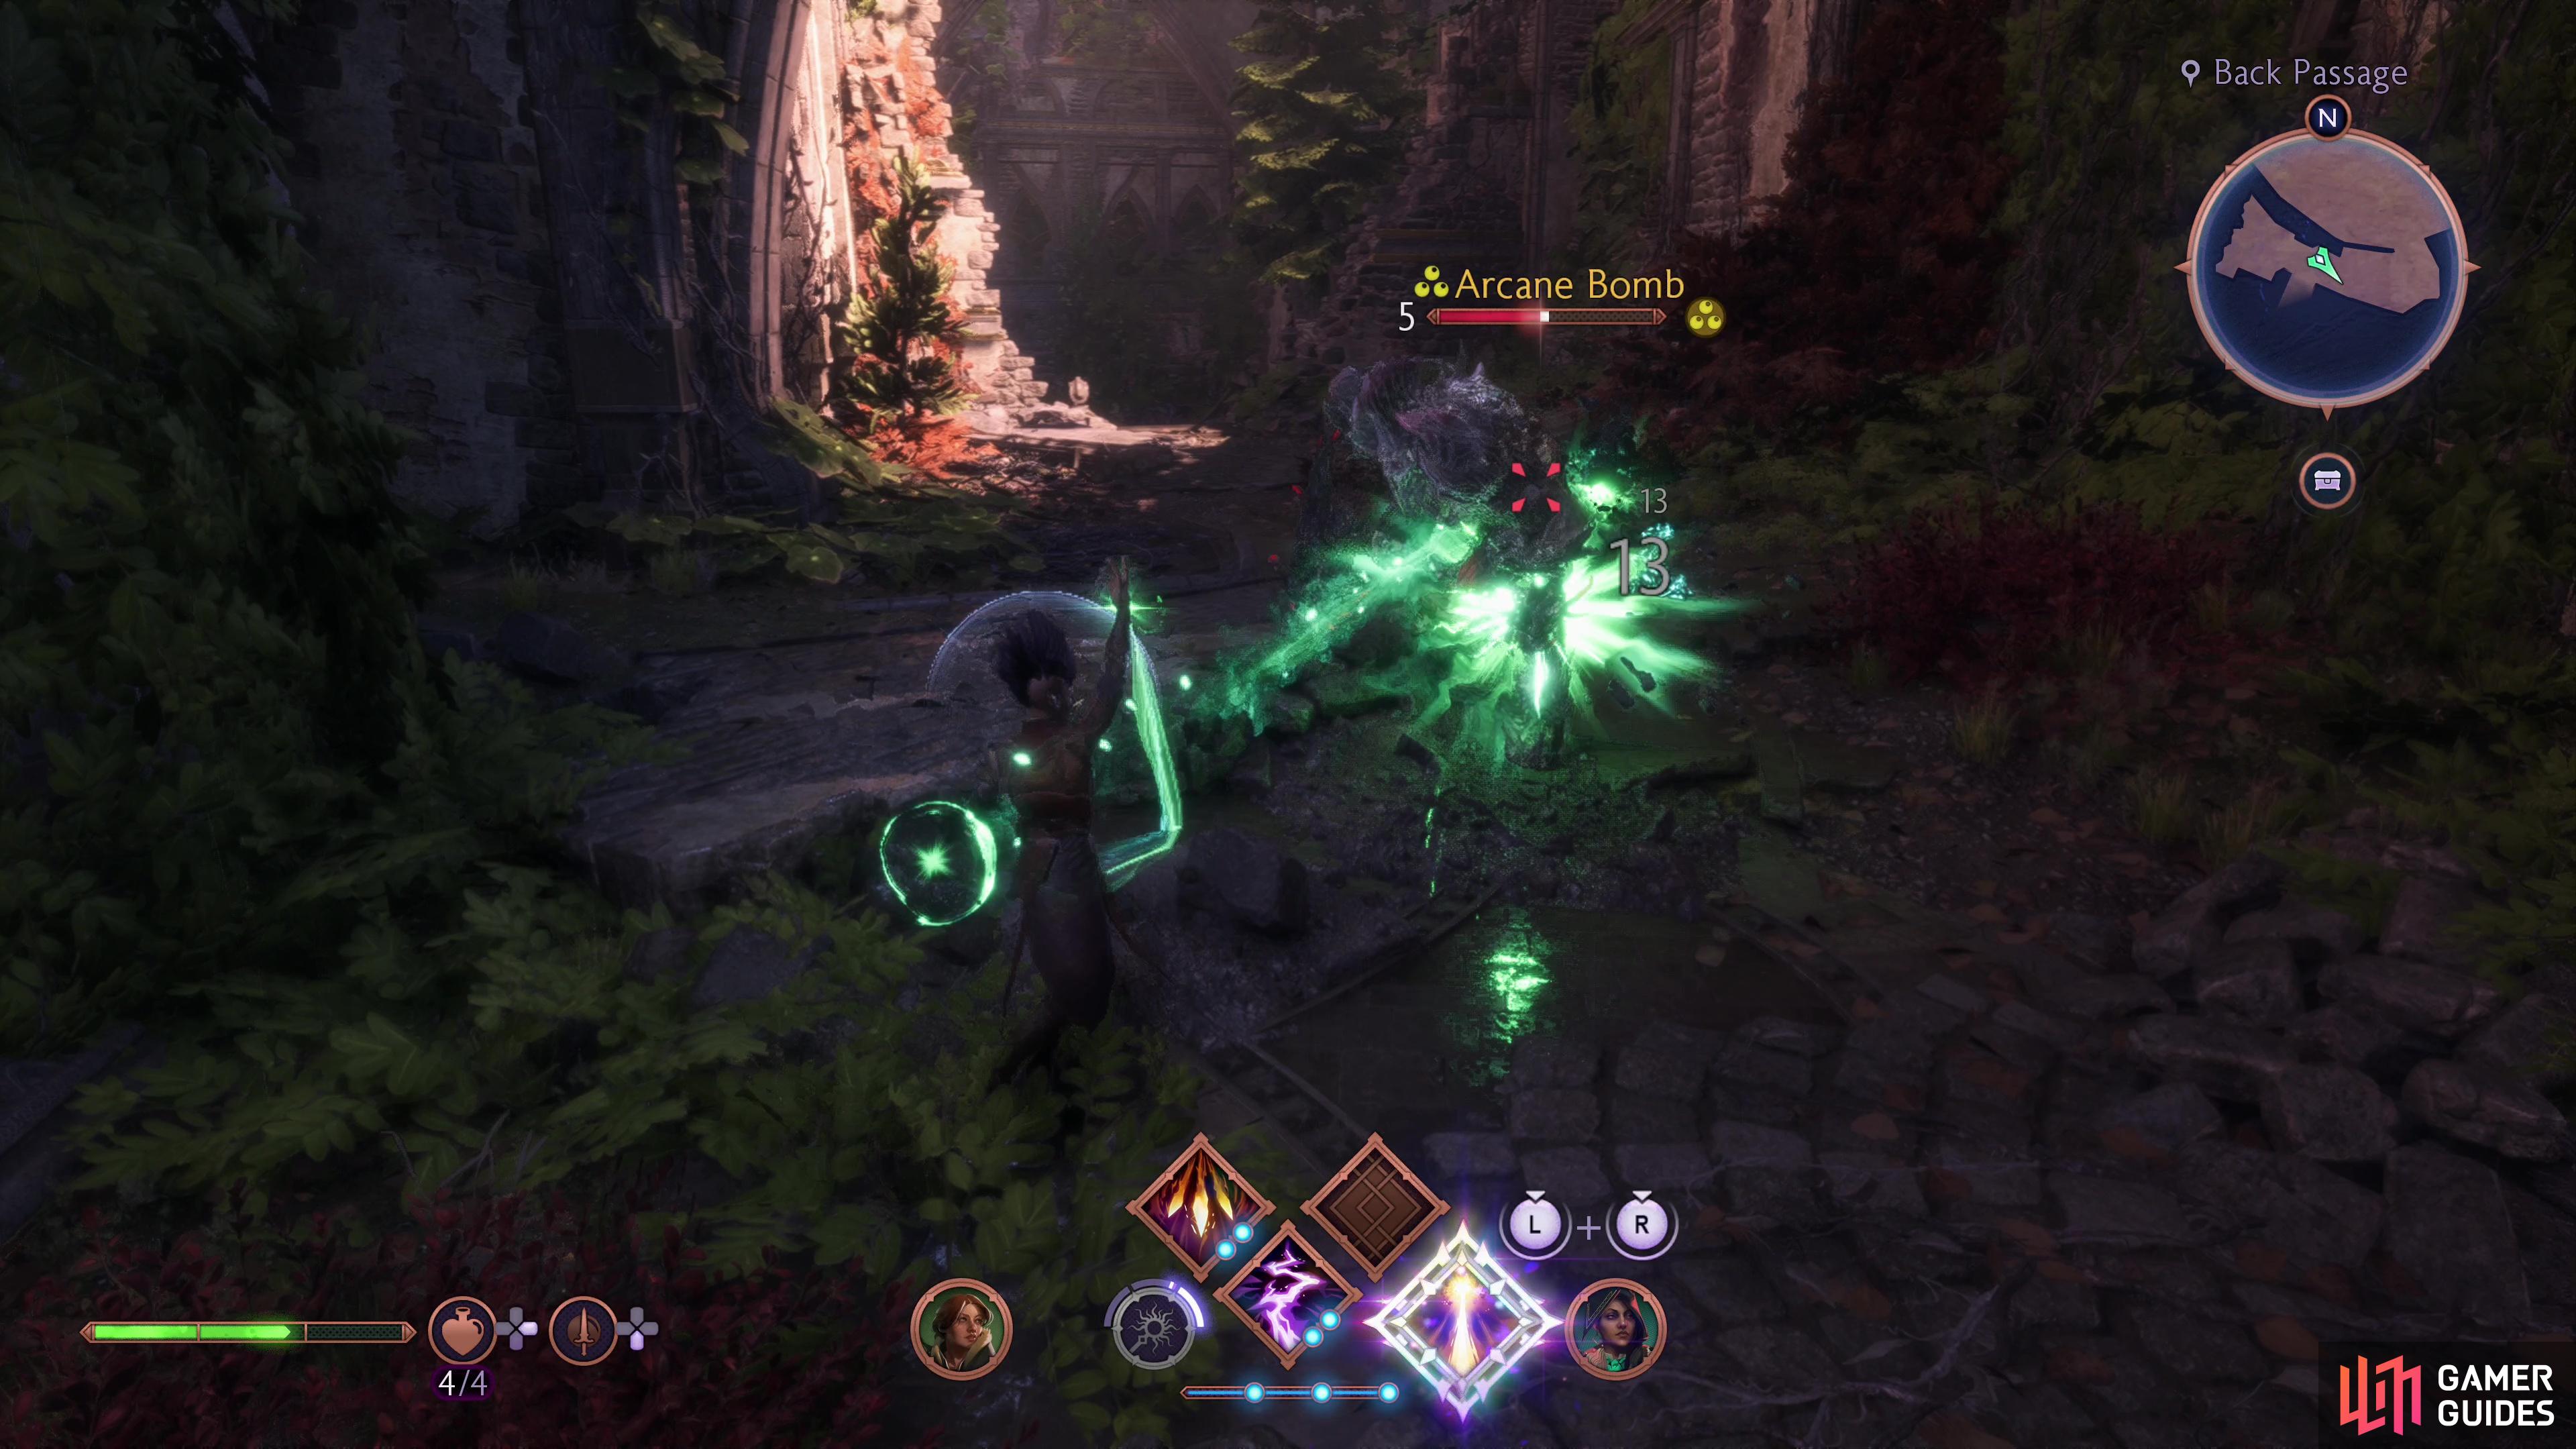
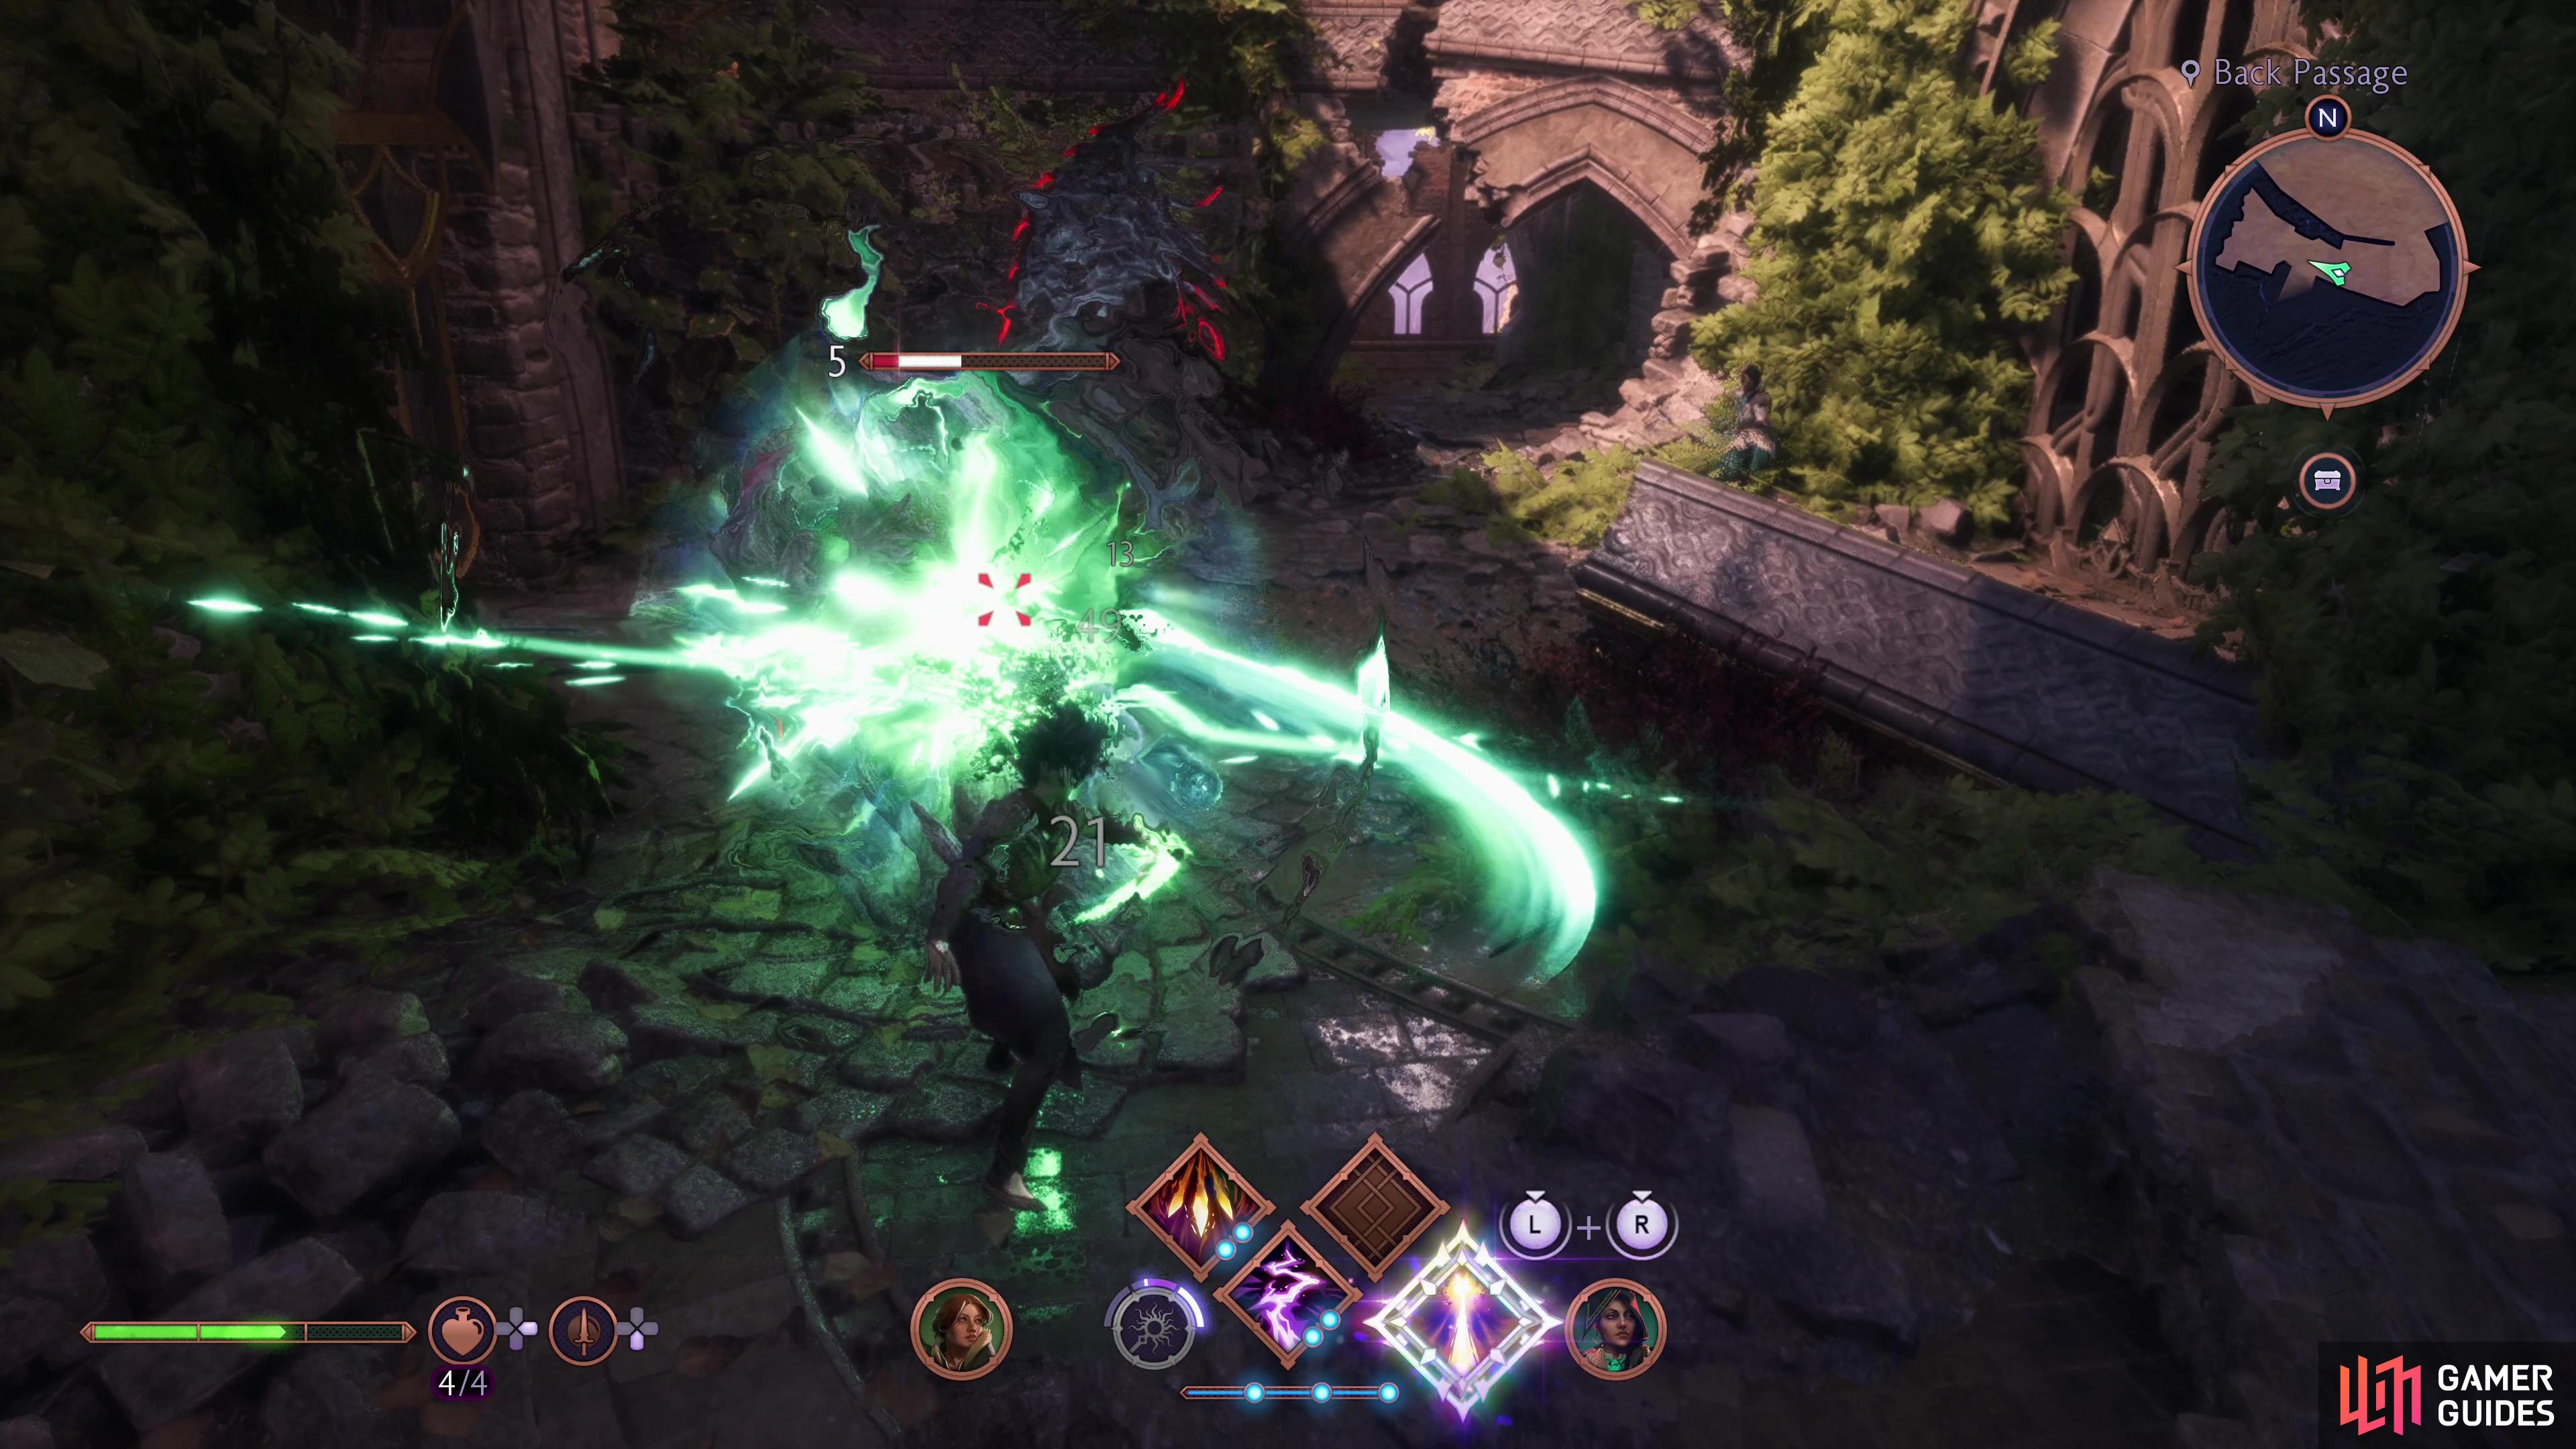
(1 of 2) At its most basic, you’ll use orb attacks to inflict Arcane Marks,
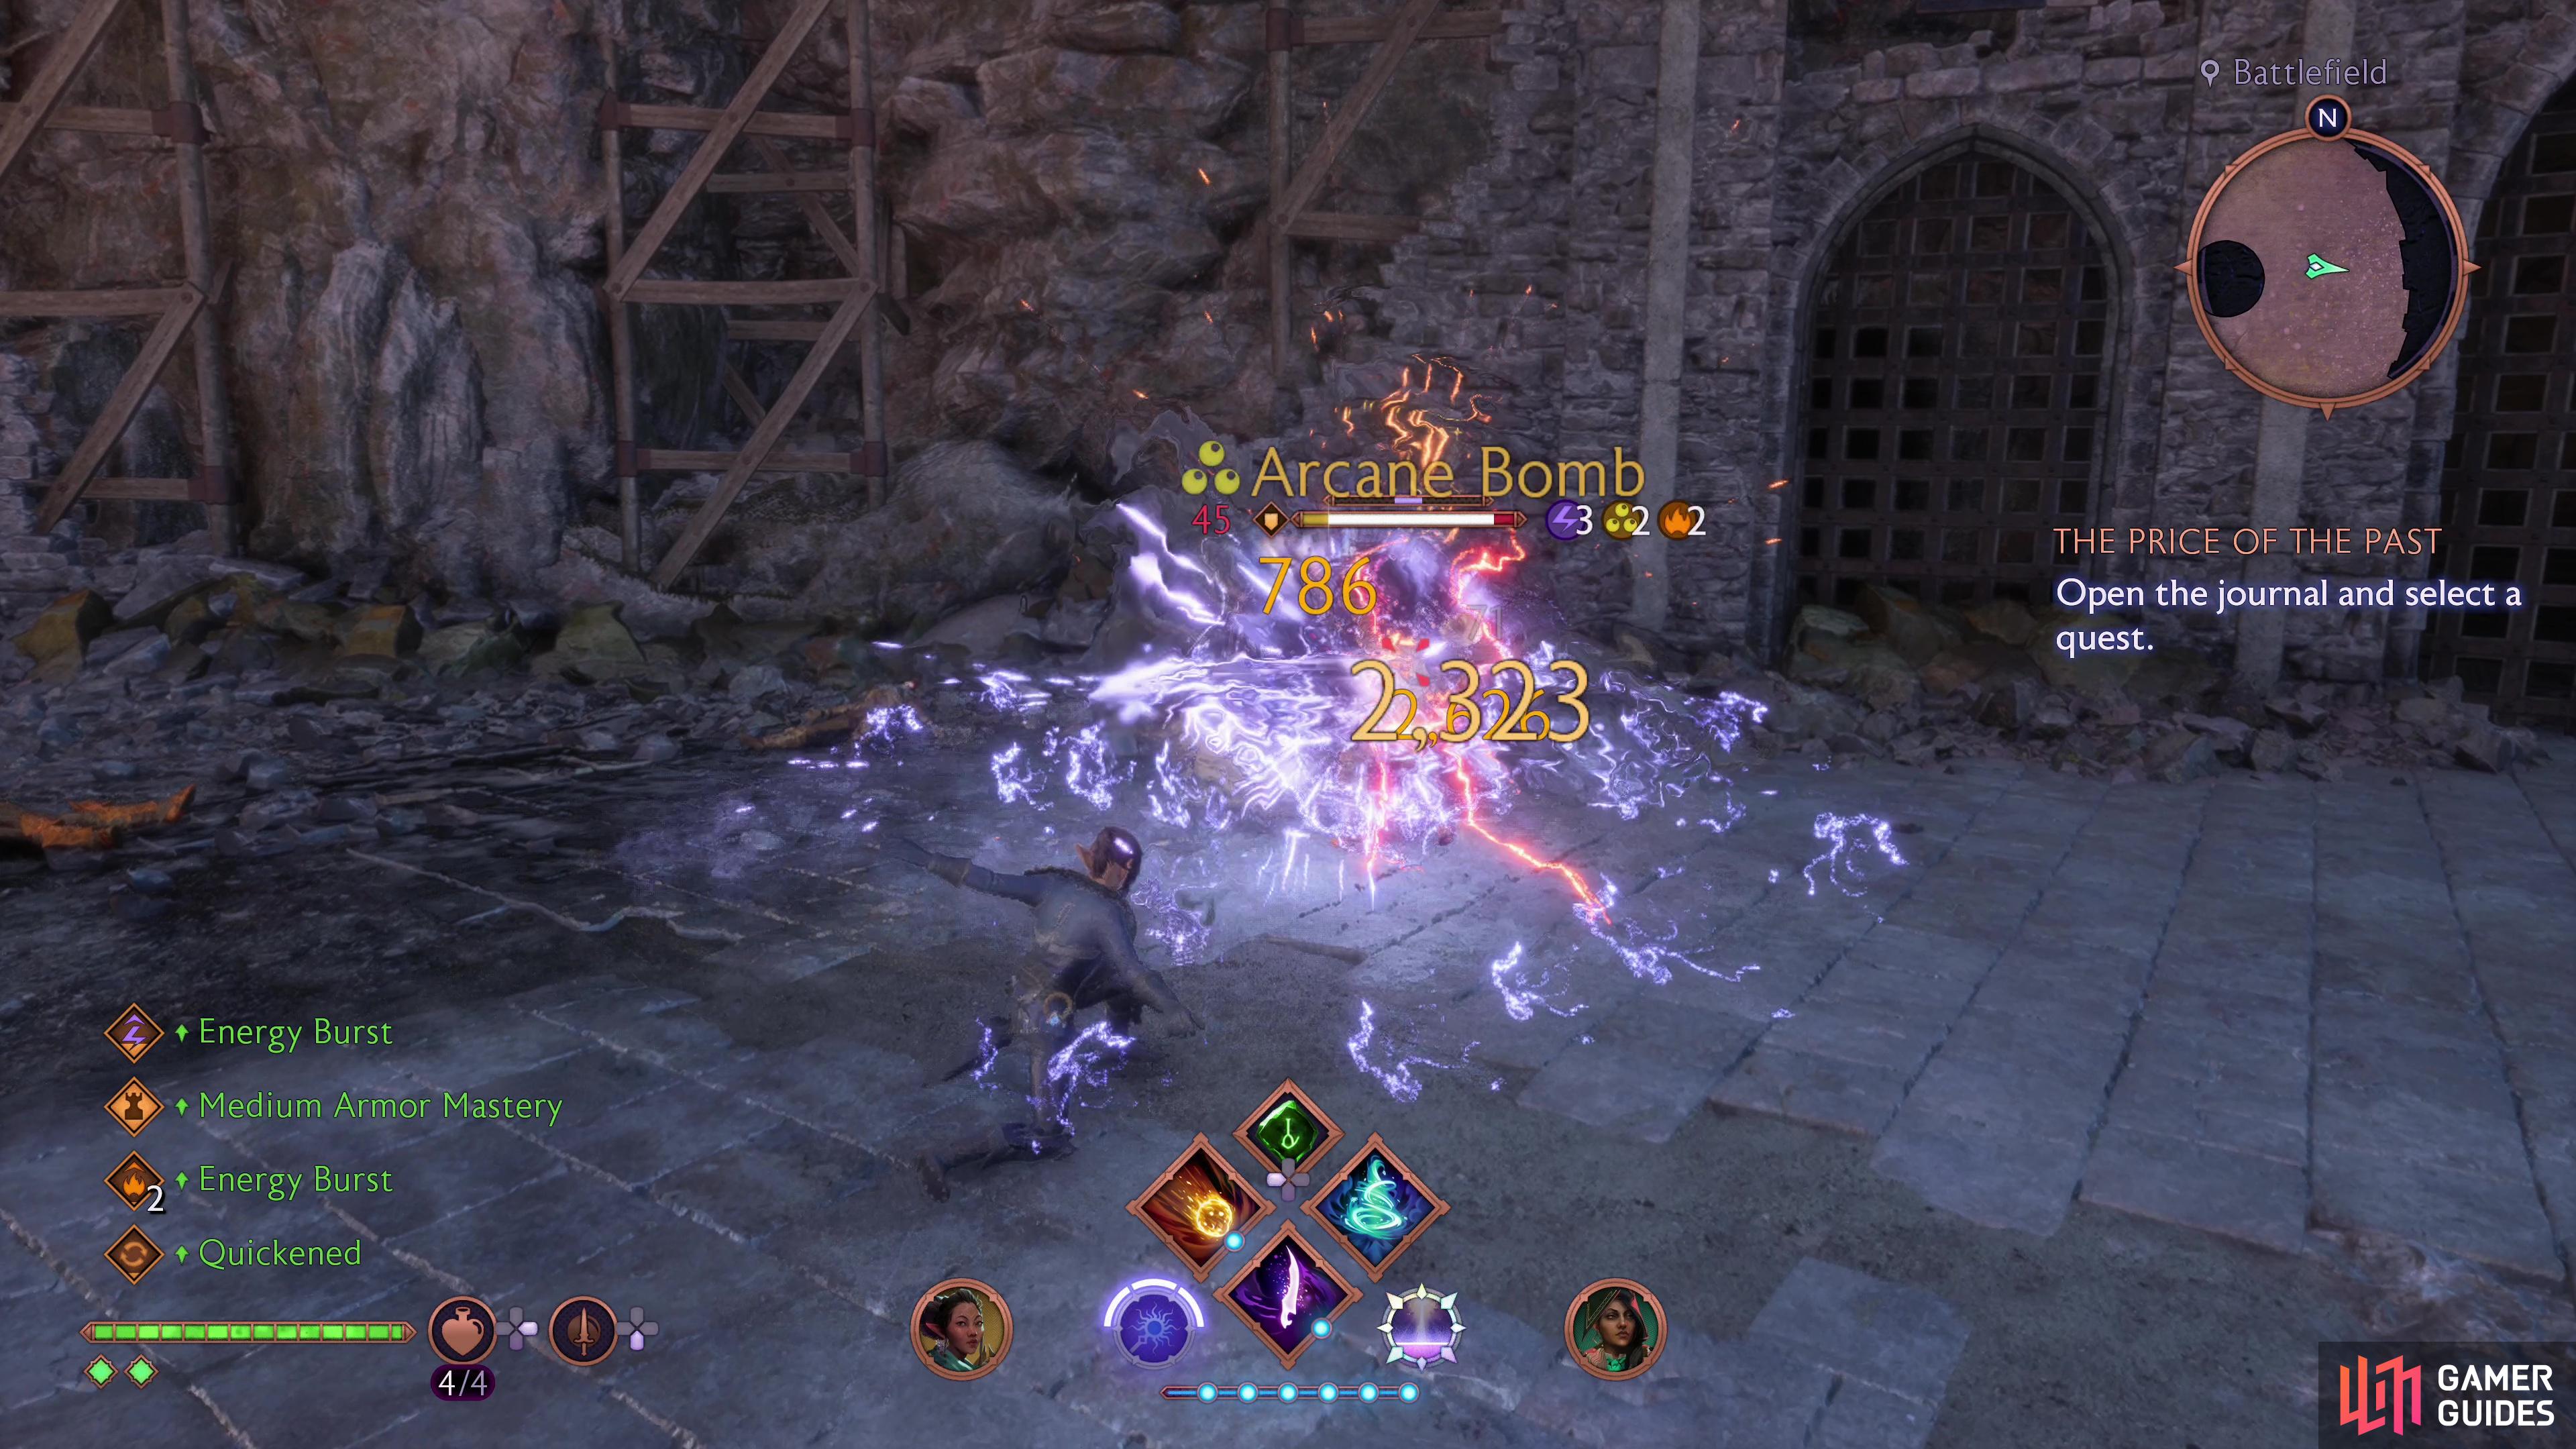
At its most basic, you’ll use orb attacks to inflict Arcane Marks, (left), three Arcane Marks turn into an Arcane Bomb, which can be detonated with the mageknife for big damage. (right)
Early Game Build - Charged Heavy Attacks and Throwing Mageknives
The Arcane Bomb Build in its most simple form is a series of light attacks (


Early game, this combo is the core gameplay element around which this build revolves, punctuated by the odd Arcane Shot and later on, Chain Lightning, although your mana reserves are low enough that you won’t be tossing these spells out all that often. Work your way to Chain Lightning and grab Fade Conduit and Perfect Cast, which will spice your build up a bit by adding a proper detonator (Overwhelm), grant you +50 Mana and give you the ability to score extra damage by timing your charged heavy attacks (hold 

(1 of 3) At the beginning of the game, your ideal way of detonating Arcane Bombs is via charged attacks.
Once this is done, work your way down to the Spellblade tree by getting the following skills:
-
 Concentration
- Energy Burst
- Bulwark
- Imbued Reaction
- Staggering Charge
-
 Storm Surge
- Shellbreaker
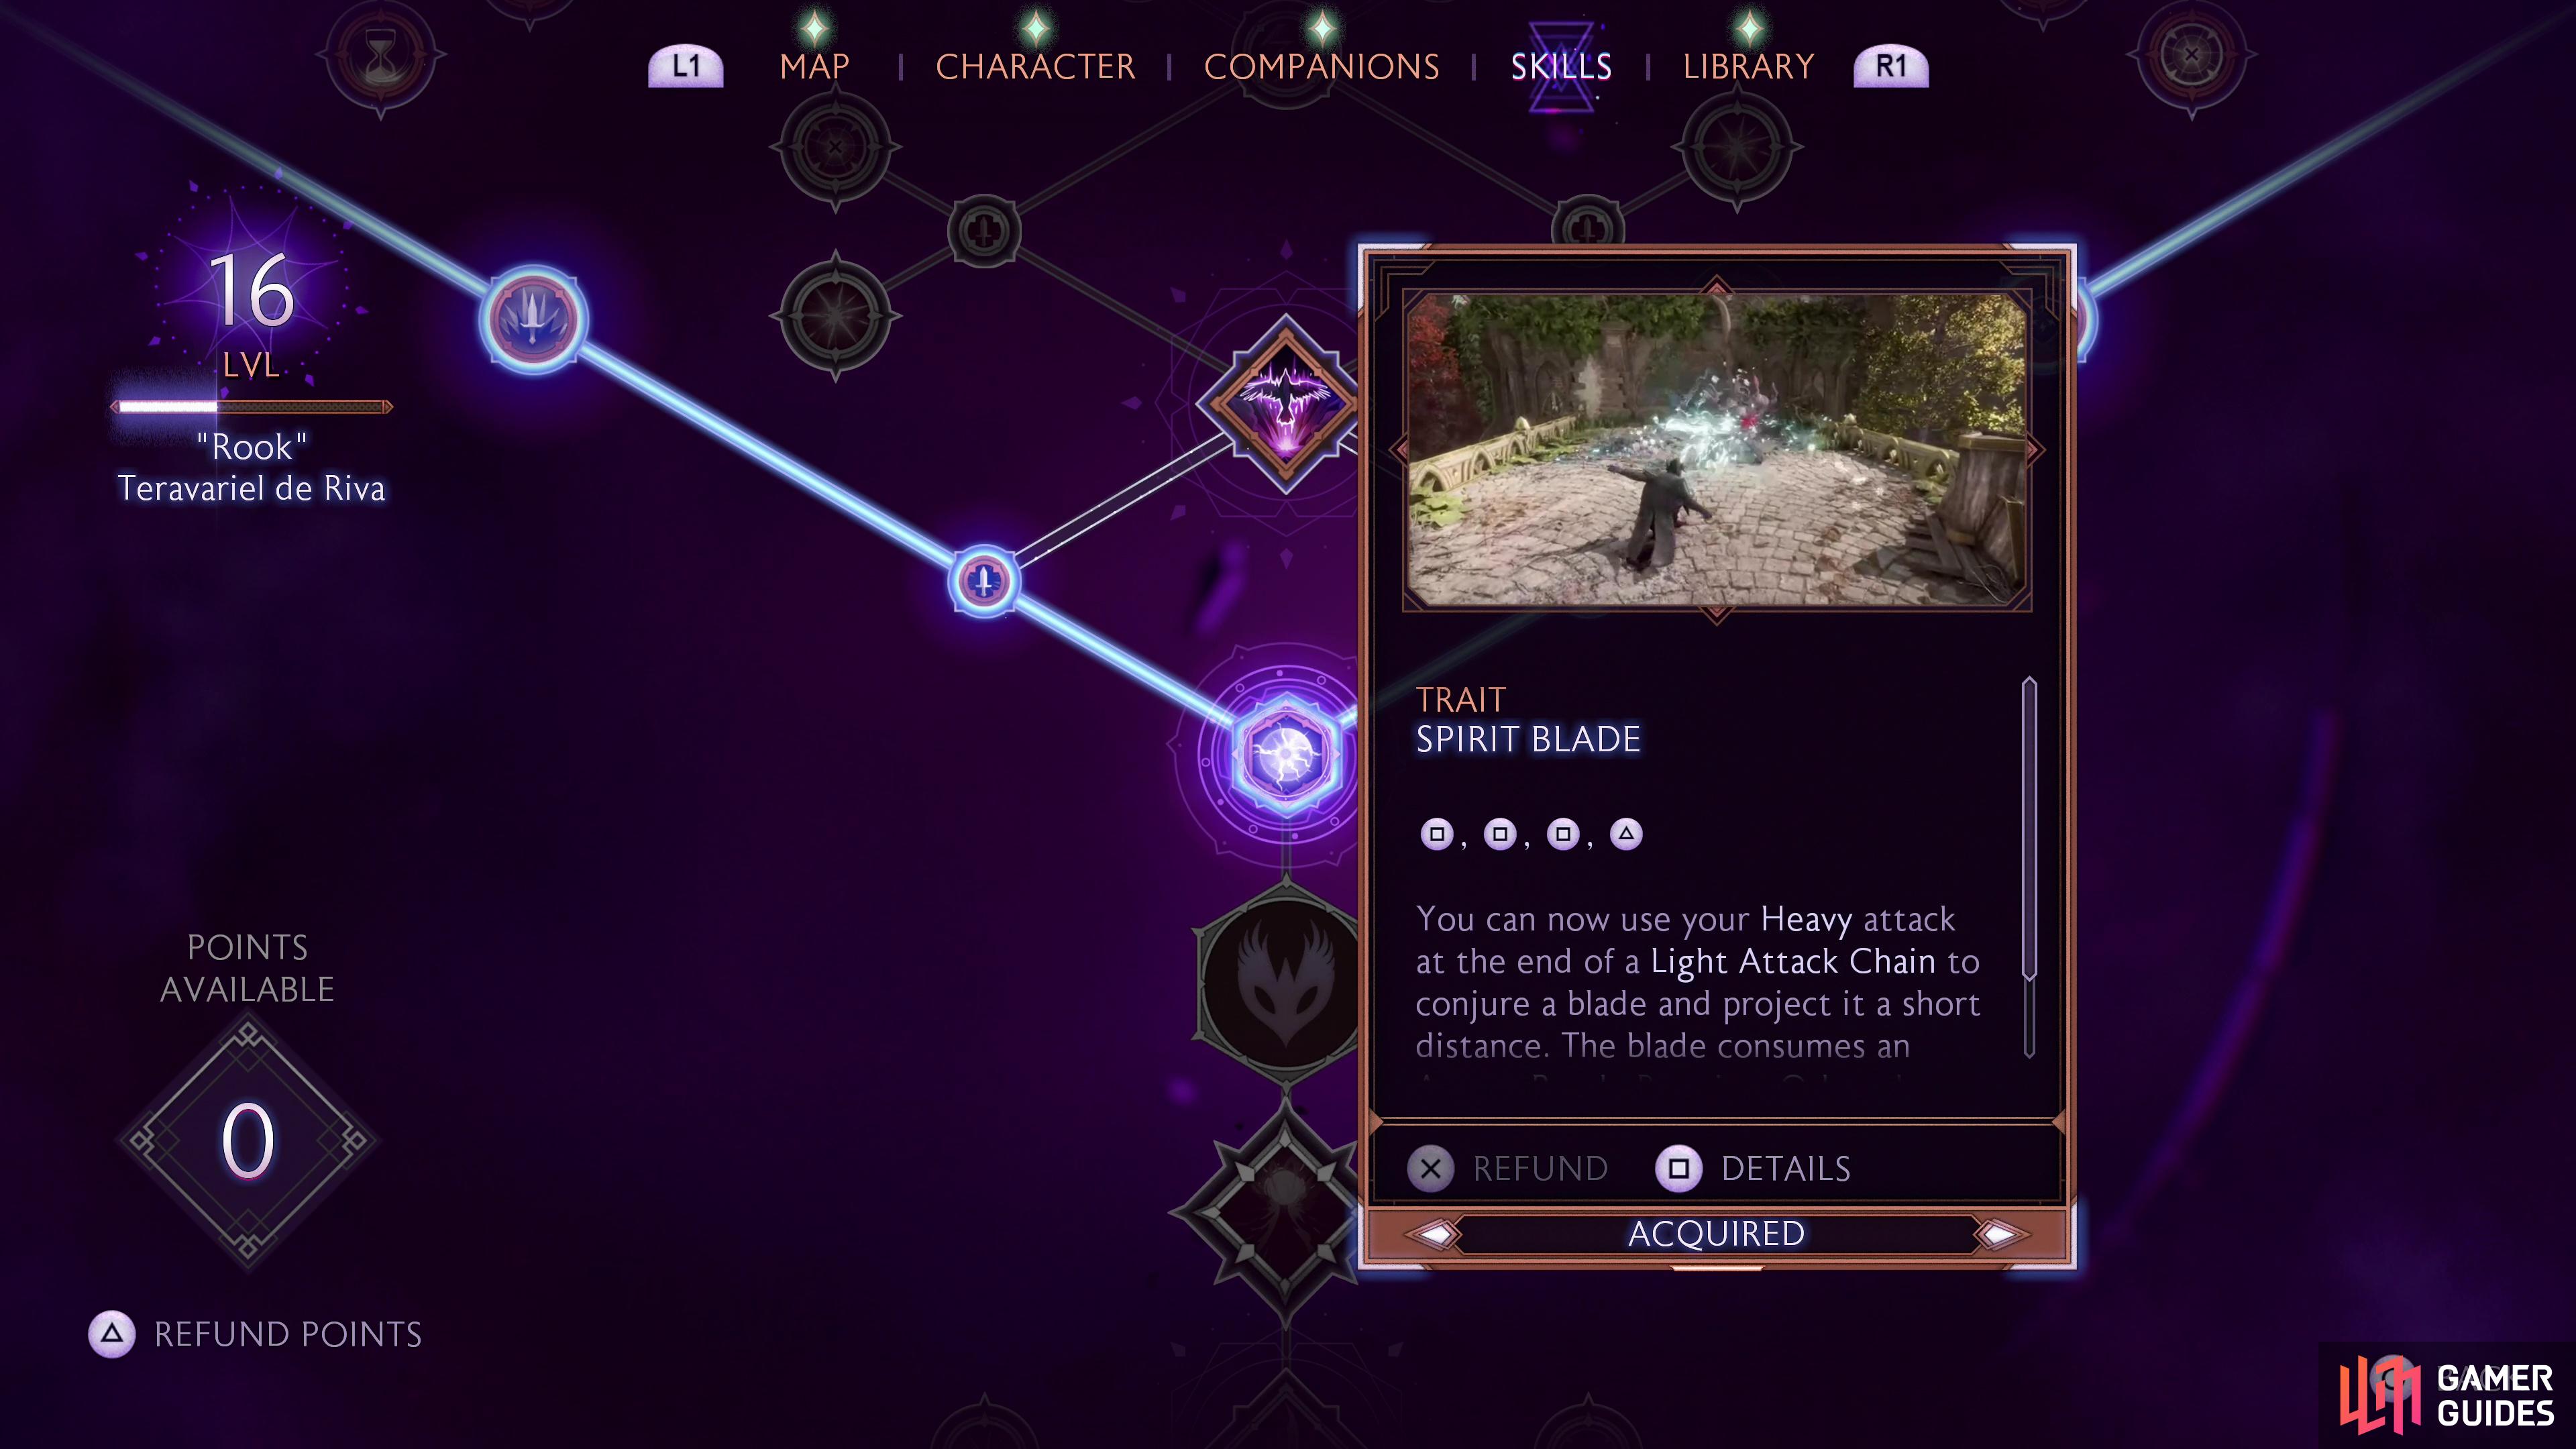
- Spirit Blade
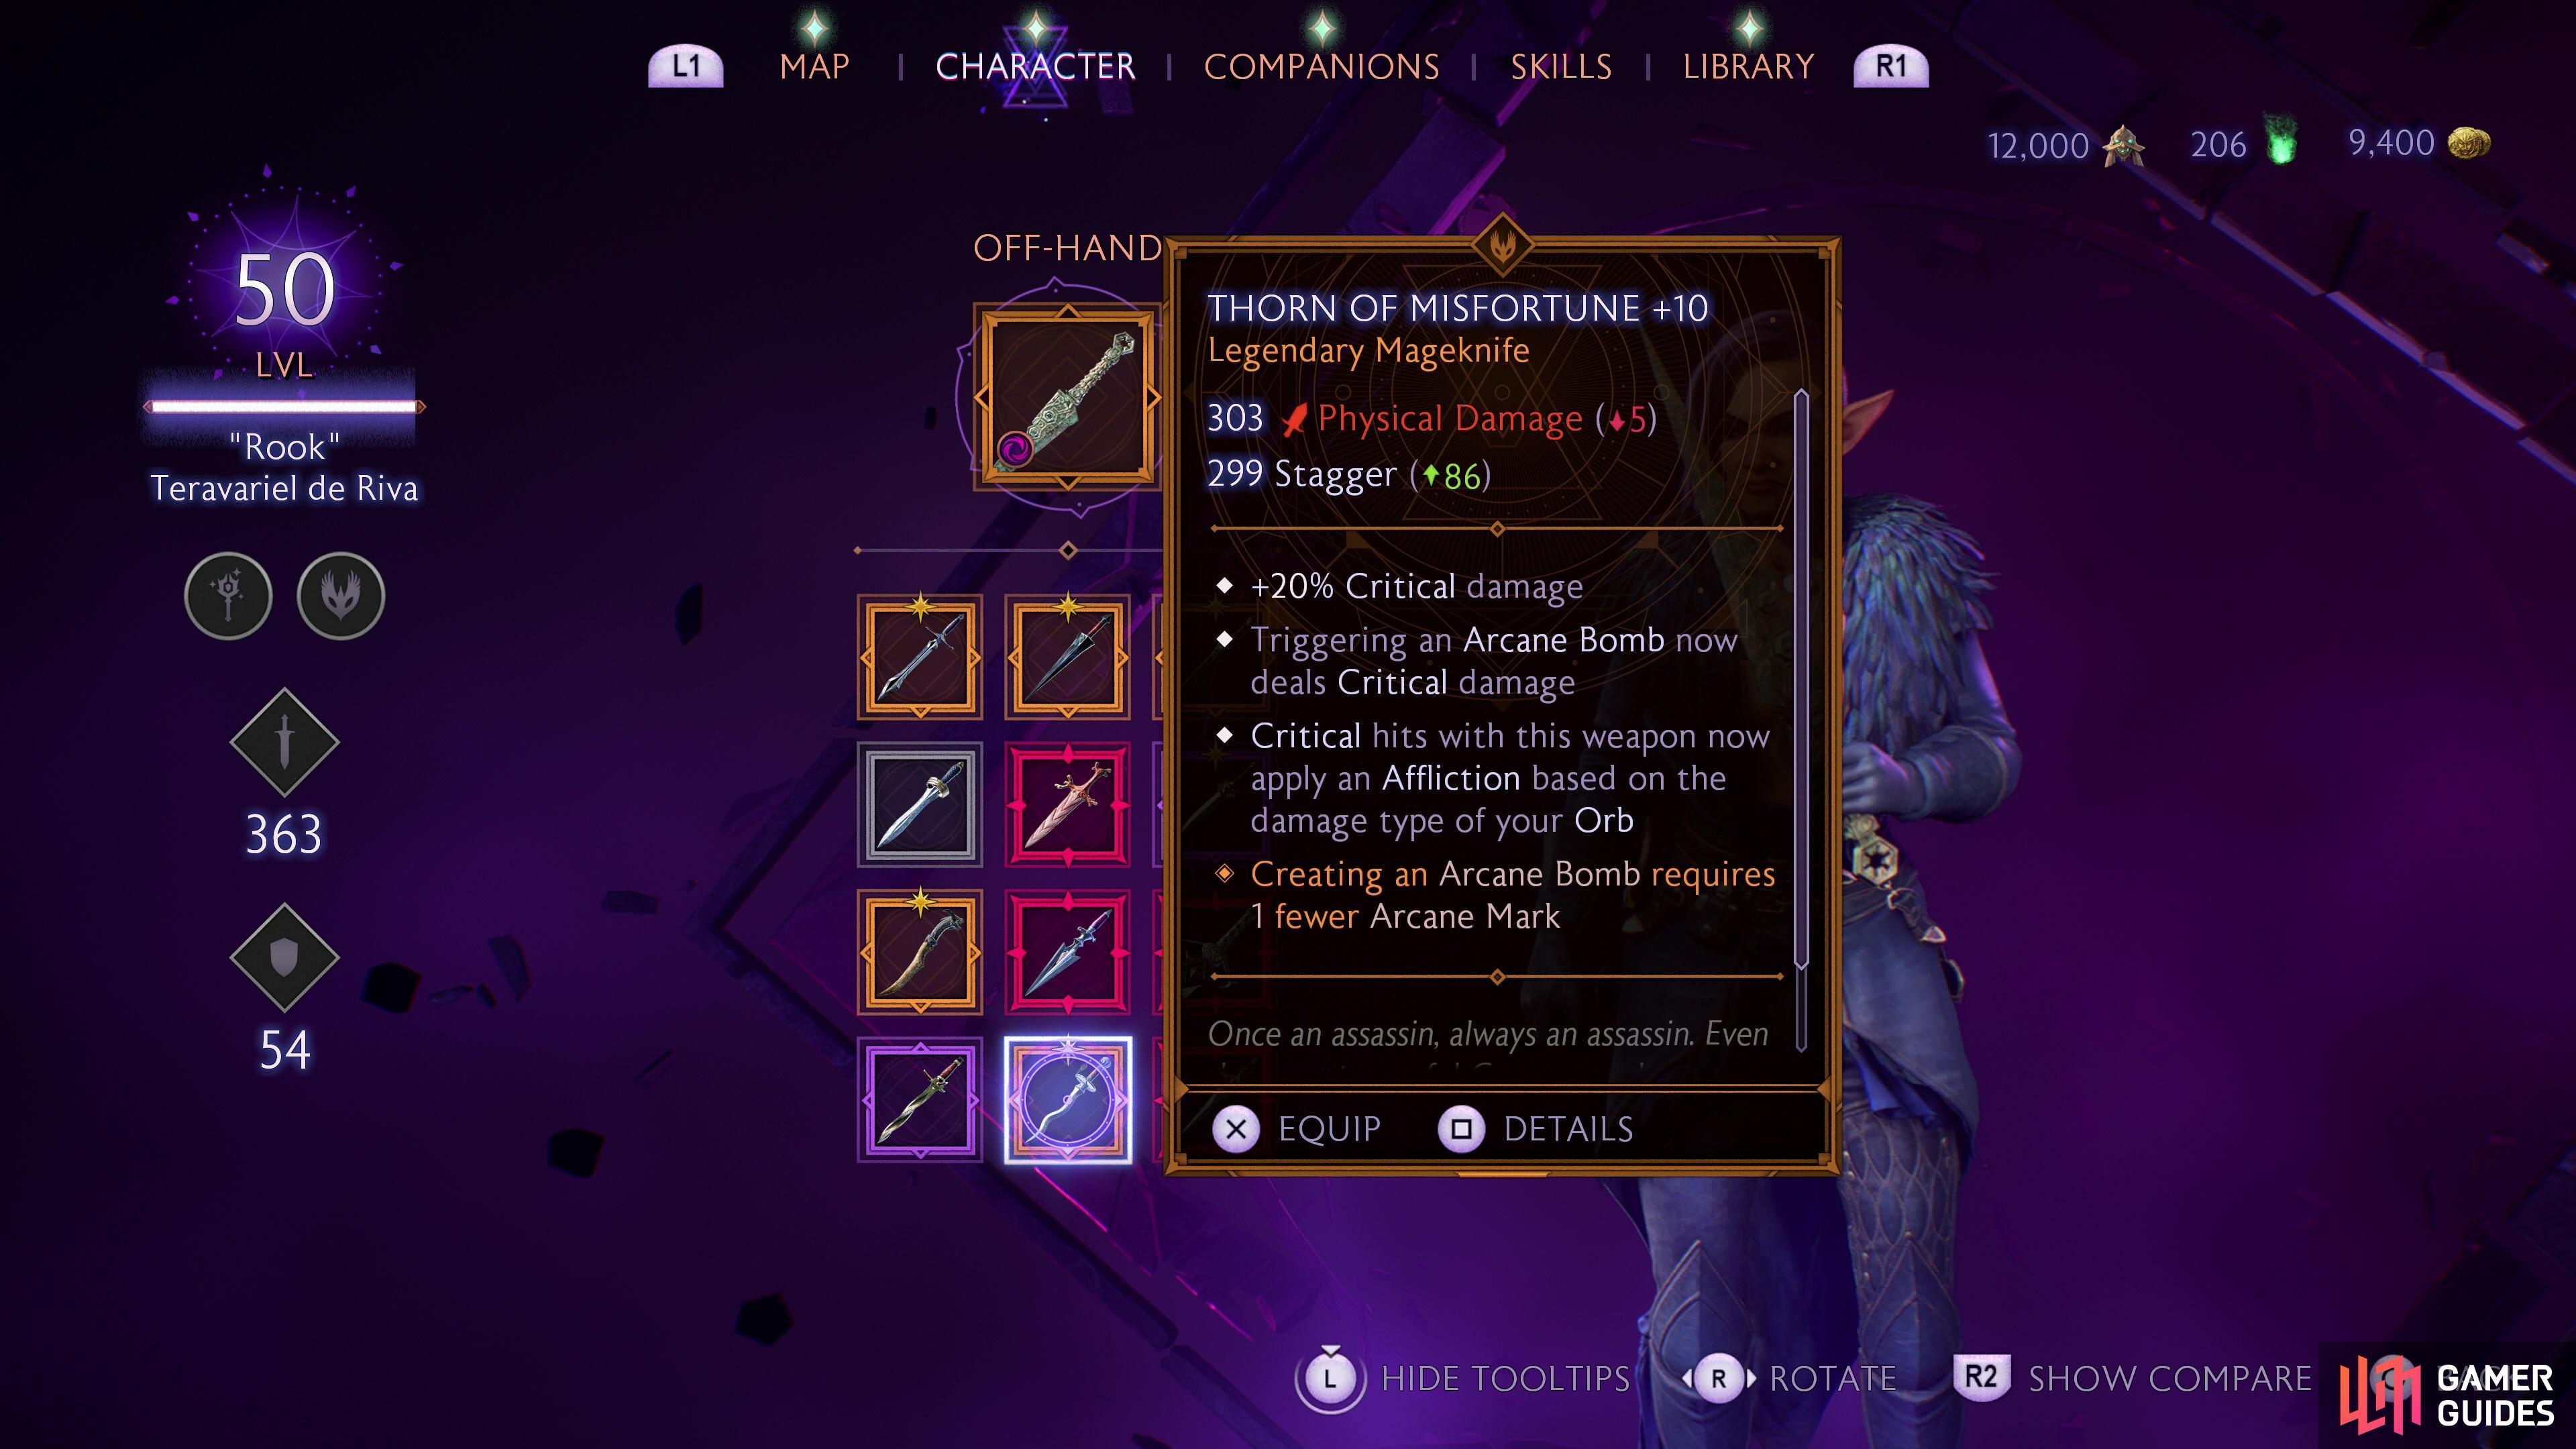
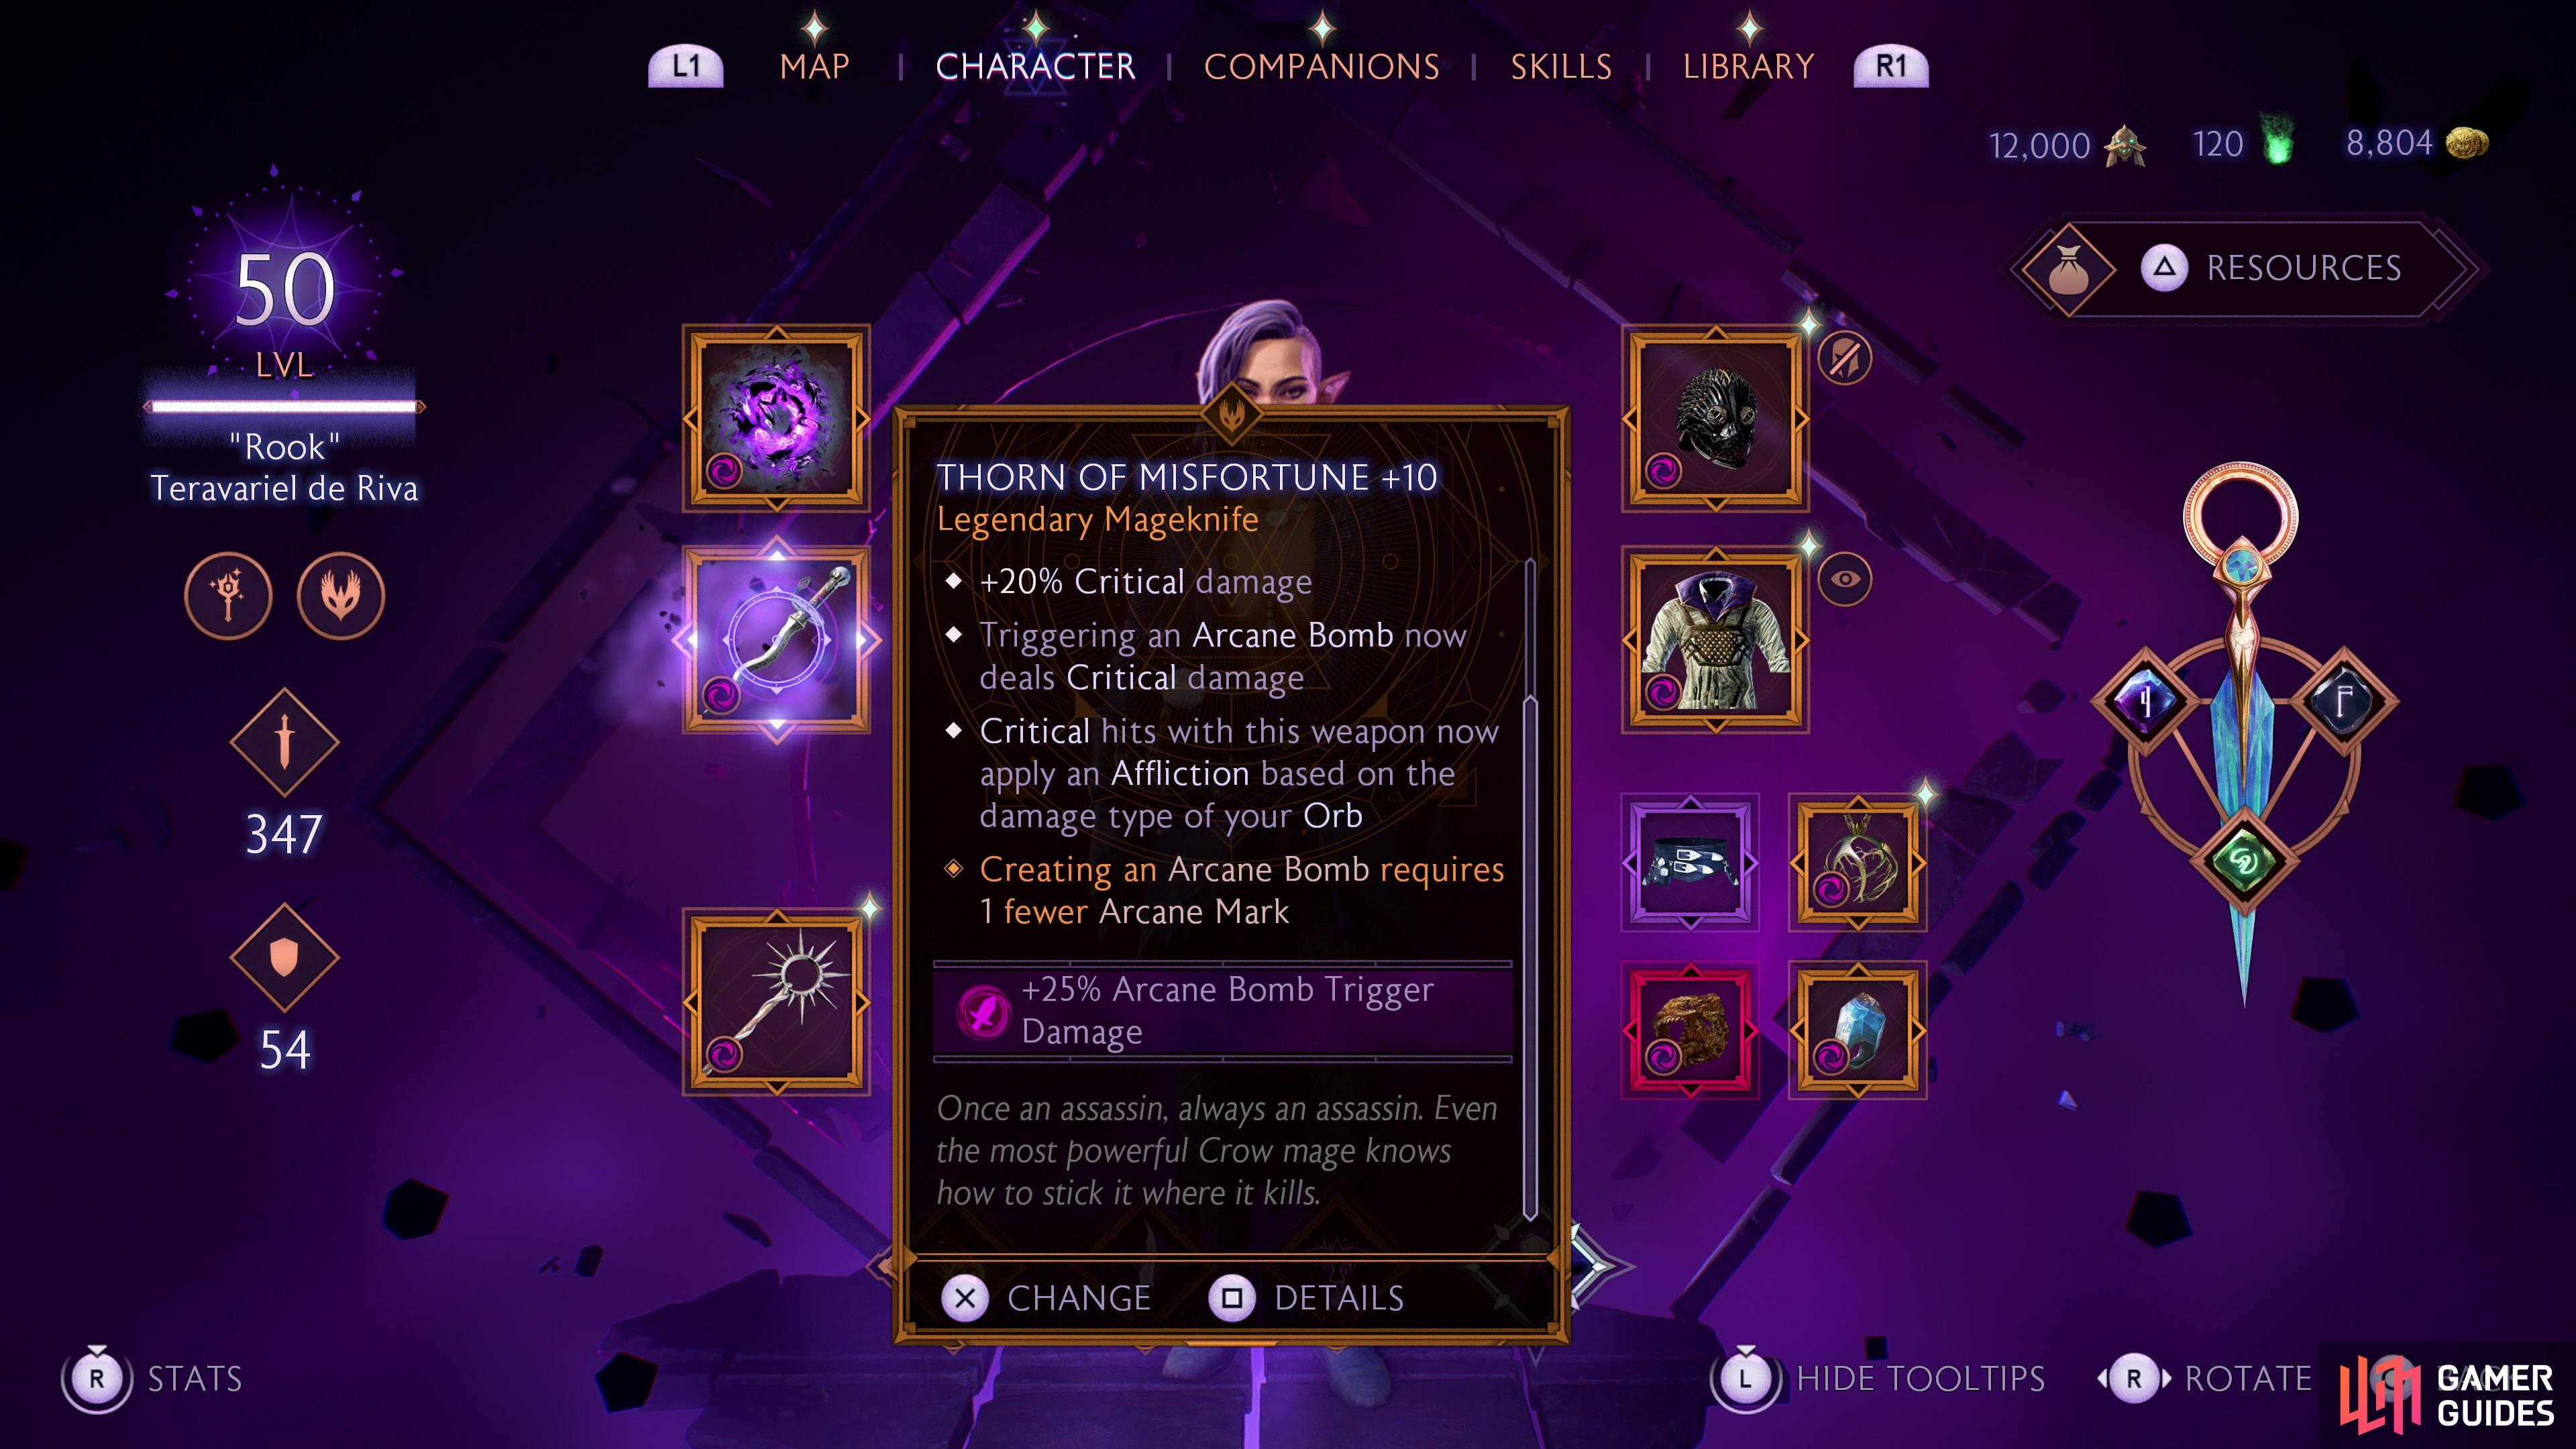
Setting yourself up to advance into Spellblade is all well and good, but we’re really here for Spirit Blade, which will toss your mageknife at range if you end a light attack combo with a heavy attack. Get the timing down, as this will become the preferred method for triggering Arcane Bombs for the rest of the game, especially when you get a legendary ![]() Thorn of Misfortune, which reduces the number of Arcane Marks required to set an Arcane Bomb from 3 to 2. This allows you to trigger and detonate an Arcane Bomb with an
Thorn of Misfortune, which reduces the number of Arcane Marks required to set an Arcane Bomb from 3 to 2. This allows you to trigger and detonate an Arcane Bomb with an 

Finish up the early-game build by grabbing the following skills as you approach Lv20:
- Elemental Executioner
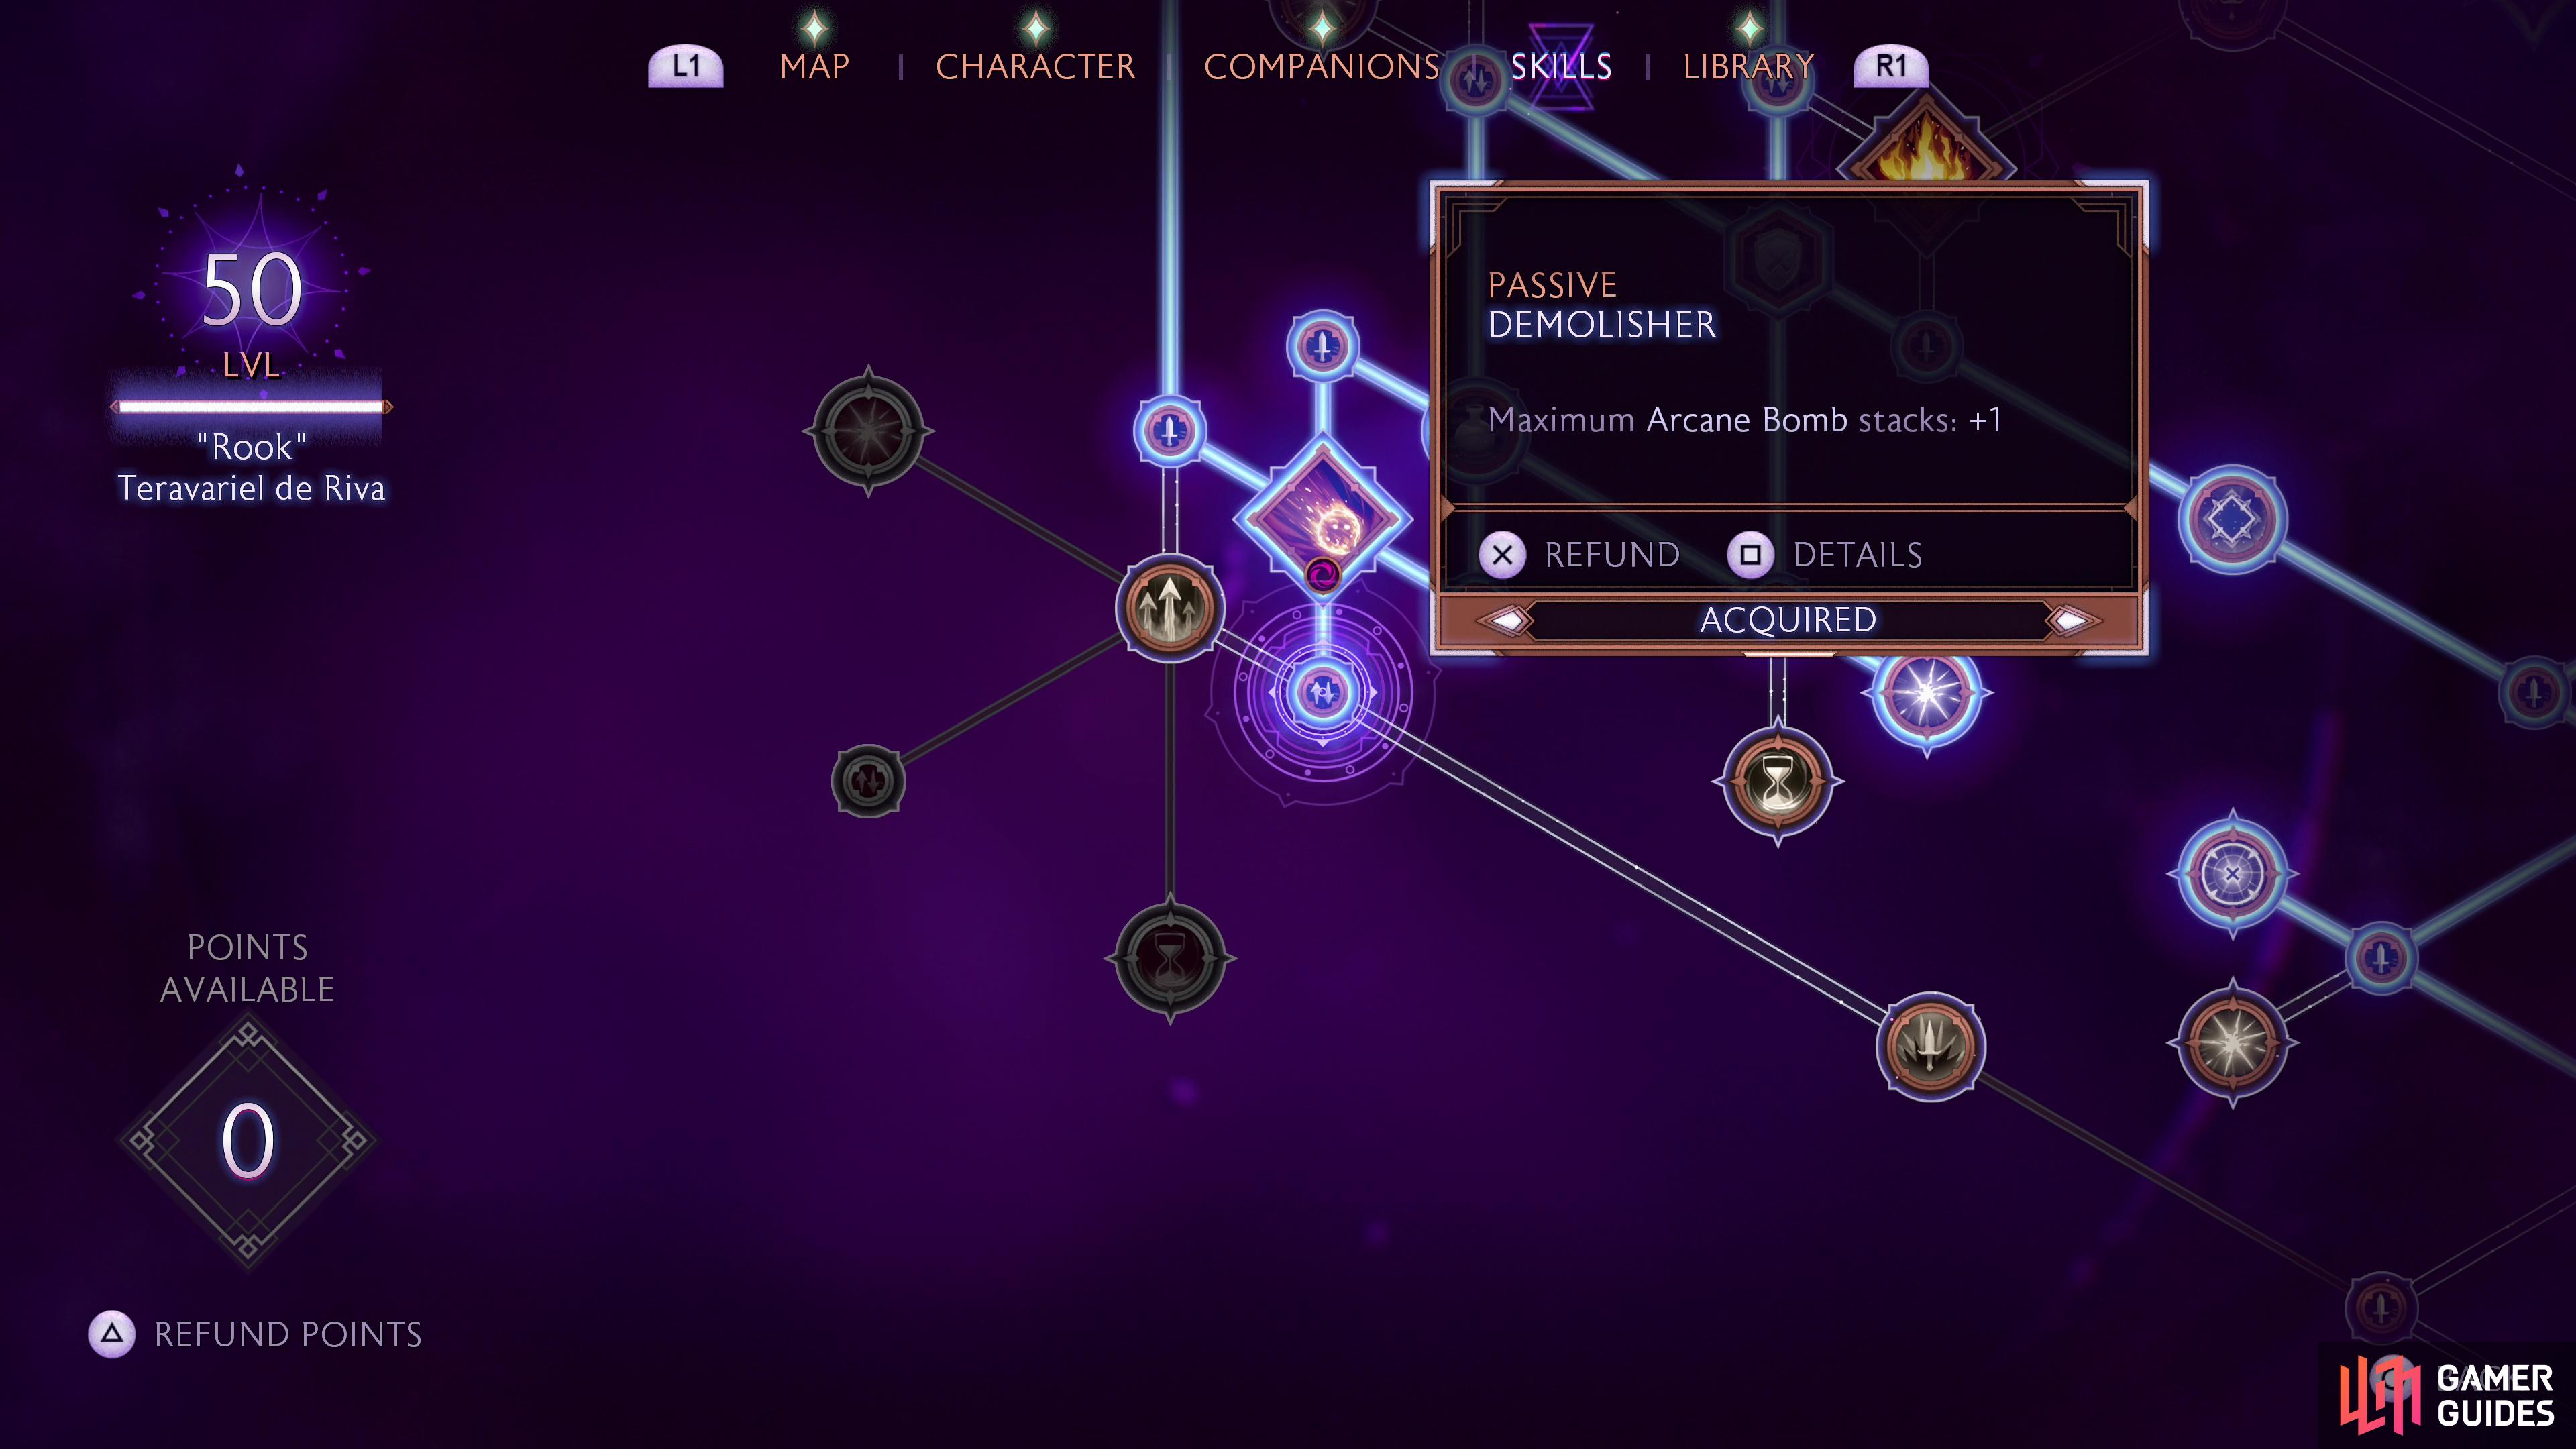
- Demolisher
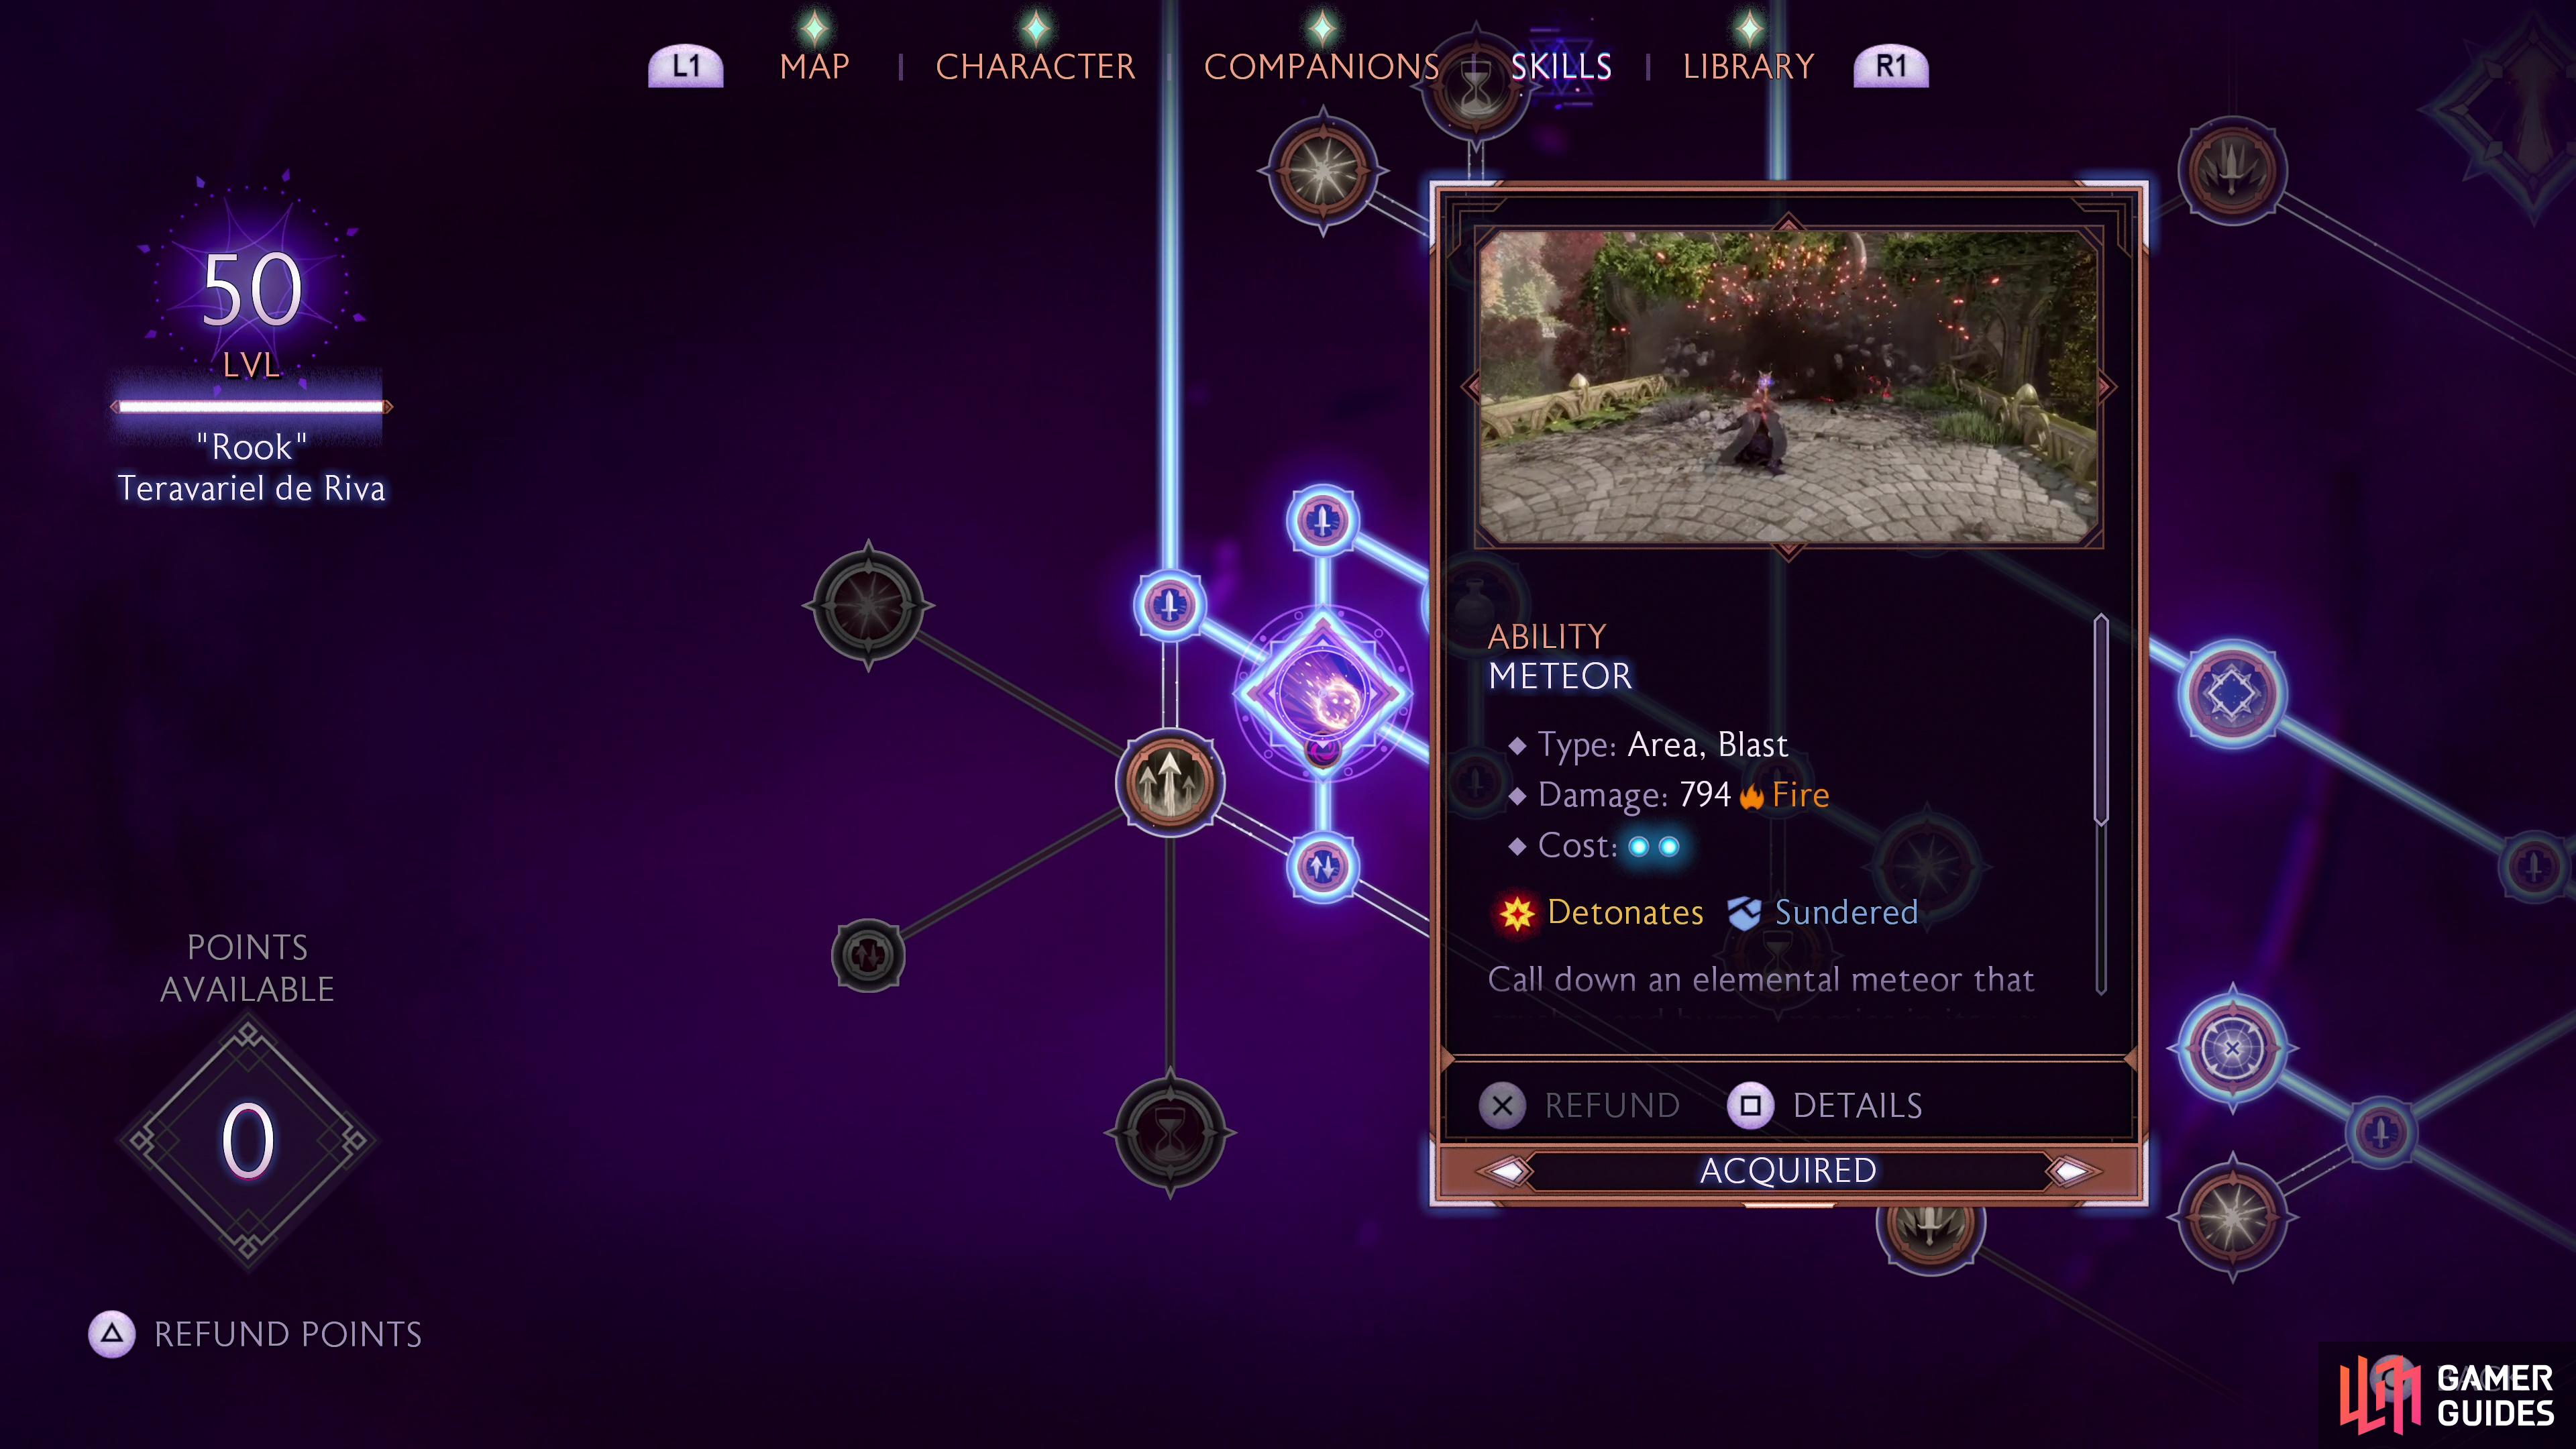
- Meteor
Demolisher will allow you to stack up to two Arcane Bombs on a single enemy, which will become more useful later in the game. The thrown mageknife at the end of a light attack combo hits an enemy twice and can consequently detonate two Arcane Bombs per throw, so if you end up putting two Arcane Bombs on an enemy, there’s even more incentive to land the 

(1 of 2) After you get a few levels under your belt you can unlock Spectral Blade,
After you get a few levels under your belt you can unlock Spectral Blade, (left), which allows you to throw your mageknife, possibly detonating two Arcane Bombs in one throw. (right)
Mid Game Build - Unlocking Spellblade
Once you hit Lv20 it’s time to leave the early game behind and move into your specialization, and since the Spellblade is centered around the orb and mageknife, it’s a no-brainer as far as this build goes. If you unlocked any extraneous skills (anything not mentioned by name above), consider refunding them so you can get as many Spellblade skills as possible - they’re worth their weight in gold, including:
- Thunderous End
- Void Blade
- Finale
- Blast Efficiency
- Deterioration
- Arcane Strike
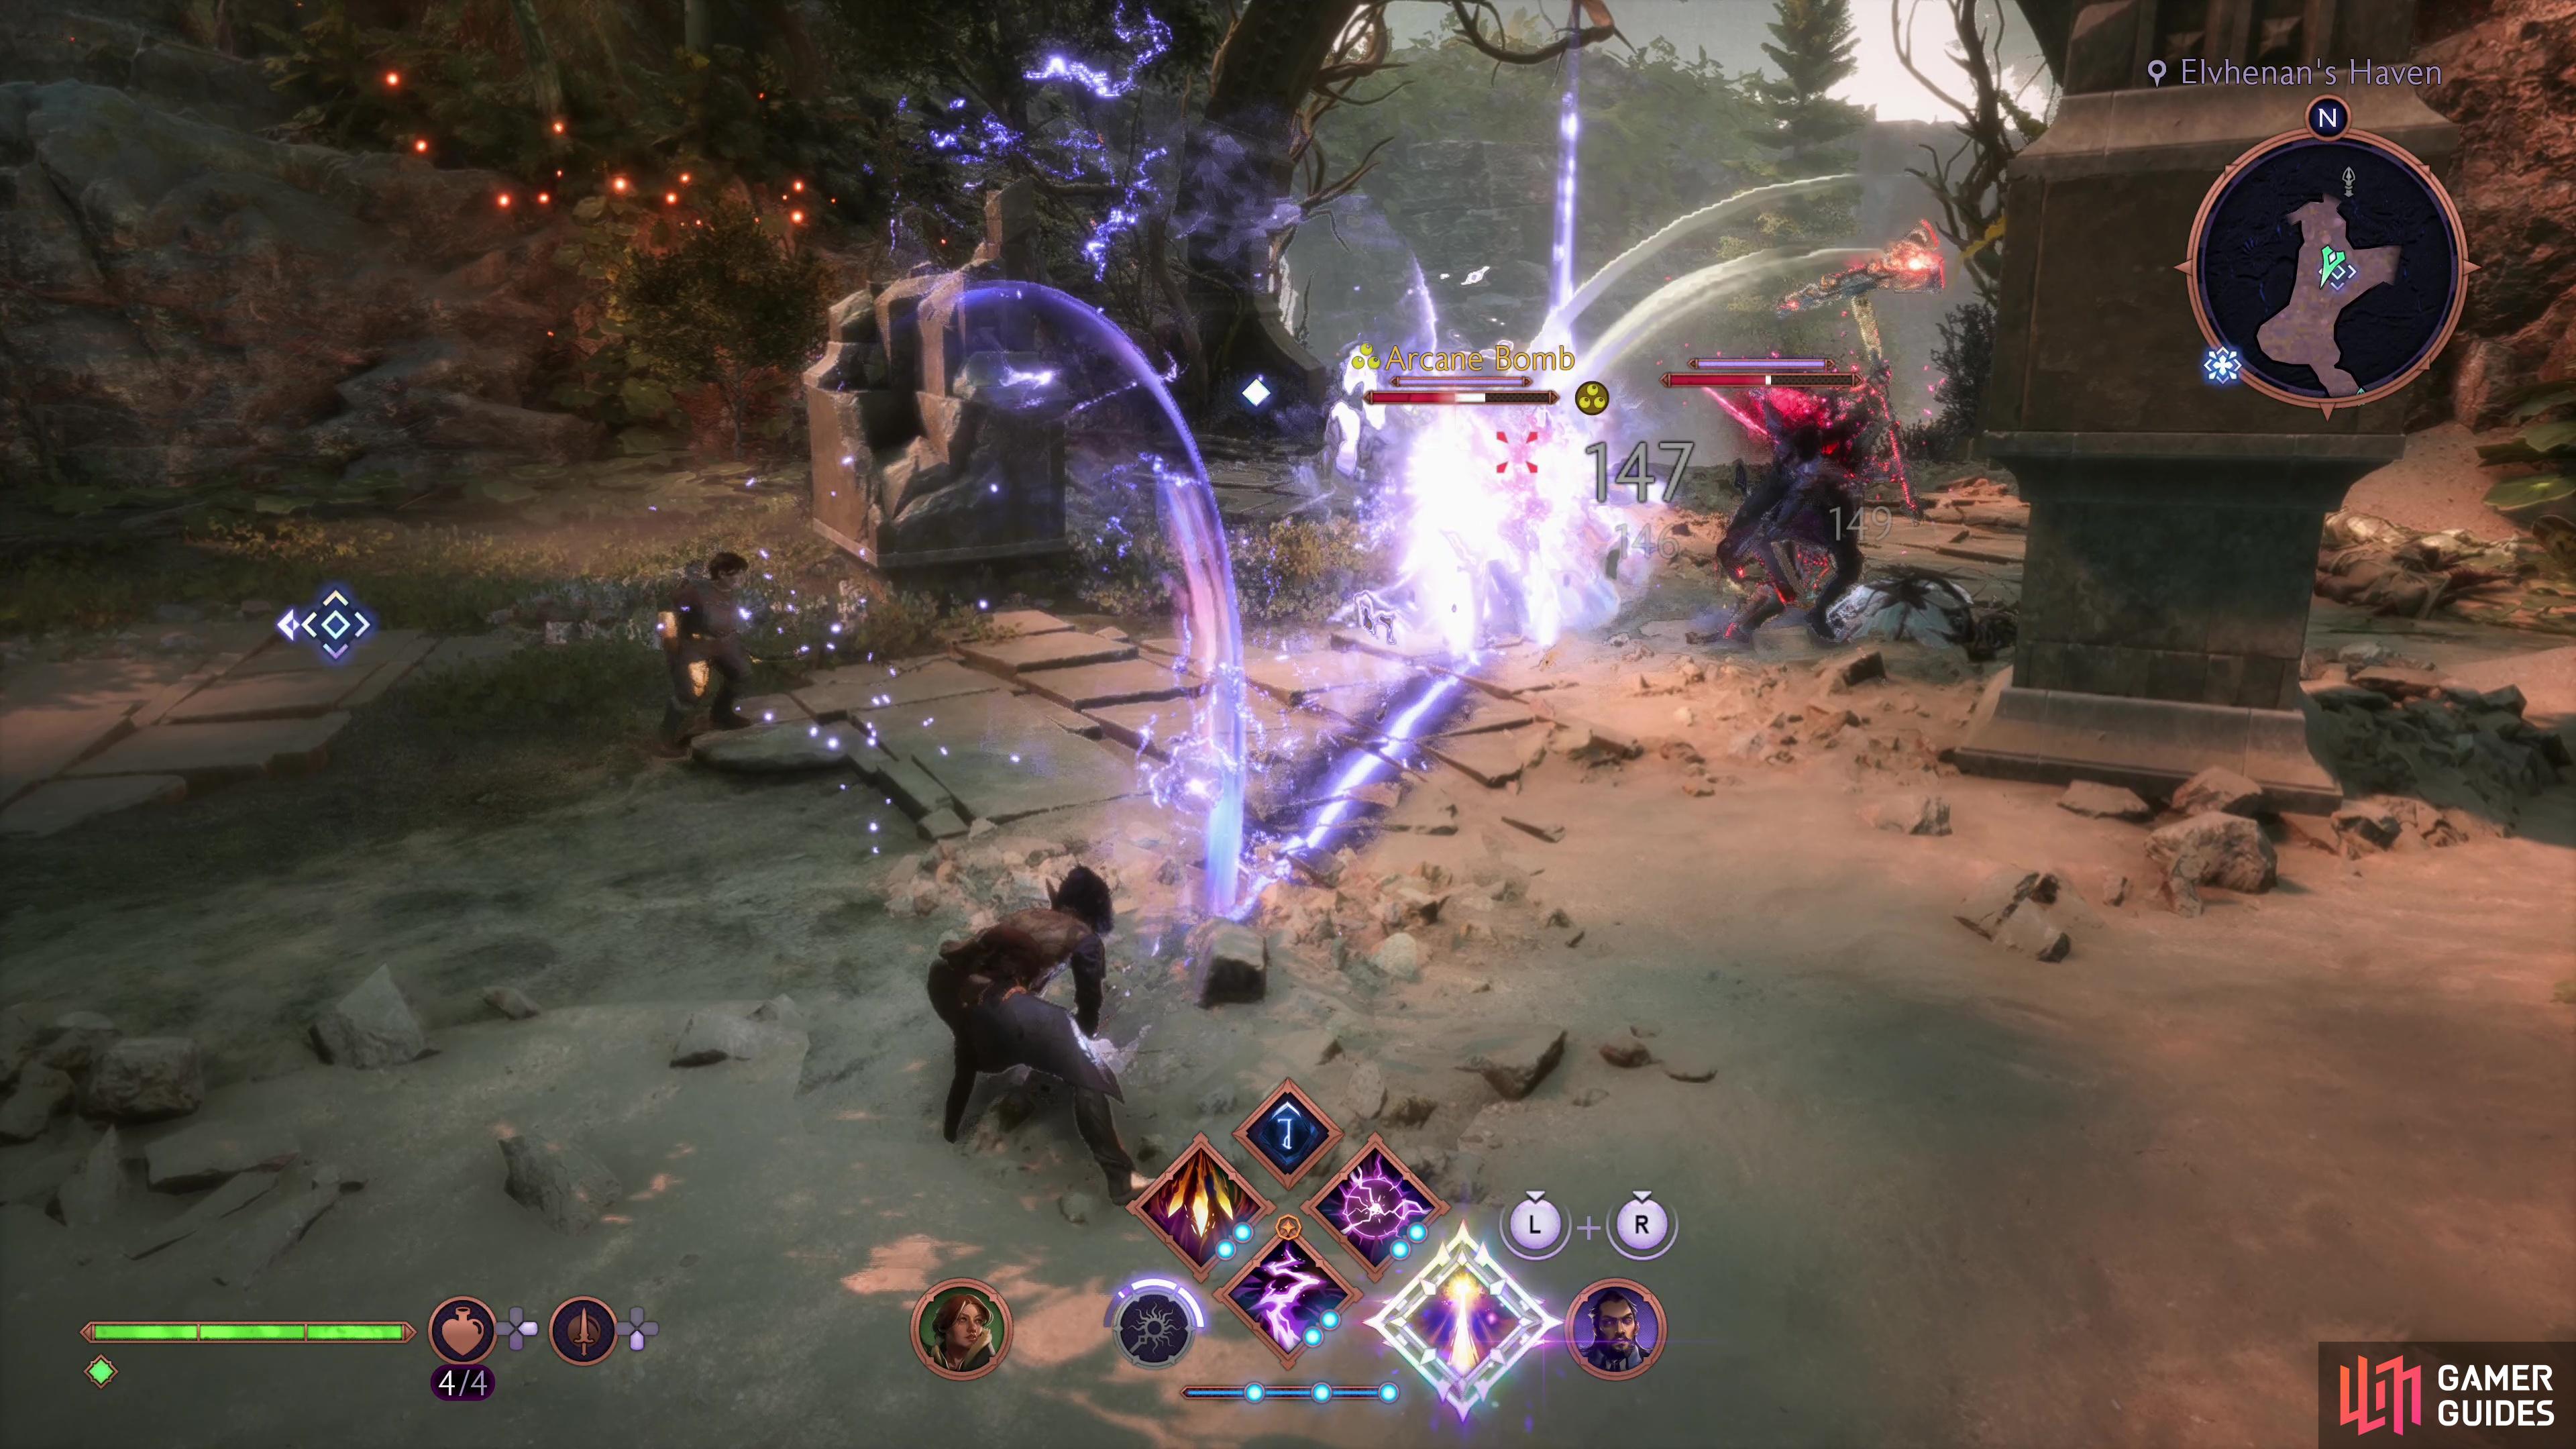
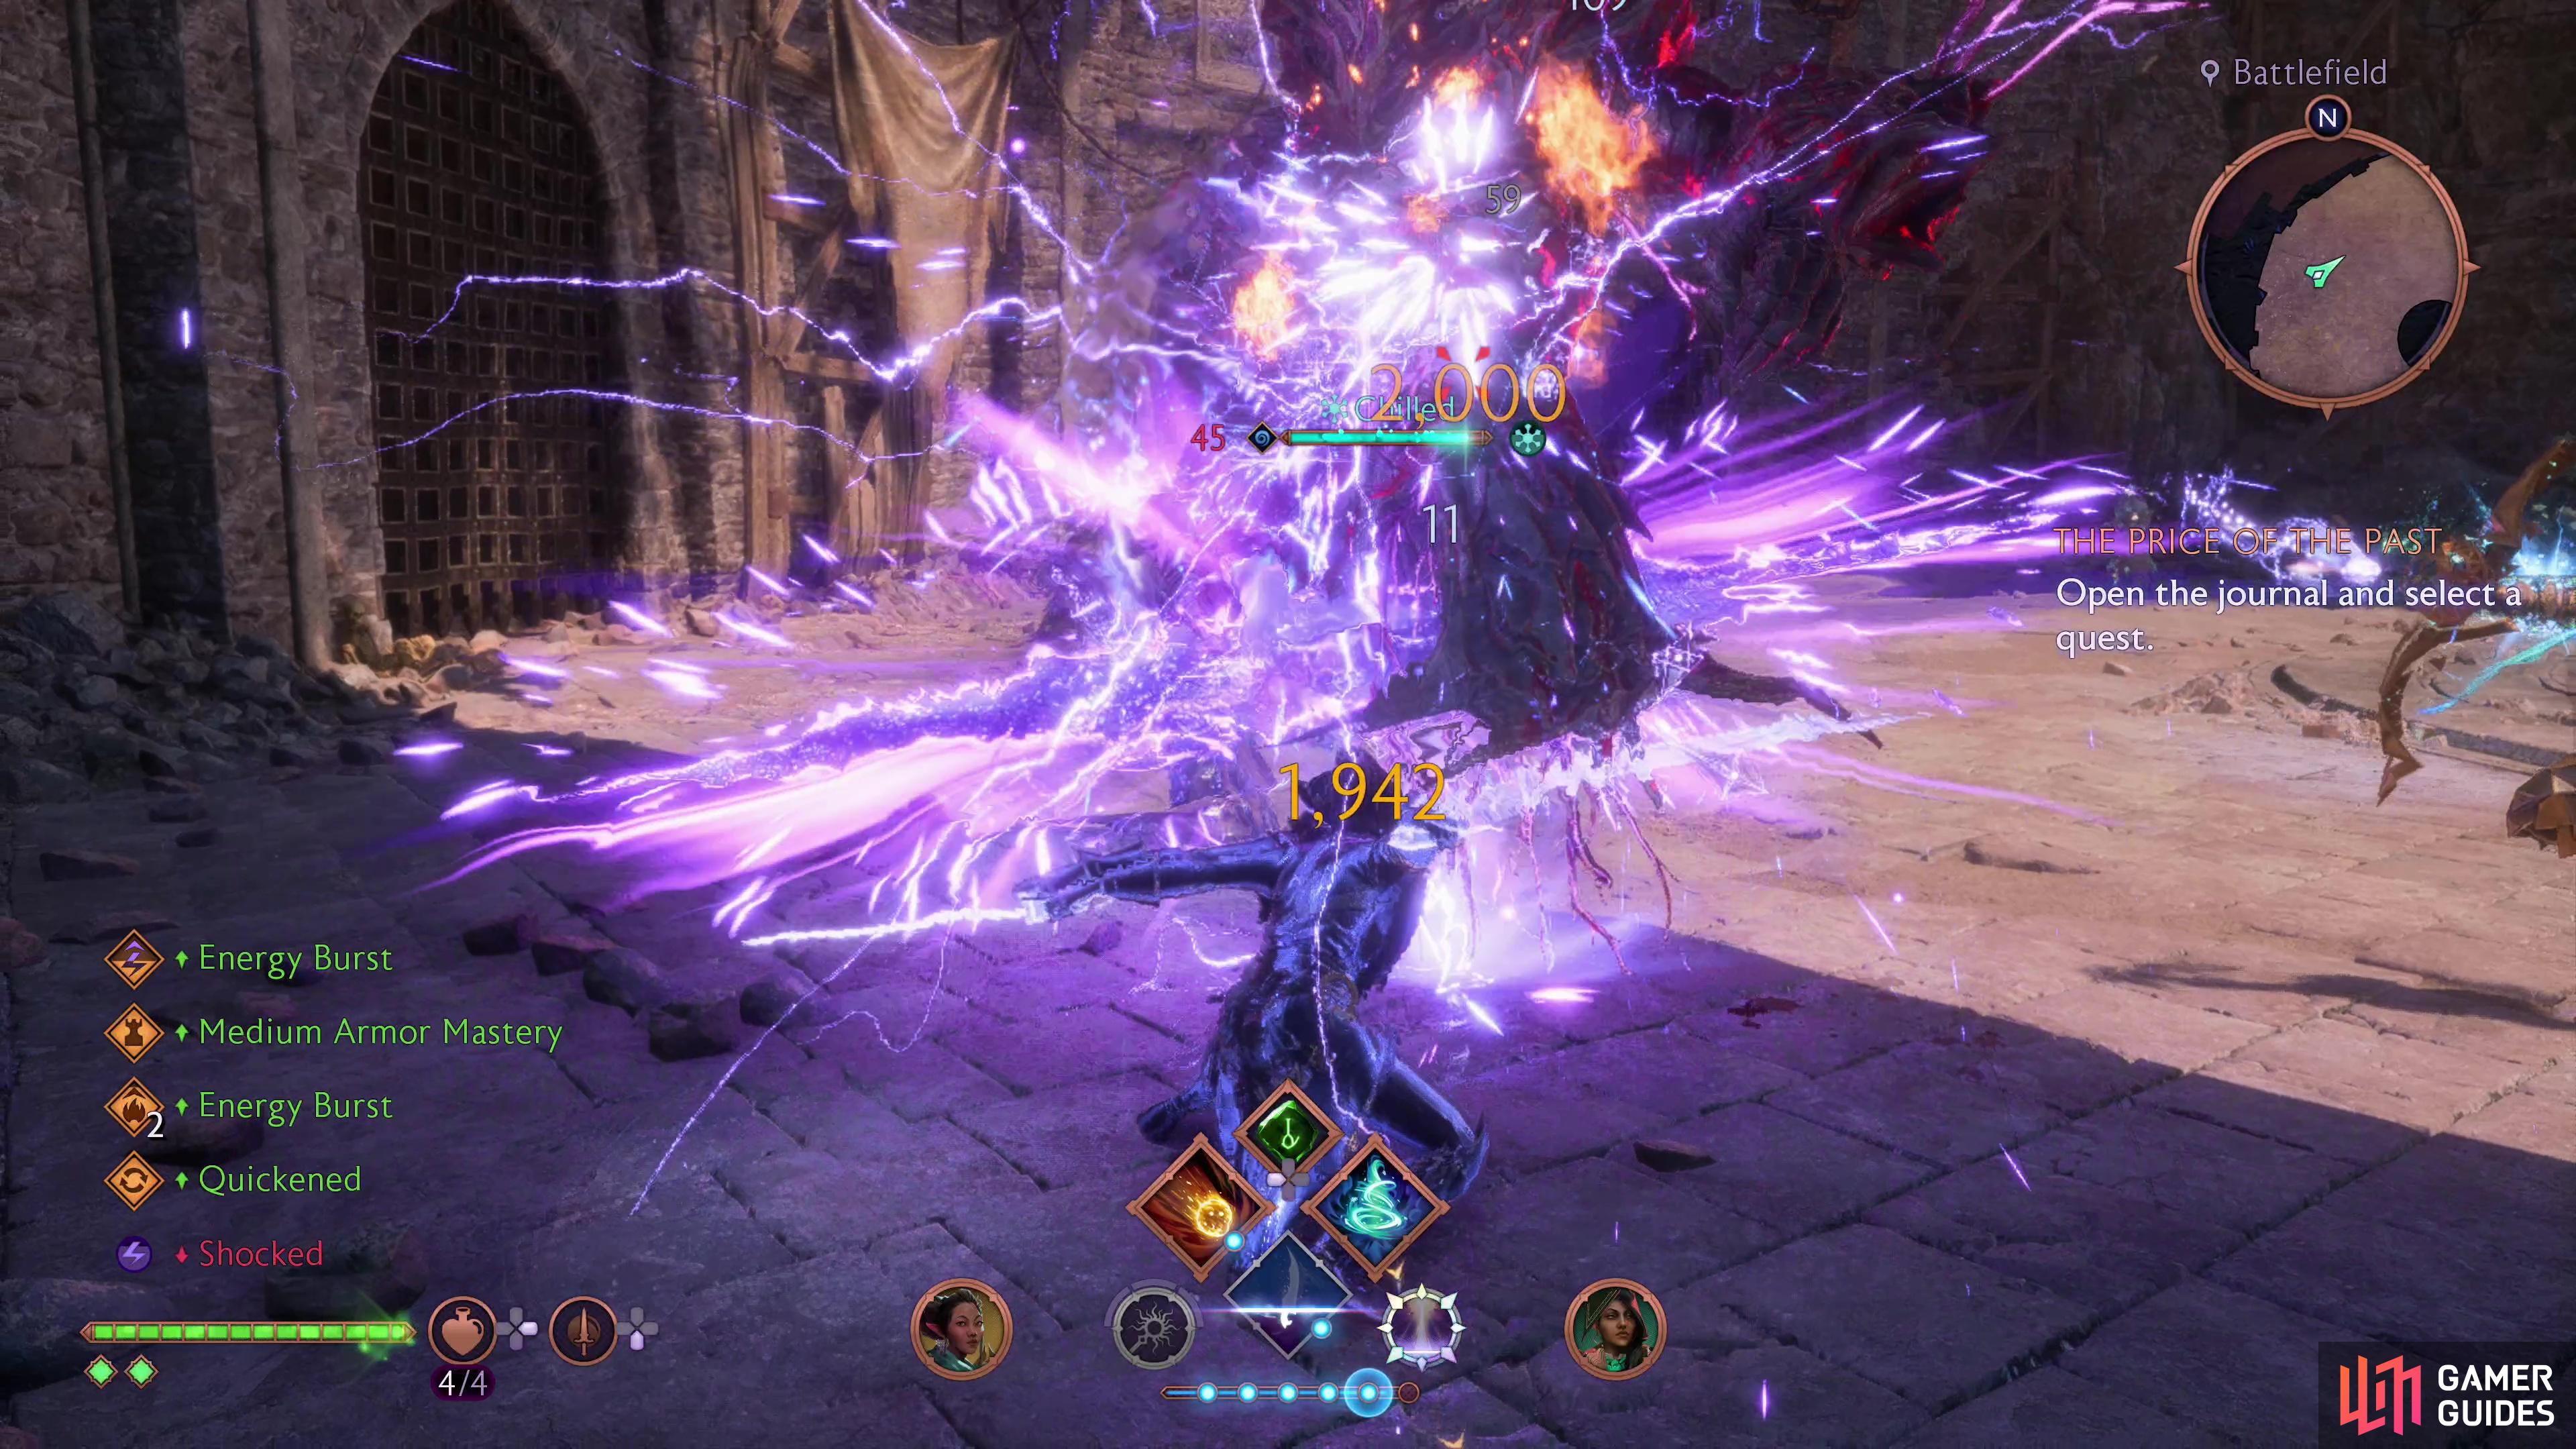
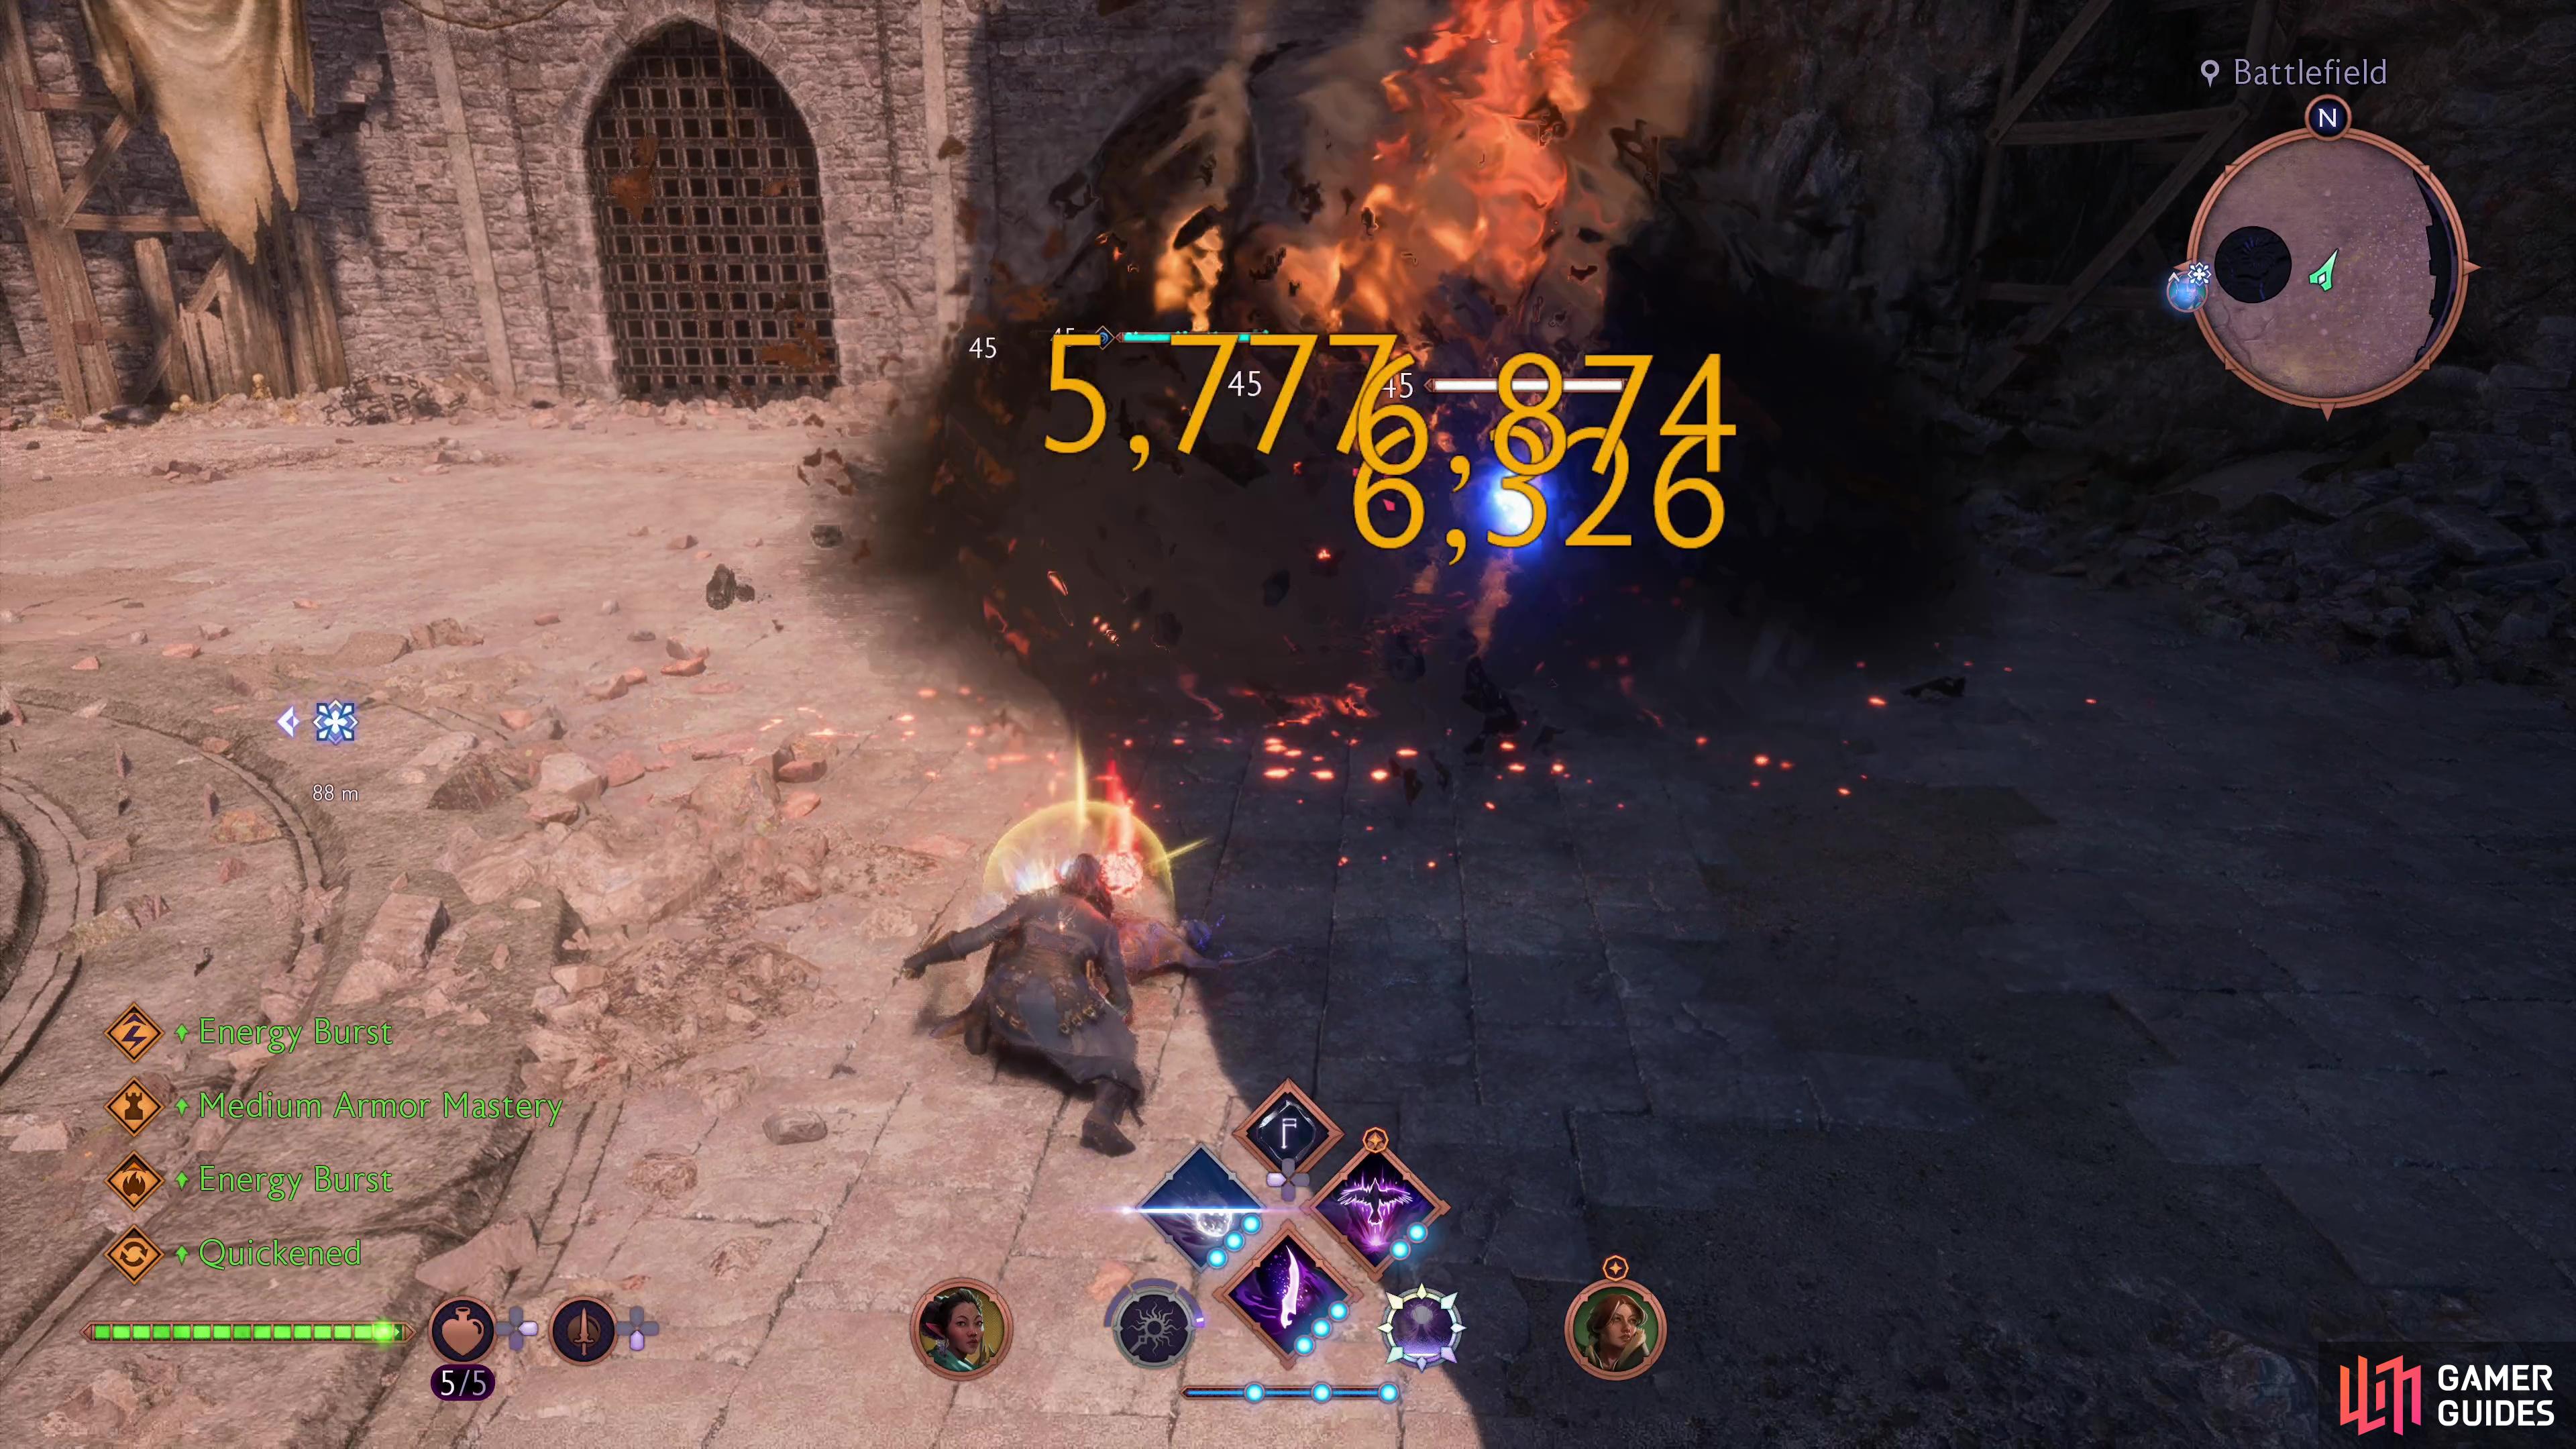
Thunderous End will replace your standard ultimate (be sure to equip it), but isn’t a main focus of this build. Void Blade, however, is, being both a blast and strike skill that deals heavy damage, hits twice and detonates Sundered enemies.On the downside it’s only got moderate AoE and range (don’t listen to the game when it tells you an enemy you’re targeting it out of range - it’s not a long range ability, but it’s got more range than the game thinks it does), but you’re immune to damage when using abilities so you shouldn’t have any trouble running up to enemies to get close enough to use it, and if that’s not possible, Meteor is a great ranged option.
Finale and Deterioration are both fine buffs, but Blast Efficiency really steals the show, reducing the mana cost of blast skills by -50, meaning you can now cast Meteor and Void Blade for a mere 50 mana. Meanwhile Arcane Strike causes all strike skills to proc an Arcane Bomb on enemies hit, giving Void Blade and Storm Surge more utility.
Once you’ve maxed out the Lv20 Spellblade skills you’ll need to hit Lv30 to reach the next wing and Lv40 to finish up. We suggest grabbing the skills along the Orbital Burst skill tree wing first, and any extra skill points you gain should go to buffing blast and strike skills, increasing your damage types (bonus vs armor, bonus vs shields, electrical damage, fire damage, heavy attack damage and critical hit damage, to name a few).
Being selective about gear starts to be important at this juncture, too. In the early game you wore whatever you had that gave you any reasonable boost to your build, but now you should be looking to upgrade gear to epic or legendary tier and enchant them with useful mods. ![]() Timeworn Mageknife is a pretty good weapon, but Thorn of Misfortune should be your goal - once it’s a rare tier it’ll turn all your Arcane Bombs into guaranteed critical hits.
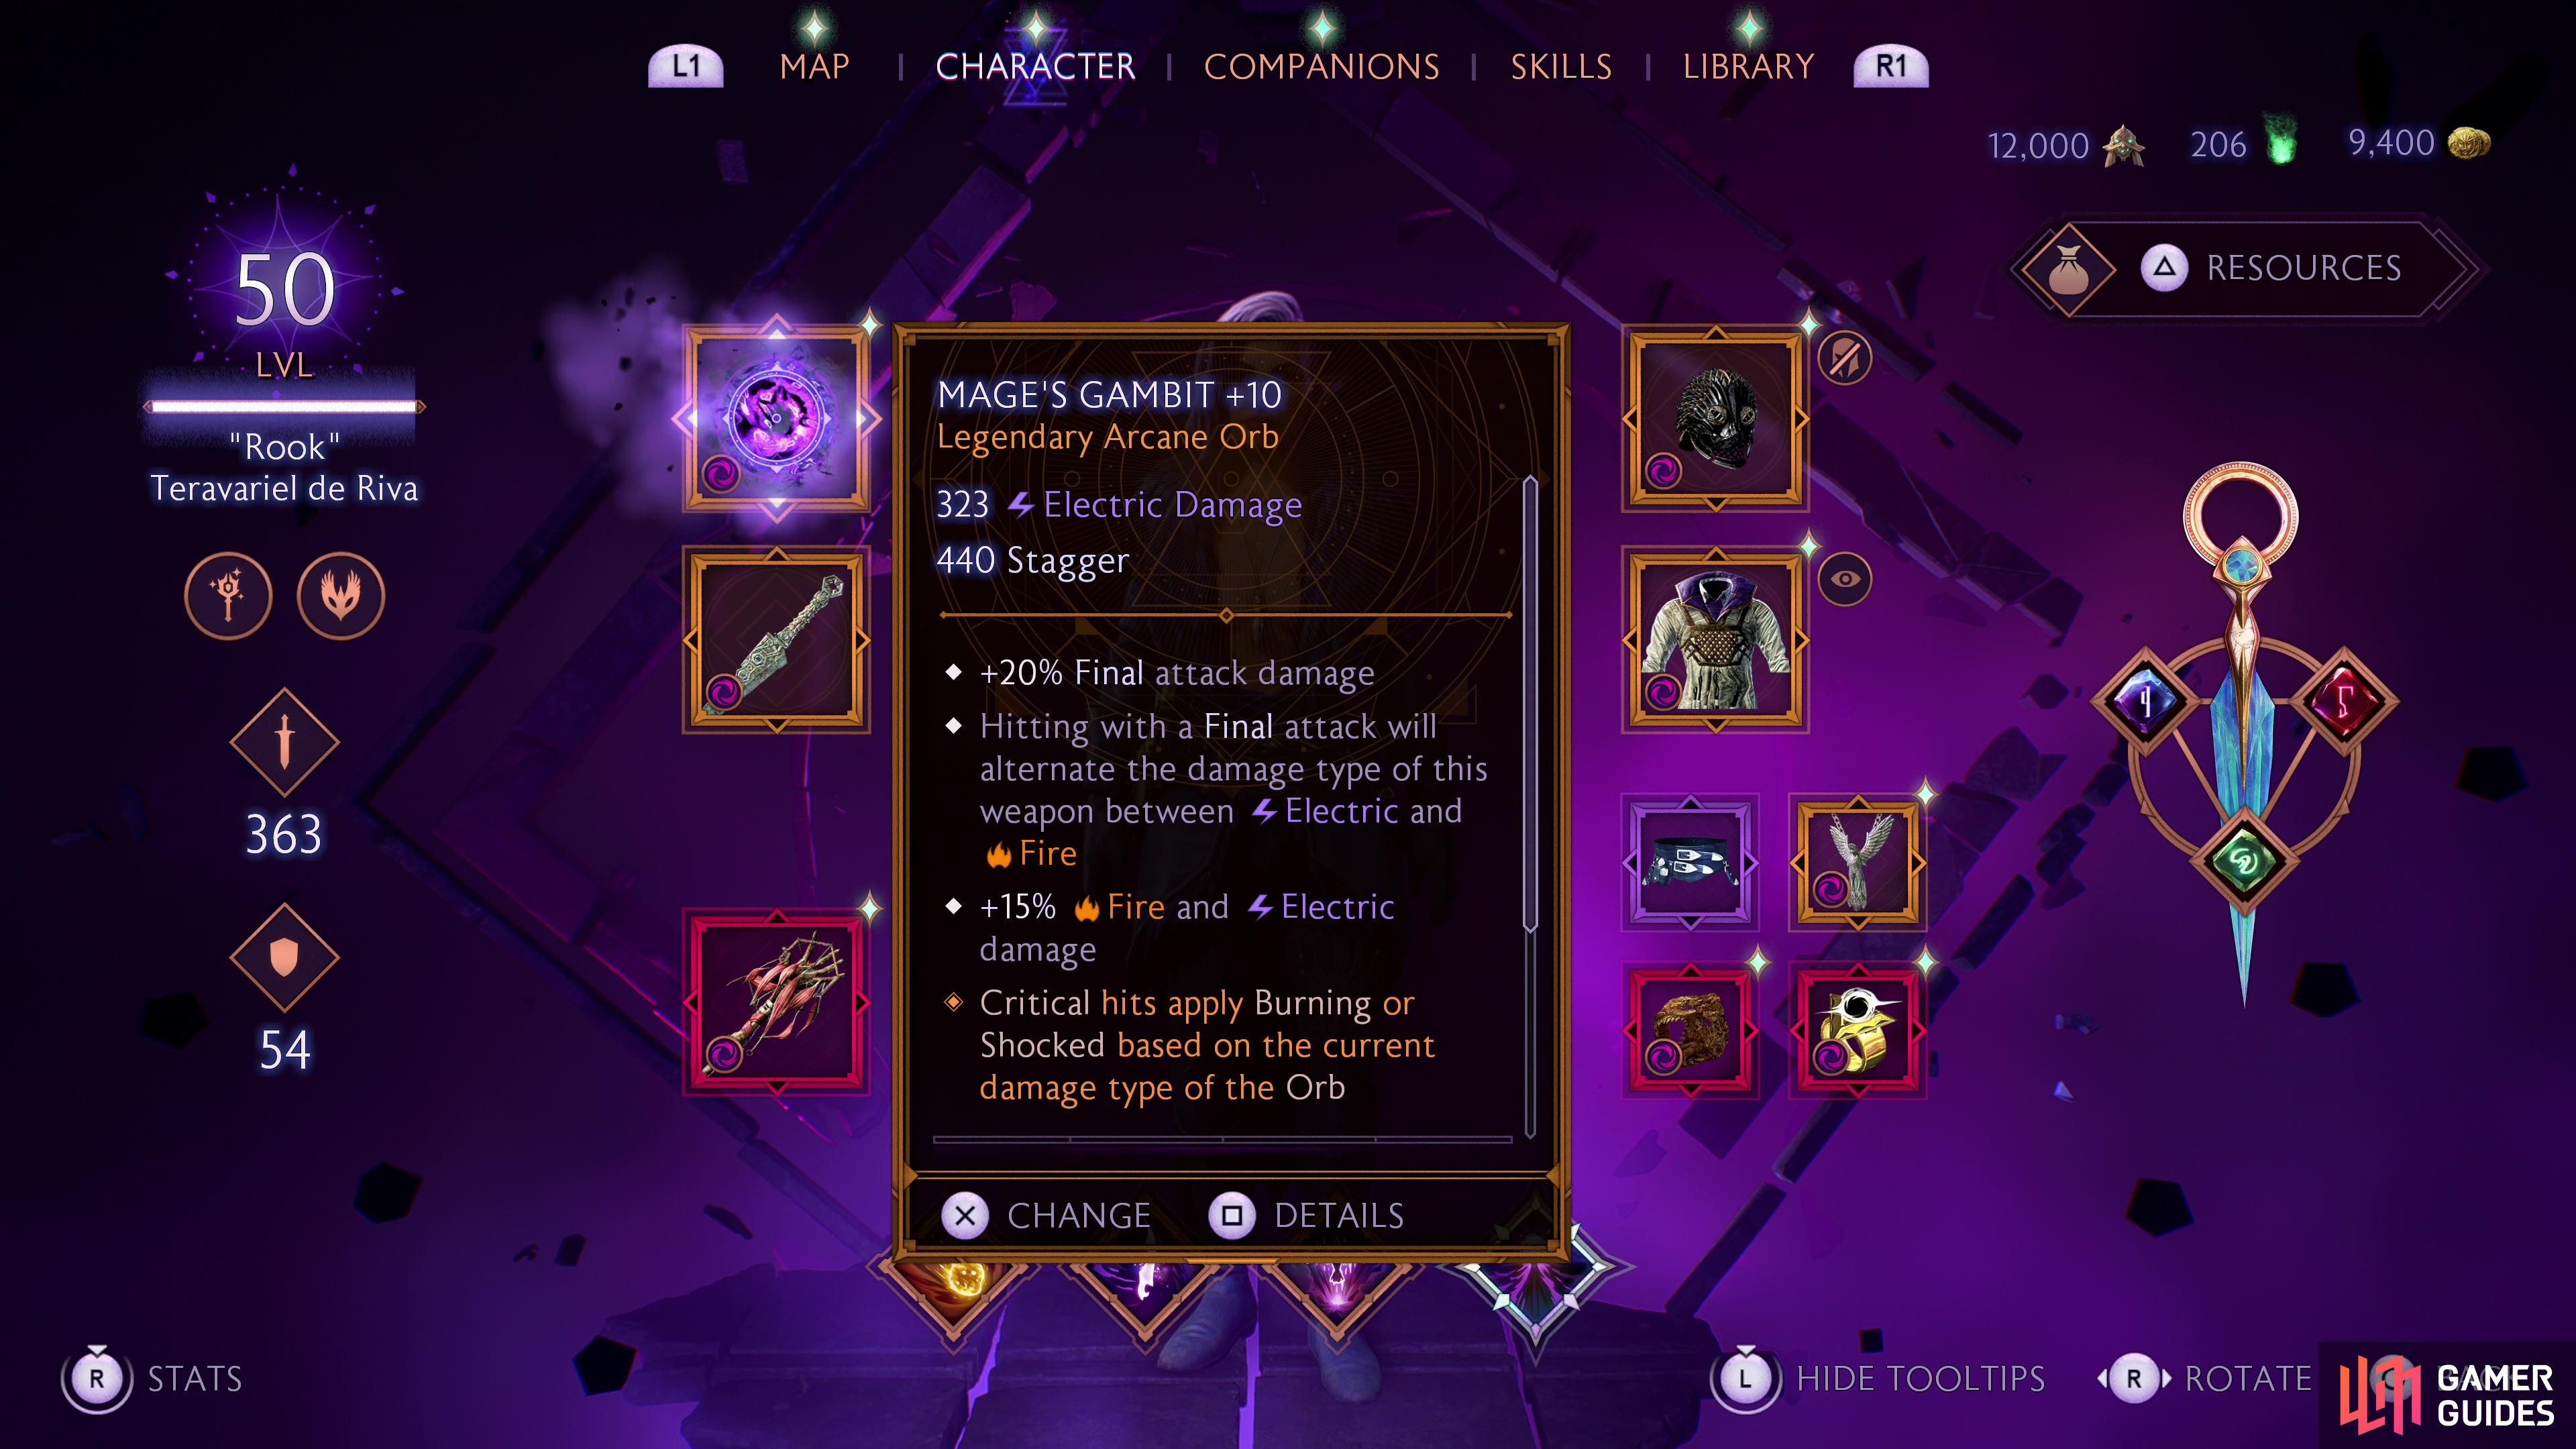
Timeworn Mageknife is a pretty good weapon, but Thorn of Misfortune should be your goal - once it’s a rare tier it’ll turn all your Arcane Bombs into guaranteed critical hits. ![]() Mage’s Gambit synergizes well for a build dealing significant fire and electric damage and procs burning and/or shocking on critical hits,
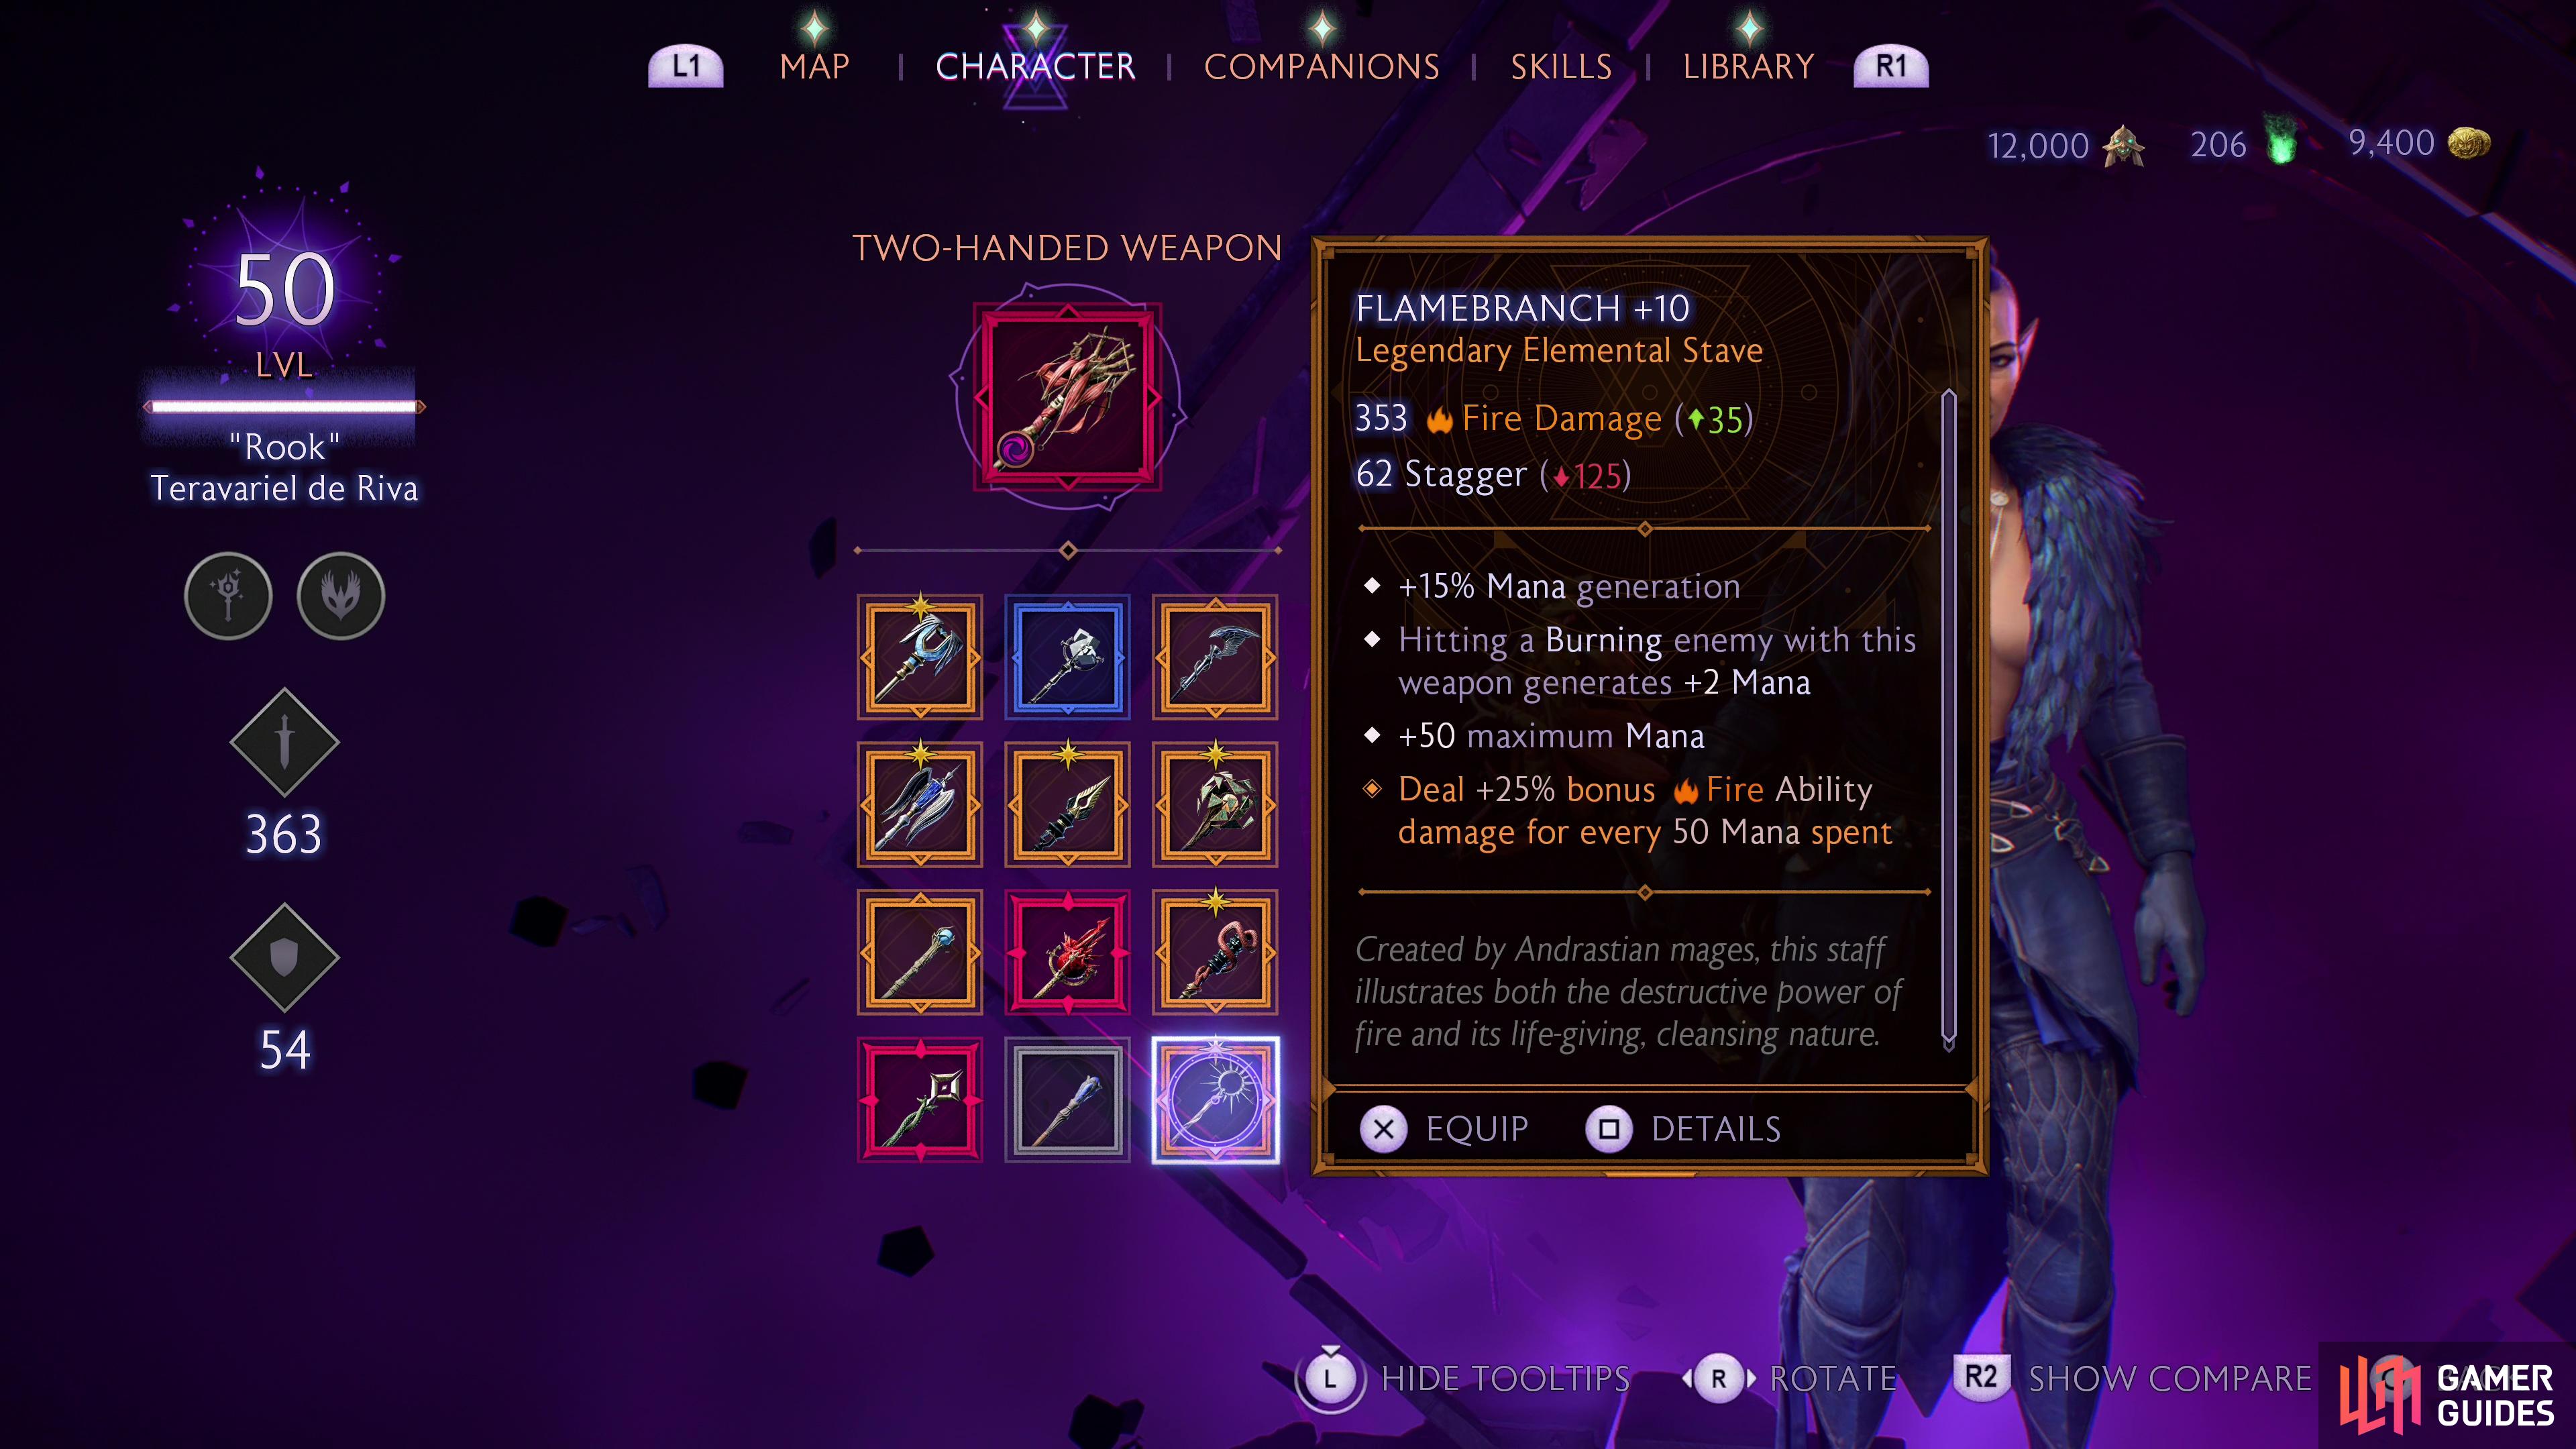
Mage’s Gambit synergizes well for a build dealing significant fire and electric damage and procs burning and/or shocking on critical hits, ![]() Flamebranch is a nice mana generator that we’ll almost never actively use and
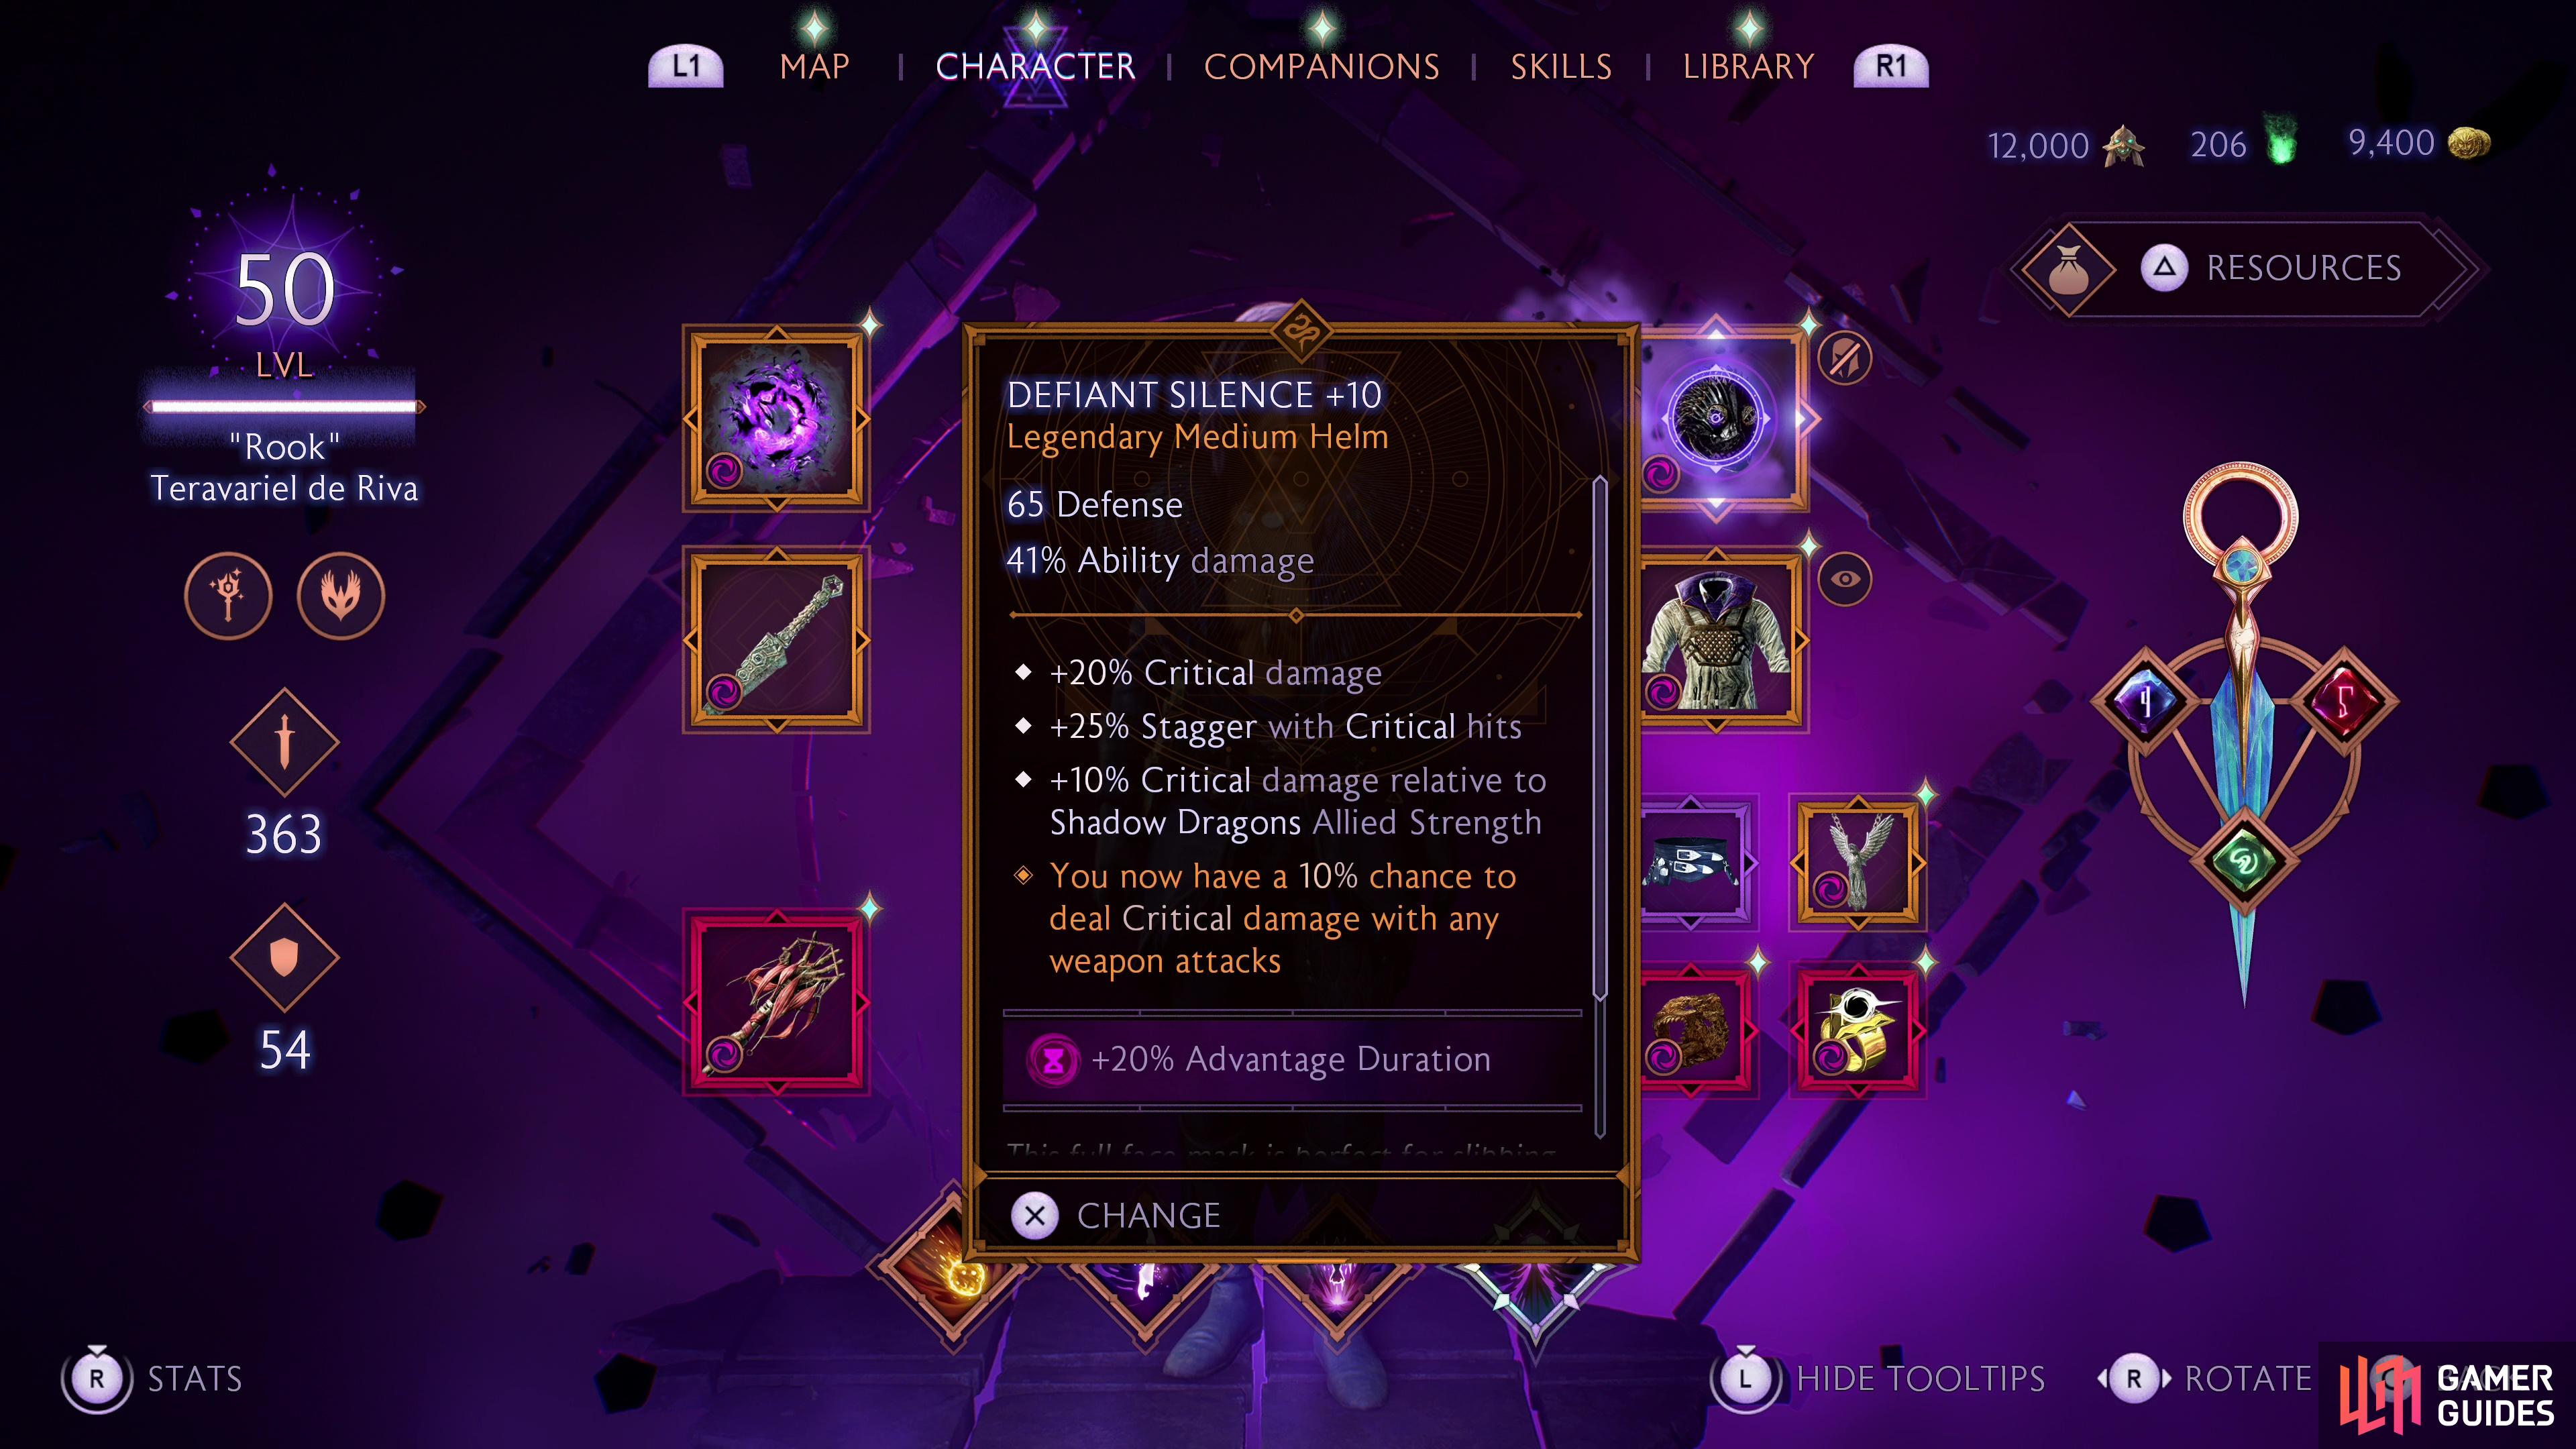
Flamebranch is a nice mana generator that we’ll almost never actively use and ![]() Defiant Silence boosts crit damage further. Jumper’s Deft Leathers is decent while you’re building up your gear, but there’s another powerful combo towards the end game, so don’t get too invested.
Defiant Silence boosts crit damage further. Jumper’s Deft Leathers is decent while you’re building up your gear, but there’s another powerful combo towards the end game, so don’t get too invested. ![]() Crow’s Perch Medallion is a nice amulet that boosts strike skills (you can substitute it for the
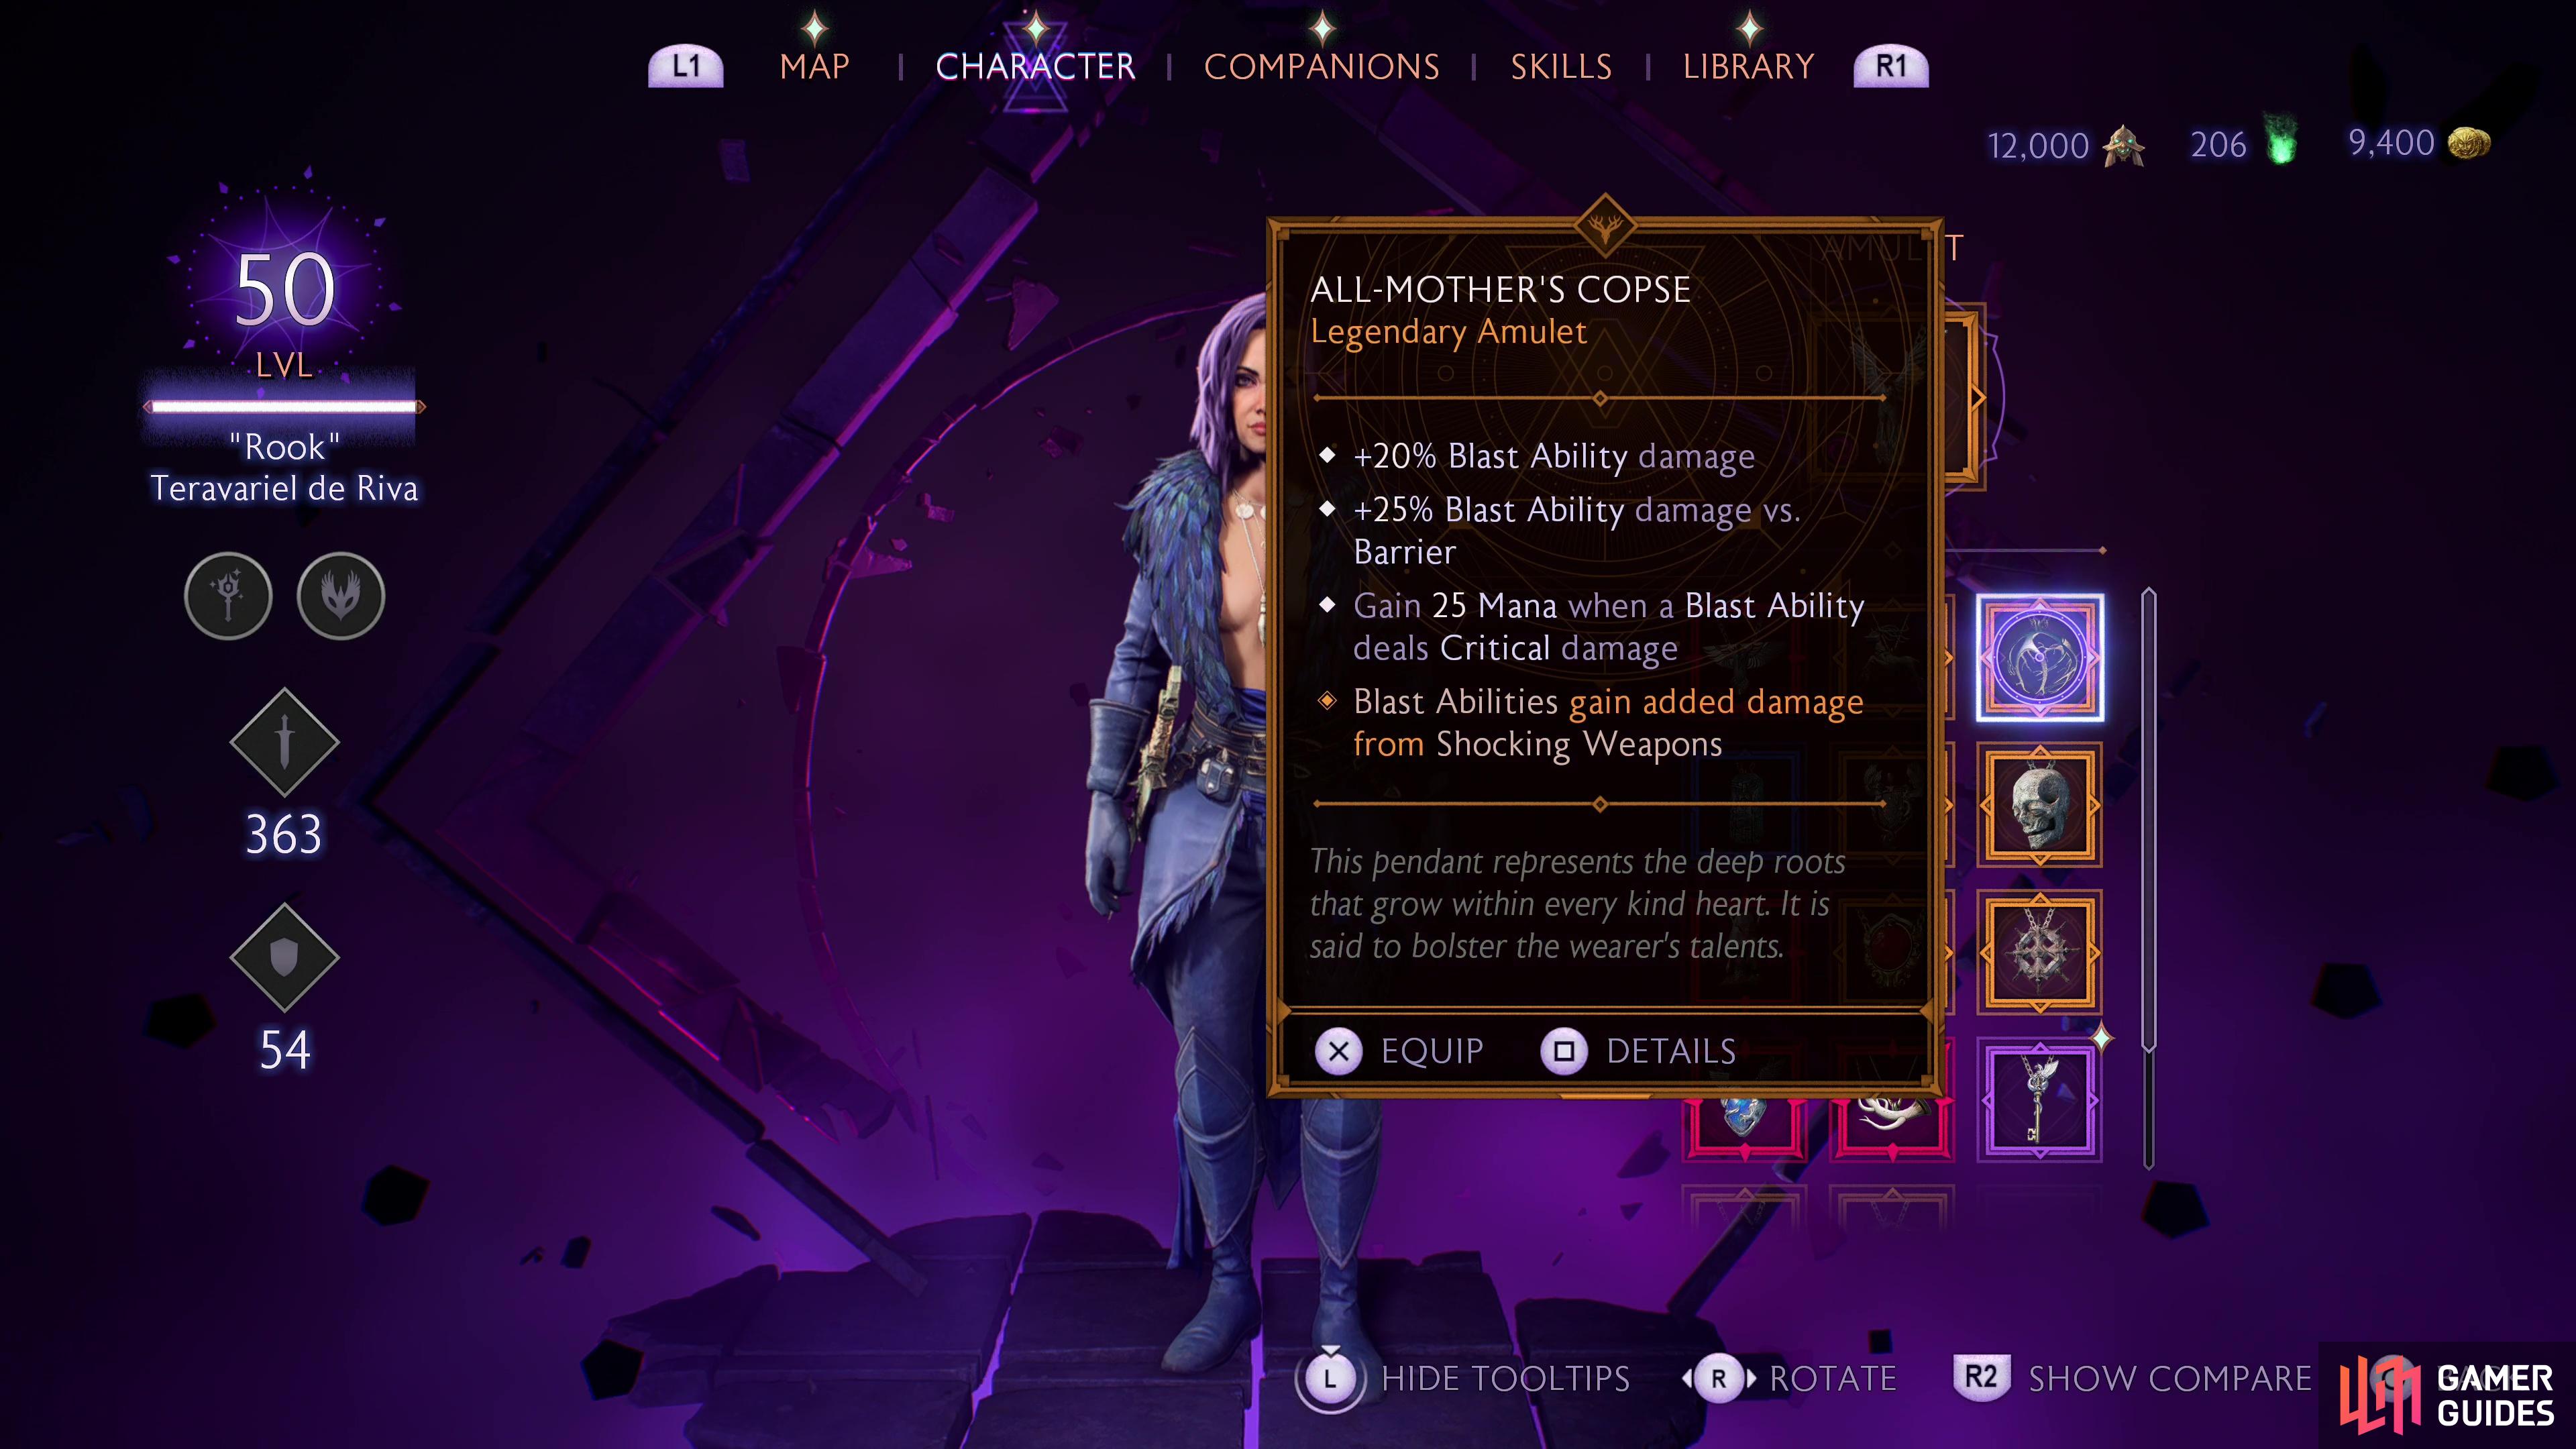
Crow’s Perch Medallion is a nice amulet that boosts strike skills (you can substitute it for the ![]() All-Mother’s Copse if you prefer a more ability-focused approach - spamming Meteor and Void Blade becomes increasingly more viable as your gear improves). Finally, the
All-Mother’s Copse if you prefer a more ability-focused approach - spamming Meteor and Void Blade becomes increasingly more viable as your gear improves). Finally, the ![]() Glacial Talus is just another great mana generator that will also boost your damage once it’s legendary.
Glacial Talus is just another great mana generator that will also boost your damage once it’s legendary.
End Game Build - Meteor and Void Blade Mana Engine
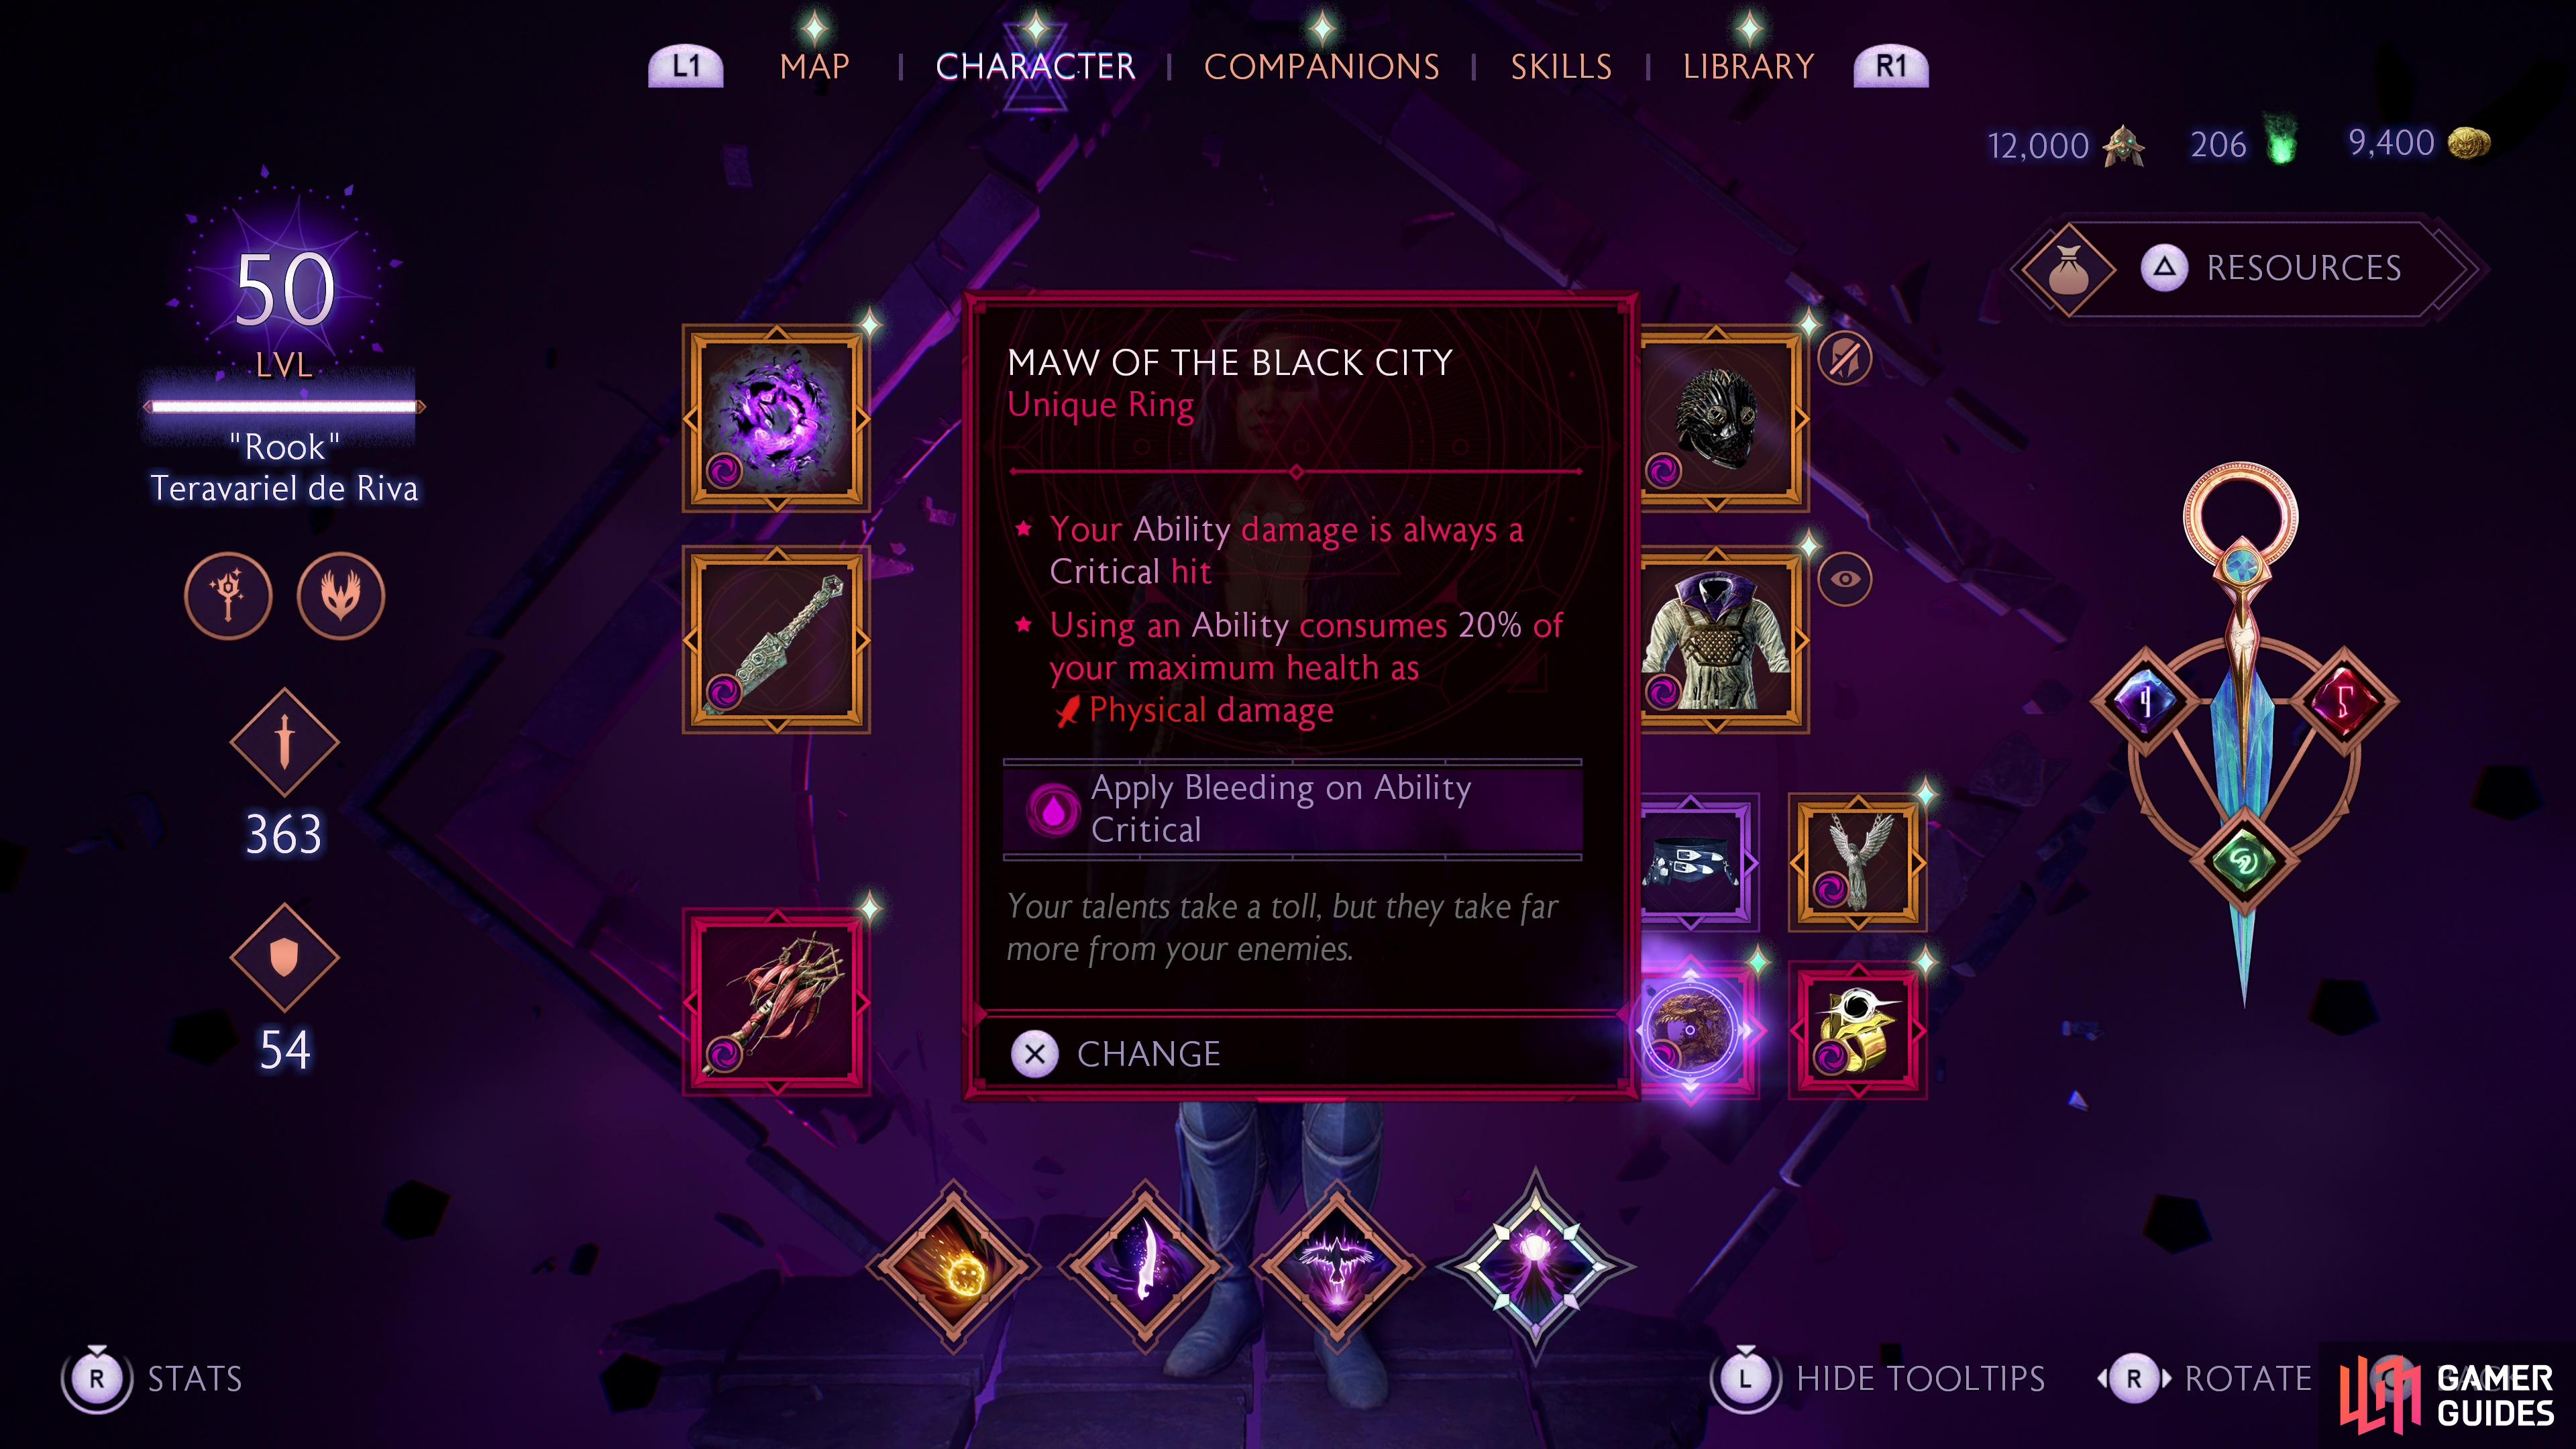
Skill-wise, this build doesn’t change a ton as you approach Lv50. You will want to get the unique ring Maw of the Black City which drains your health by 20% every time you use an ability, but makes all your abilities critical hits. To counter this health drain, equip the ![]() Researcher’s Coat which, once legendary, will 15% of the damage you deal when you strike a bleeding enemy. To ensure enemies are bleeding often, enchant Maw of the Black City to “Apply Bleeding on Ability Critical”, which will not only just prevent Maw of the Black City from being a health drain, but will actually mitigate your need from outside healing - as long as you can keep spamming abilities and dealing damage, your HP will remain high.
Researcher’s Coat which, once legendary, will 15% of the damage you deal when you strike a bleeding enemy. To ensure enemies are bleeding often, enchant Maw of the Black City to “Apply Bleeding on Ability Critical”, which will not only just prevent Maw of the Black City from being a health drain, but will actually mitigate your need from outside healing - as long as you can keep spamming abilities and dealing damage, your HP will remain high.
Now that all your abilities and Arcane Bombs are guaranteed critical hits you can divest from any skills that land critical hits under certain circumstances and instead invest in skills that give you boons when you land critical hits - like Pressure Point, which gives you the Quickened buff every time you use a strike skill. This in turn makes the belt ![]() Twin Buckle Binding interesting, as you’ll also gain +100 HP when you use an ability while Quickened… which should be any ability you use, as ability crits now give you Quickened. Failing that, you can always just equip the
Twin Buckle Binding interesting, as you’ll also gain +100 HP when you use an ability while Quickened… which should be any ability you use, as ability crits now give you Quickened. Failing that, you can always just equip the ![]() Glorious Ultimatum belt to sacrifice potion healing (now mostly unnecessary) for faster ultimate generation, but it’s hard to get too excited about spamming ultimates when your Void Blade and Meteor always crit and can be spammed virtually endlessly.
Glorious Ultimatum belt to sacrifice potion healing (now mostly unnecessary) for faster ultimate generation, but it’s hard to get too excited about spamming ultimates when your Void Blade and Meteor always crit and can be spammed virtually endlessly.
Finish up the Spellblade tree and the skill Electrical Burns will cause you to apply burning when you apply shocked and shocked when you apply burning. With the skill Shocking Strikes all your strike skills will apply shocked on use, Meteor applies burning by default, and all ability crits (read: all abilities) apply bleeding. Simply put, you’ll stack debuffs on foes all the time, and while this damage isn’t massive, if you can lay on several stacks and buff your affliction damage with skills, it’s not a bad supplemental source of damage.
At this point in the game, you’ll generally want to use Void Blade first thing in a fight, then land a quick 

(1 of 3) Near the end of the game, abilities will take over - start out fights using Void Blade,
Skill Point Allocation
The most important skills have been mentioned above, but now it’s time to lay all our cards on the table and reveal every skill we acquire. You can accumulate a total of 66 skill points in Dragon Age: The Veilguard, one per level up to Lv50, and 16 more from Fen’Harel Altars. Follow the early game/mid game/end game build advice above for a general guideline of when to buy various skills and keep in mind that this build evolves over the course of the game - don’t be shy about experimenting with skills not mentioned above. Early game, getting ahold of Frost Nova can be quite useful, even if we ultimately plan to spec out of it later in the game. Respeccing is free - use it!
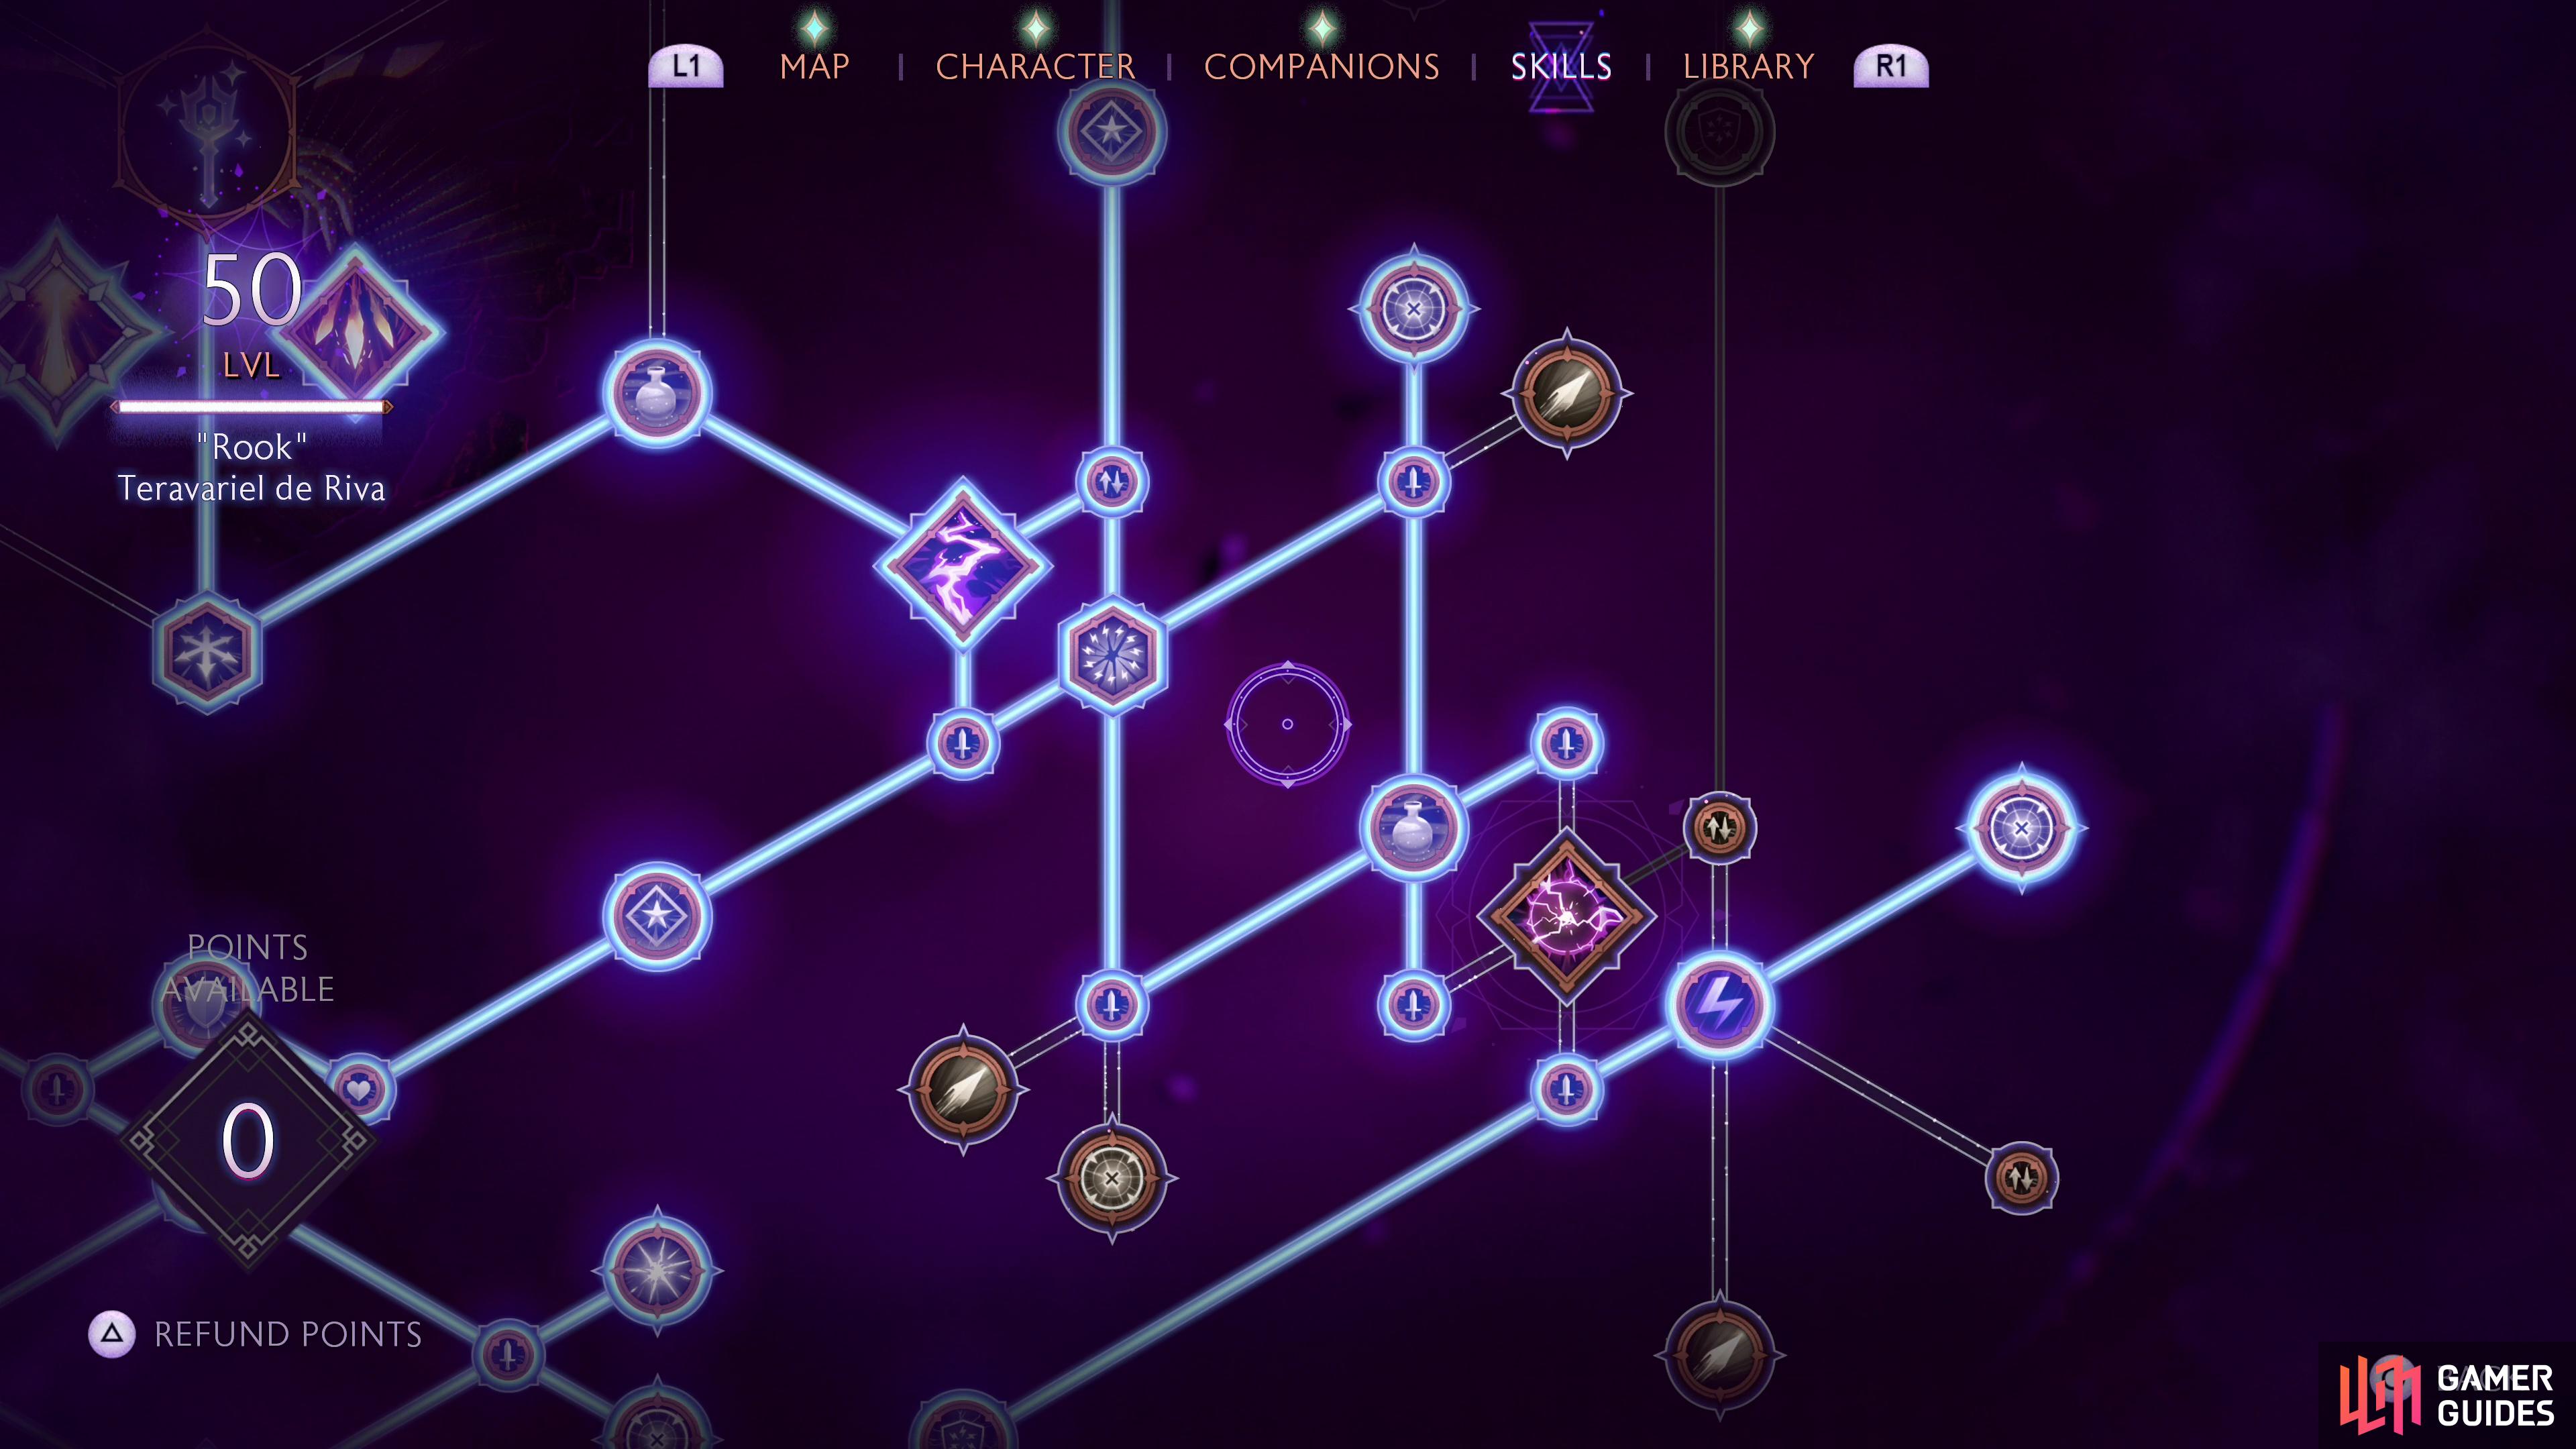
A broad look at the skill tree for the Arcane Bomb Spellblade build.
Mage Core - 2 Skill Points
| Skill | Type | Description |
|---|---|---|
| Fade Strike | Trait | Use your speed to unleash a powerful attack with any weapon after using Fade Step. |
| Quick Recovery | Greater Passive | Mana regeneration restarts 25% faster when paused by spending Mana or taking damage. |
Not gonna sugar coat things - we just want to break out of the Mage Core and get to the meat of this build. Quick Recovery is nice enough, but we’re mostly just angling towards Chain Lightning.
Burst - 16 Skill Points
| Skill | Type | Description |
|---|---|---|
| Chain Lightning | Ability | [Strike] [Projectile] Charge the air and fire a bolt of lightning that splits to hit multiple targets in a chain reaction. The bolt bounces up to 4 times, dealing damage to each enemy hit and rendering them Shocked. |
| Fade Conduit | Passive | Maximum Mana: +50 |
| Elemental Catalyst | Greater Passive | Abilities gain +15% bonus damage based on the damage type of your Staff and Orb weapons. |
| Perfect Cast | Trait | Hold  or or  / /  or or  , then release at maximum charge. Releasing a Charged attack at the moment it reaches the maximum charge level increases its damage by 50%. , then release at maximum charge. Releasing a Charged attack at the moment it reaches the maximum charge level increases its damage by 50%. |
| Killer Instinct | Passive | Stagger from Abilities: +20% |
| Shocking Strikes | Ability Upgrade | Using Strike Abilities applies Shocked to nearby enemies. |
| Passive | Charged attack damage: +10% | |
| Energy Burst | Greater Passive | Abilities that deal Fire or Electric damage increase the other type’s damage by 15% for 10 seconds. |
| Wrath | Passive | Critical damage: +10% |
| Reclamation | Greater Passive | Mana restored after defeating enemy: +8 |
| Enervation | Passive | Damage vs. Barrier: +20% |
| Amperage | Passive | Electric damage: +10% |
| Debilitating Shocks | Greater Passive | Take 15% less damage from enemies who are Shocked. |
| Traumatize | Passive | Takedown damage +15% |
| Nexus Shock | Greater Passive | Hitting enemies with at least 3 stacks of Shocked causes a chain of Electric damage that strikes up to 2 additional enemies within range. |
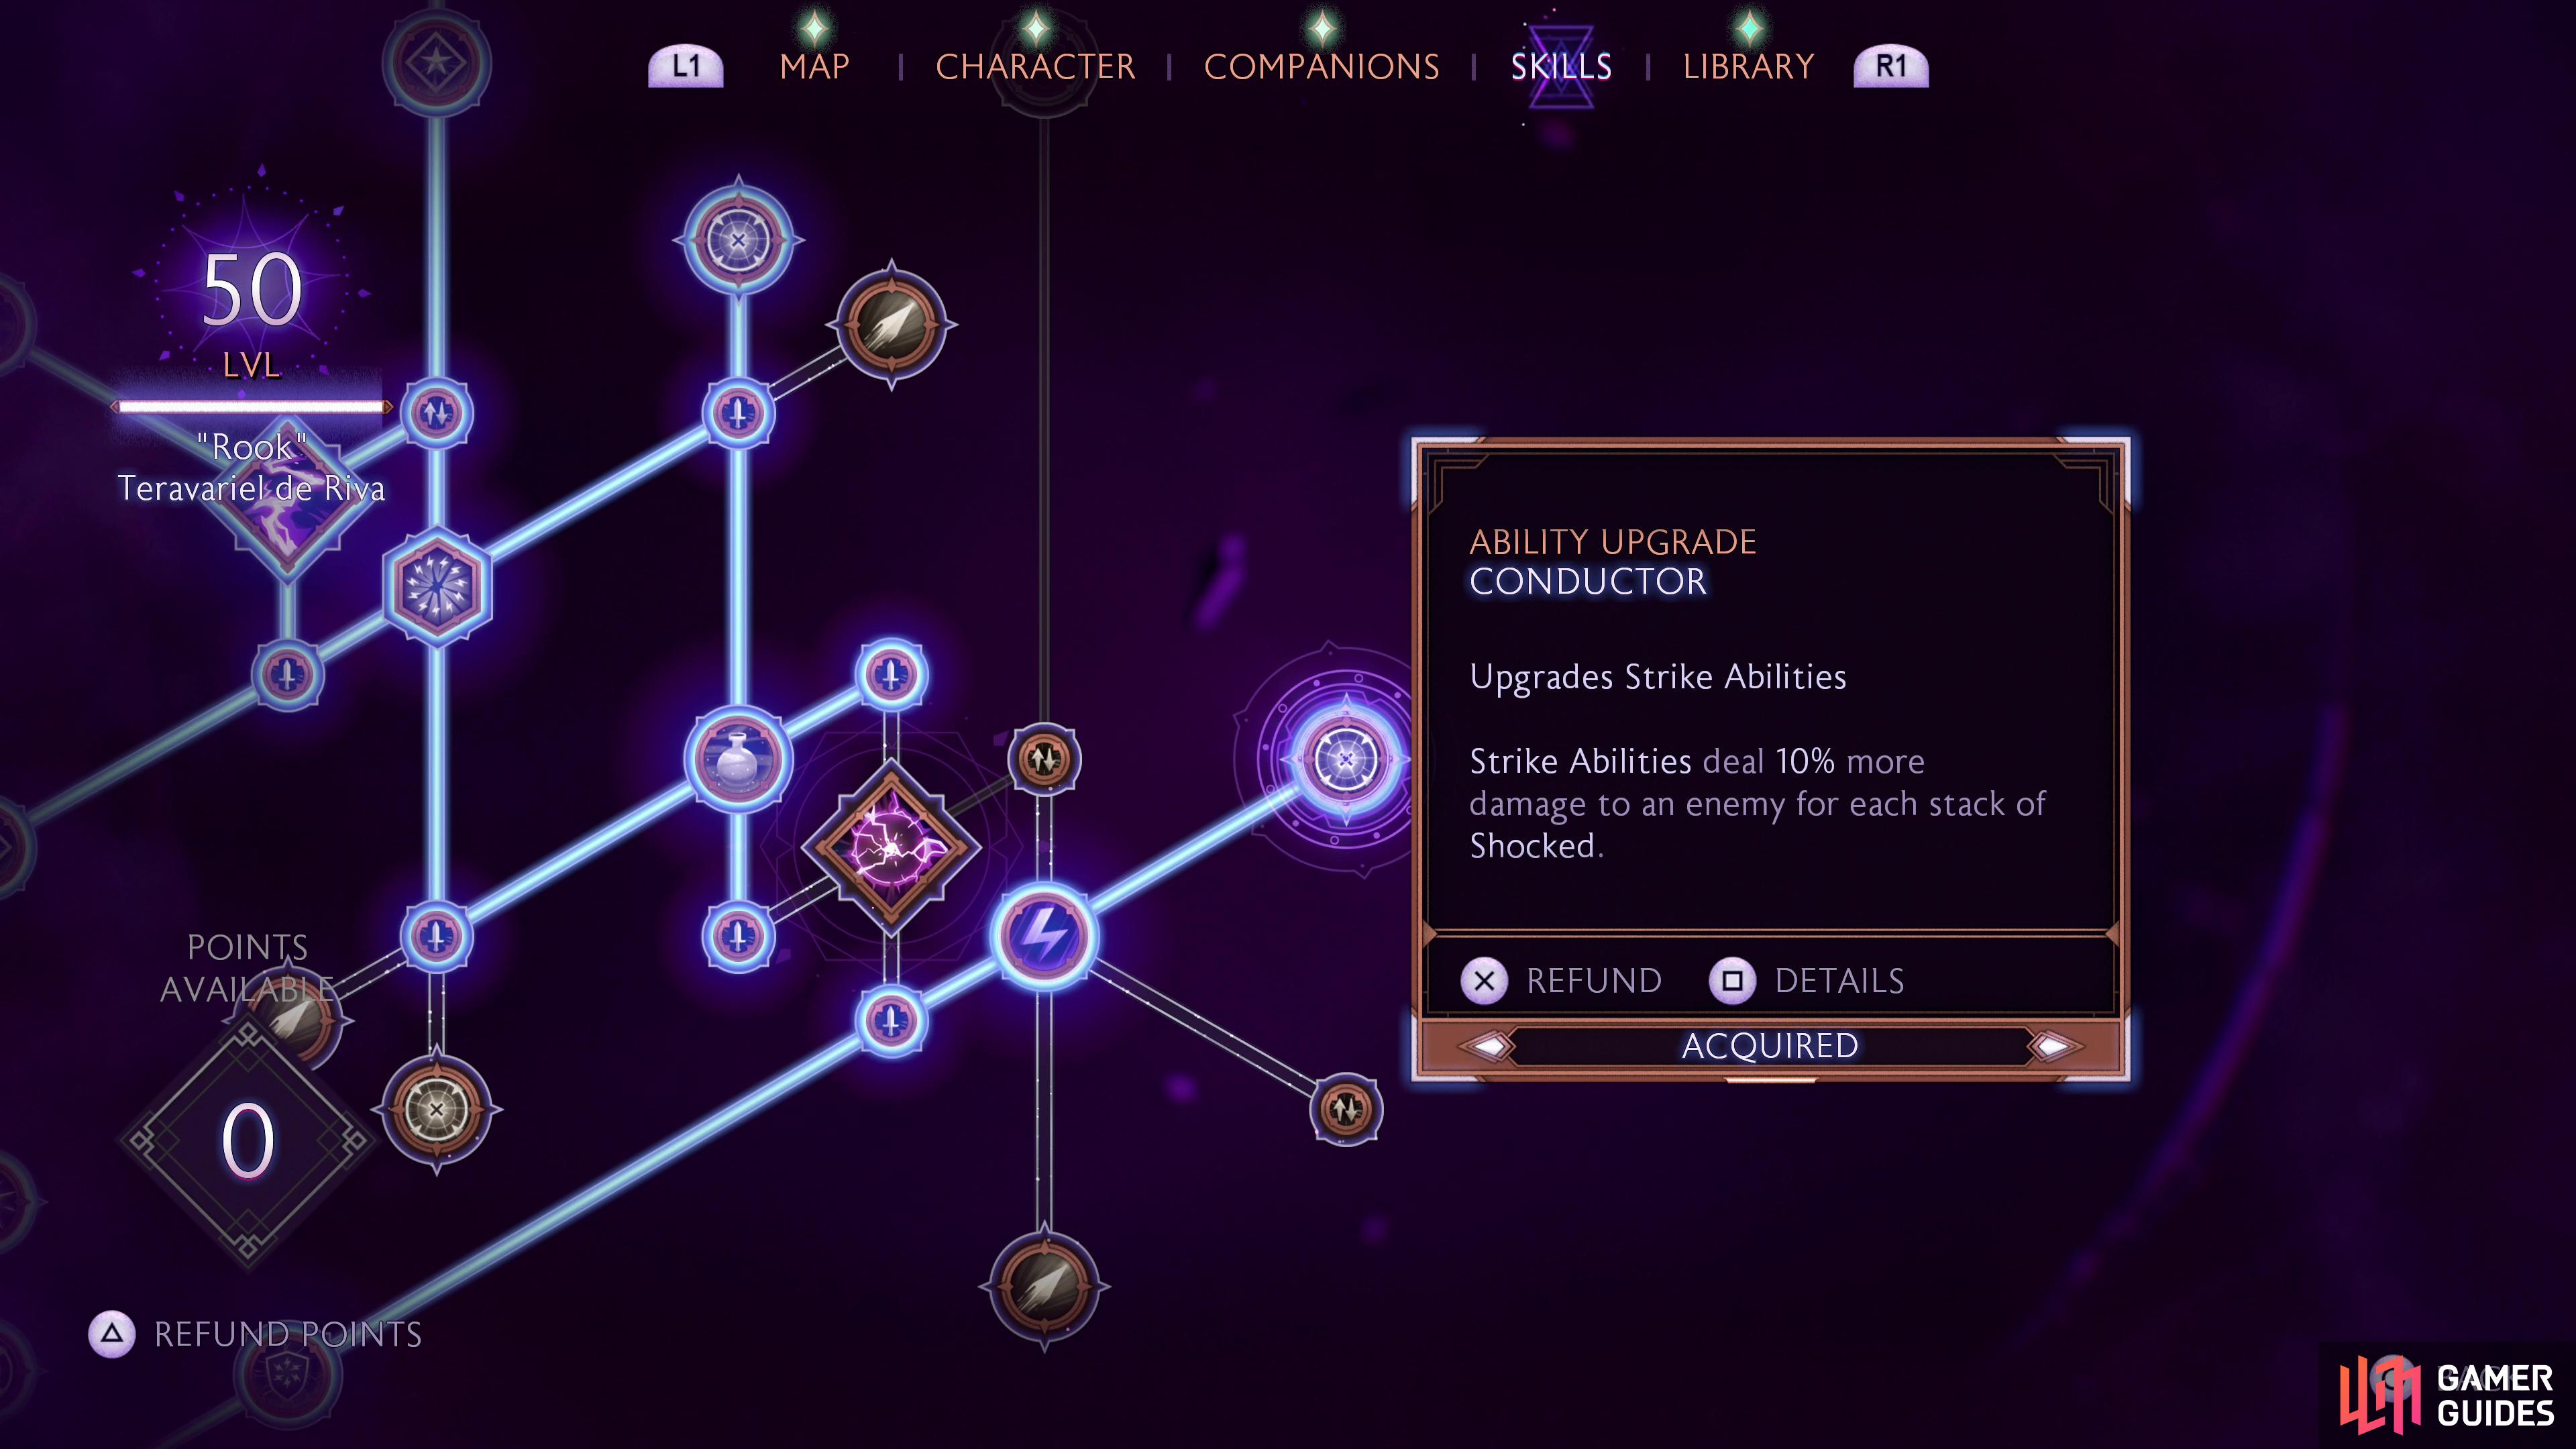
| Conductor | Ability Upgrade | Strike Abilities deal 10% more damage to an enemy for each stack of Shocked. |
Chain Lightning is a nice starter skill, providing our fledgling mage some well-needed AoE and we’ll also make good use of Perfect Cast as our preferred means of detonating Arcane Bombs. Both will wane in usefulness over time, but the bonus Mana from Fade Conduit will not. Shocking Strikes will give us more ways to debuff enemies with Shocked and Conductor will boost the damage our Strike abilities deal against Shocked enemies, while Debilitating Shocks will reduce incoming damage from Shocked enemies. We skip Tempest in the long run, and generally don’t bother with the lower right skills (the ones around Tempest) until we’re much later in the game.
(1 of 3) The Burst section of the mage skill tree has few abilities we’ll use long-term, but many useful passives,
Shadow Dragon - 1 Skill Points
| Skill | Type | Description |
|---|---|---|
| Meditation | Passive | Mana regeneration rate: +15% |
Just a quick dip for some mana regeneration.
Antivan Crow - 13 Skill Points
| Skill | Type | Description |
|---|---|---|
| Bulwark | Passive | Physical Resistance: +10% |
| Medium Armor Mastery | Greater Passive | While wearing a Medium Helm and Armor: Critical damage: +20%, Final damage: +20%, Charged attack damage: +20%, Agile attack damage: +20% |
| Imbued Reaction | Greater Passive | Perfect Defense grants Shocking weapons. Shocking Weapons deals 25% more damage. |
| Deterioration | Passive | Penetration: +15% |
| Essence Eater | Greater Passive | Performing a Takedown grants 250 health and 20 Ultimate. |
| Staggering Charge | Passive | Stagger from Charged attacks: +20% |
| Breacher | Ability Upgrade | Blast Abilities deal 50% more damage vs. Barrier and Armor. |
| Staggering Strikes | Ability Upgrade | Strike Abilities deal 50% more Stagger. |
| Underestimated | Passive | Light attack damage vs. health: +10% |
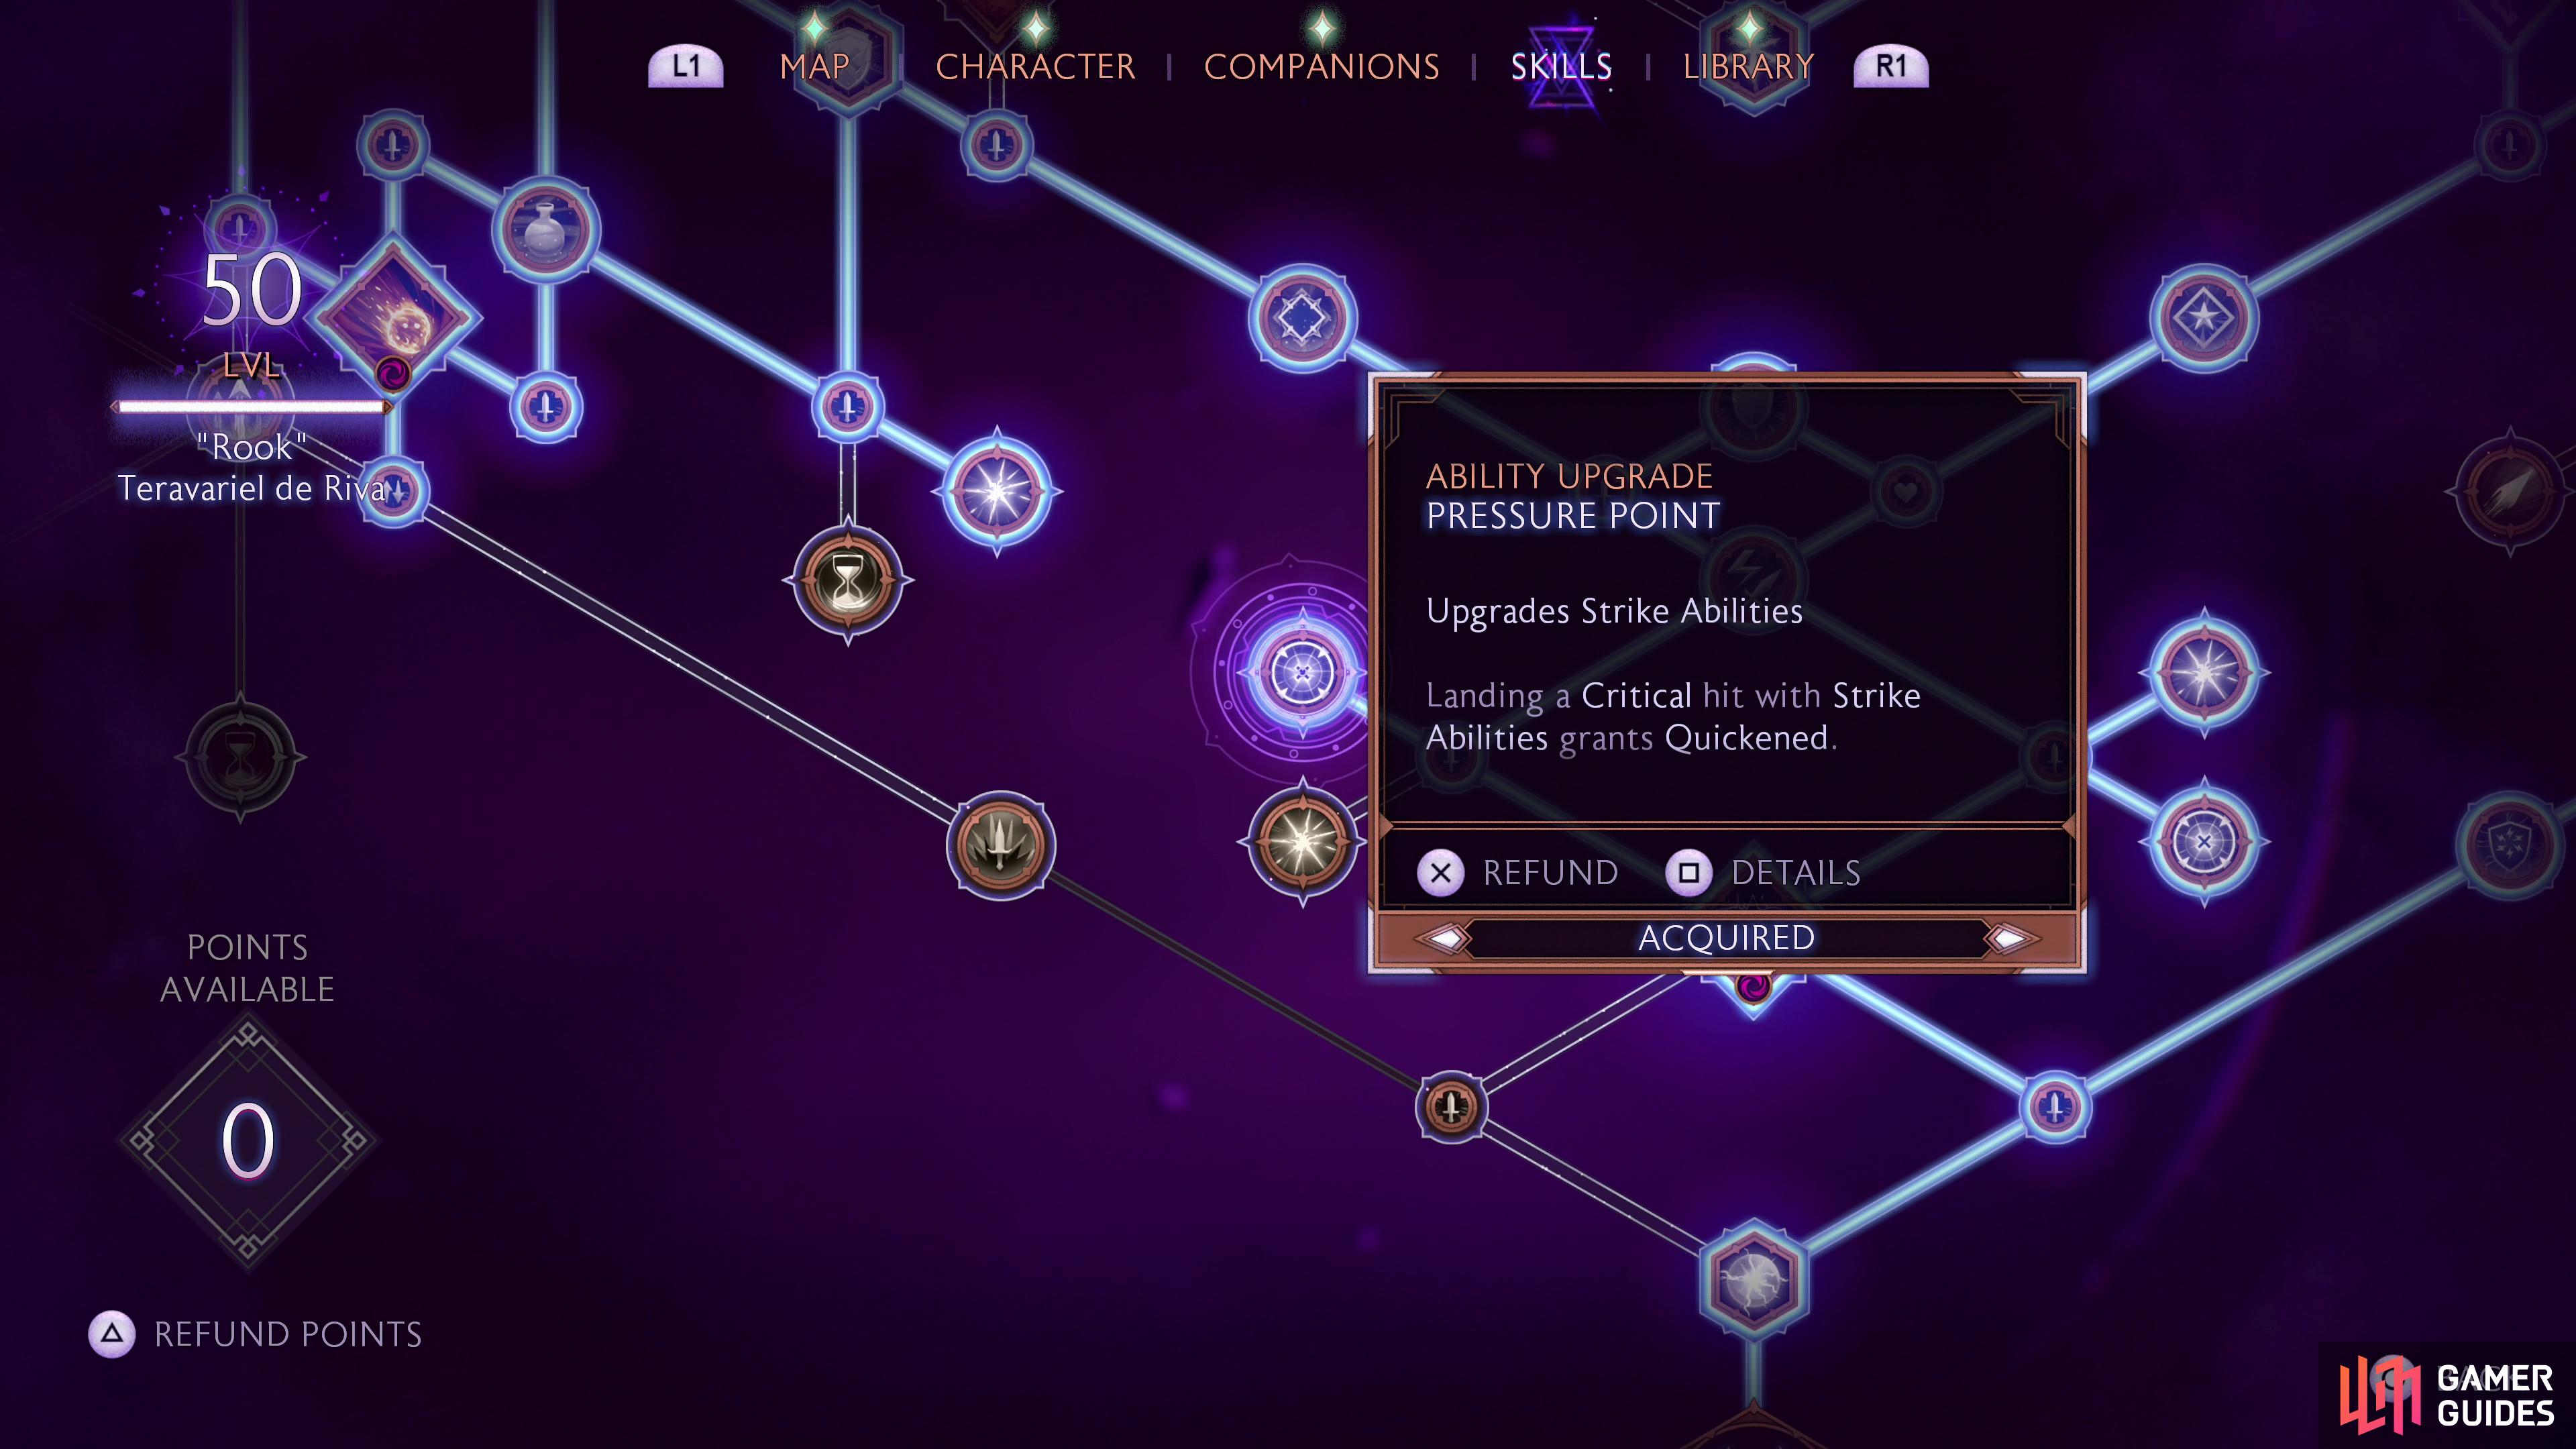
| Pressure Point | Ability Upgrade | Landing a Critical hit with Strike Abilities granted Quickened. |
| Ability | [Area] [Strike] Leap backward, stirring up a storm of elemental energy in your wake. Deals damage to all nearby enemies. | |
| Shellbreaker | Passive | Damage vs. Armor: +20% |
| Spirit Blade | Trait | You can now use your Heavy attack at the end of a Light Attack Chain to conjure a blade and project it a short distance. The blade consumes an Arcane Bomb. Required Orb and Dagger. |
Spirit Blade is the go-to method for detonating Arcane Bombs from the moment you acquire it, making it one of the more important skills in this build. Storm Surge deals damage to foes immediately in front of Rook and costs no Mana, making it a nice ability to mix in along with Void Blade and Meteor. Pressure Point and Staggering Strikes both improve Strike abilities, but the former doesn’t really shine until you get Maw of the Black City - once you have it, however, it’ll keep Quickened on you as long as you use abilities. Breacher boosts the damage of Blast abilities by 50% against Armor and Barriers, making the prospect of starting fights with Meteor or Void Blade much more appealing. Medium Armor Mastery probably won’t be useful until late-game, when you’re ready to don the Researcher’s Coat, but once you have that armor and the Defiant Silence helmet on, Medium Armor Mastery provides several useful boons, including Critical damage, Final damage and Charged attack damage. Baleful Blast and Elemental Executioner are useful skills in the midgame, but once you have Maw of the Black City you won’t need them any more.
(1 of 2) The Antivan Crow section of the tree has many useful skills, but also some refinements that can be made as time goes on.
Sustain - 14 Skill Points
| Skill | Type | Description |
|---|---|---|
| Velocity | Passive | Stagger from weapon attacks +20% |
| Return Fire | Trait | Use a Light of Heavy attack after a Perfect Defense to perform a counterattack. |
| Prolong | Passive | Affliction duration: +20% |
| Degrade | Greater Passive | Deal 5% bonus damage for each unique Primer and Affliction on your target. |
| Bigger Blast | Passive | Arcane Bomb damage: +15% |
| Veil Blasts | Ability Upgrade | Apply 15% of your current Mana as bonus damage for Blast Abilities. |
| Providence | Passive | Advantage duration: +20% |
| Inner Focus | Greater Passive | Successful LIght attacks generate an additional 25% Mana. This value is doubled against enemies suffering from an Affliction. |
| Wildfire | Passive | Fire damage: +10% |
| Wrath | Passive | Critical damage: +10% |
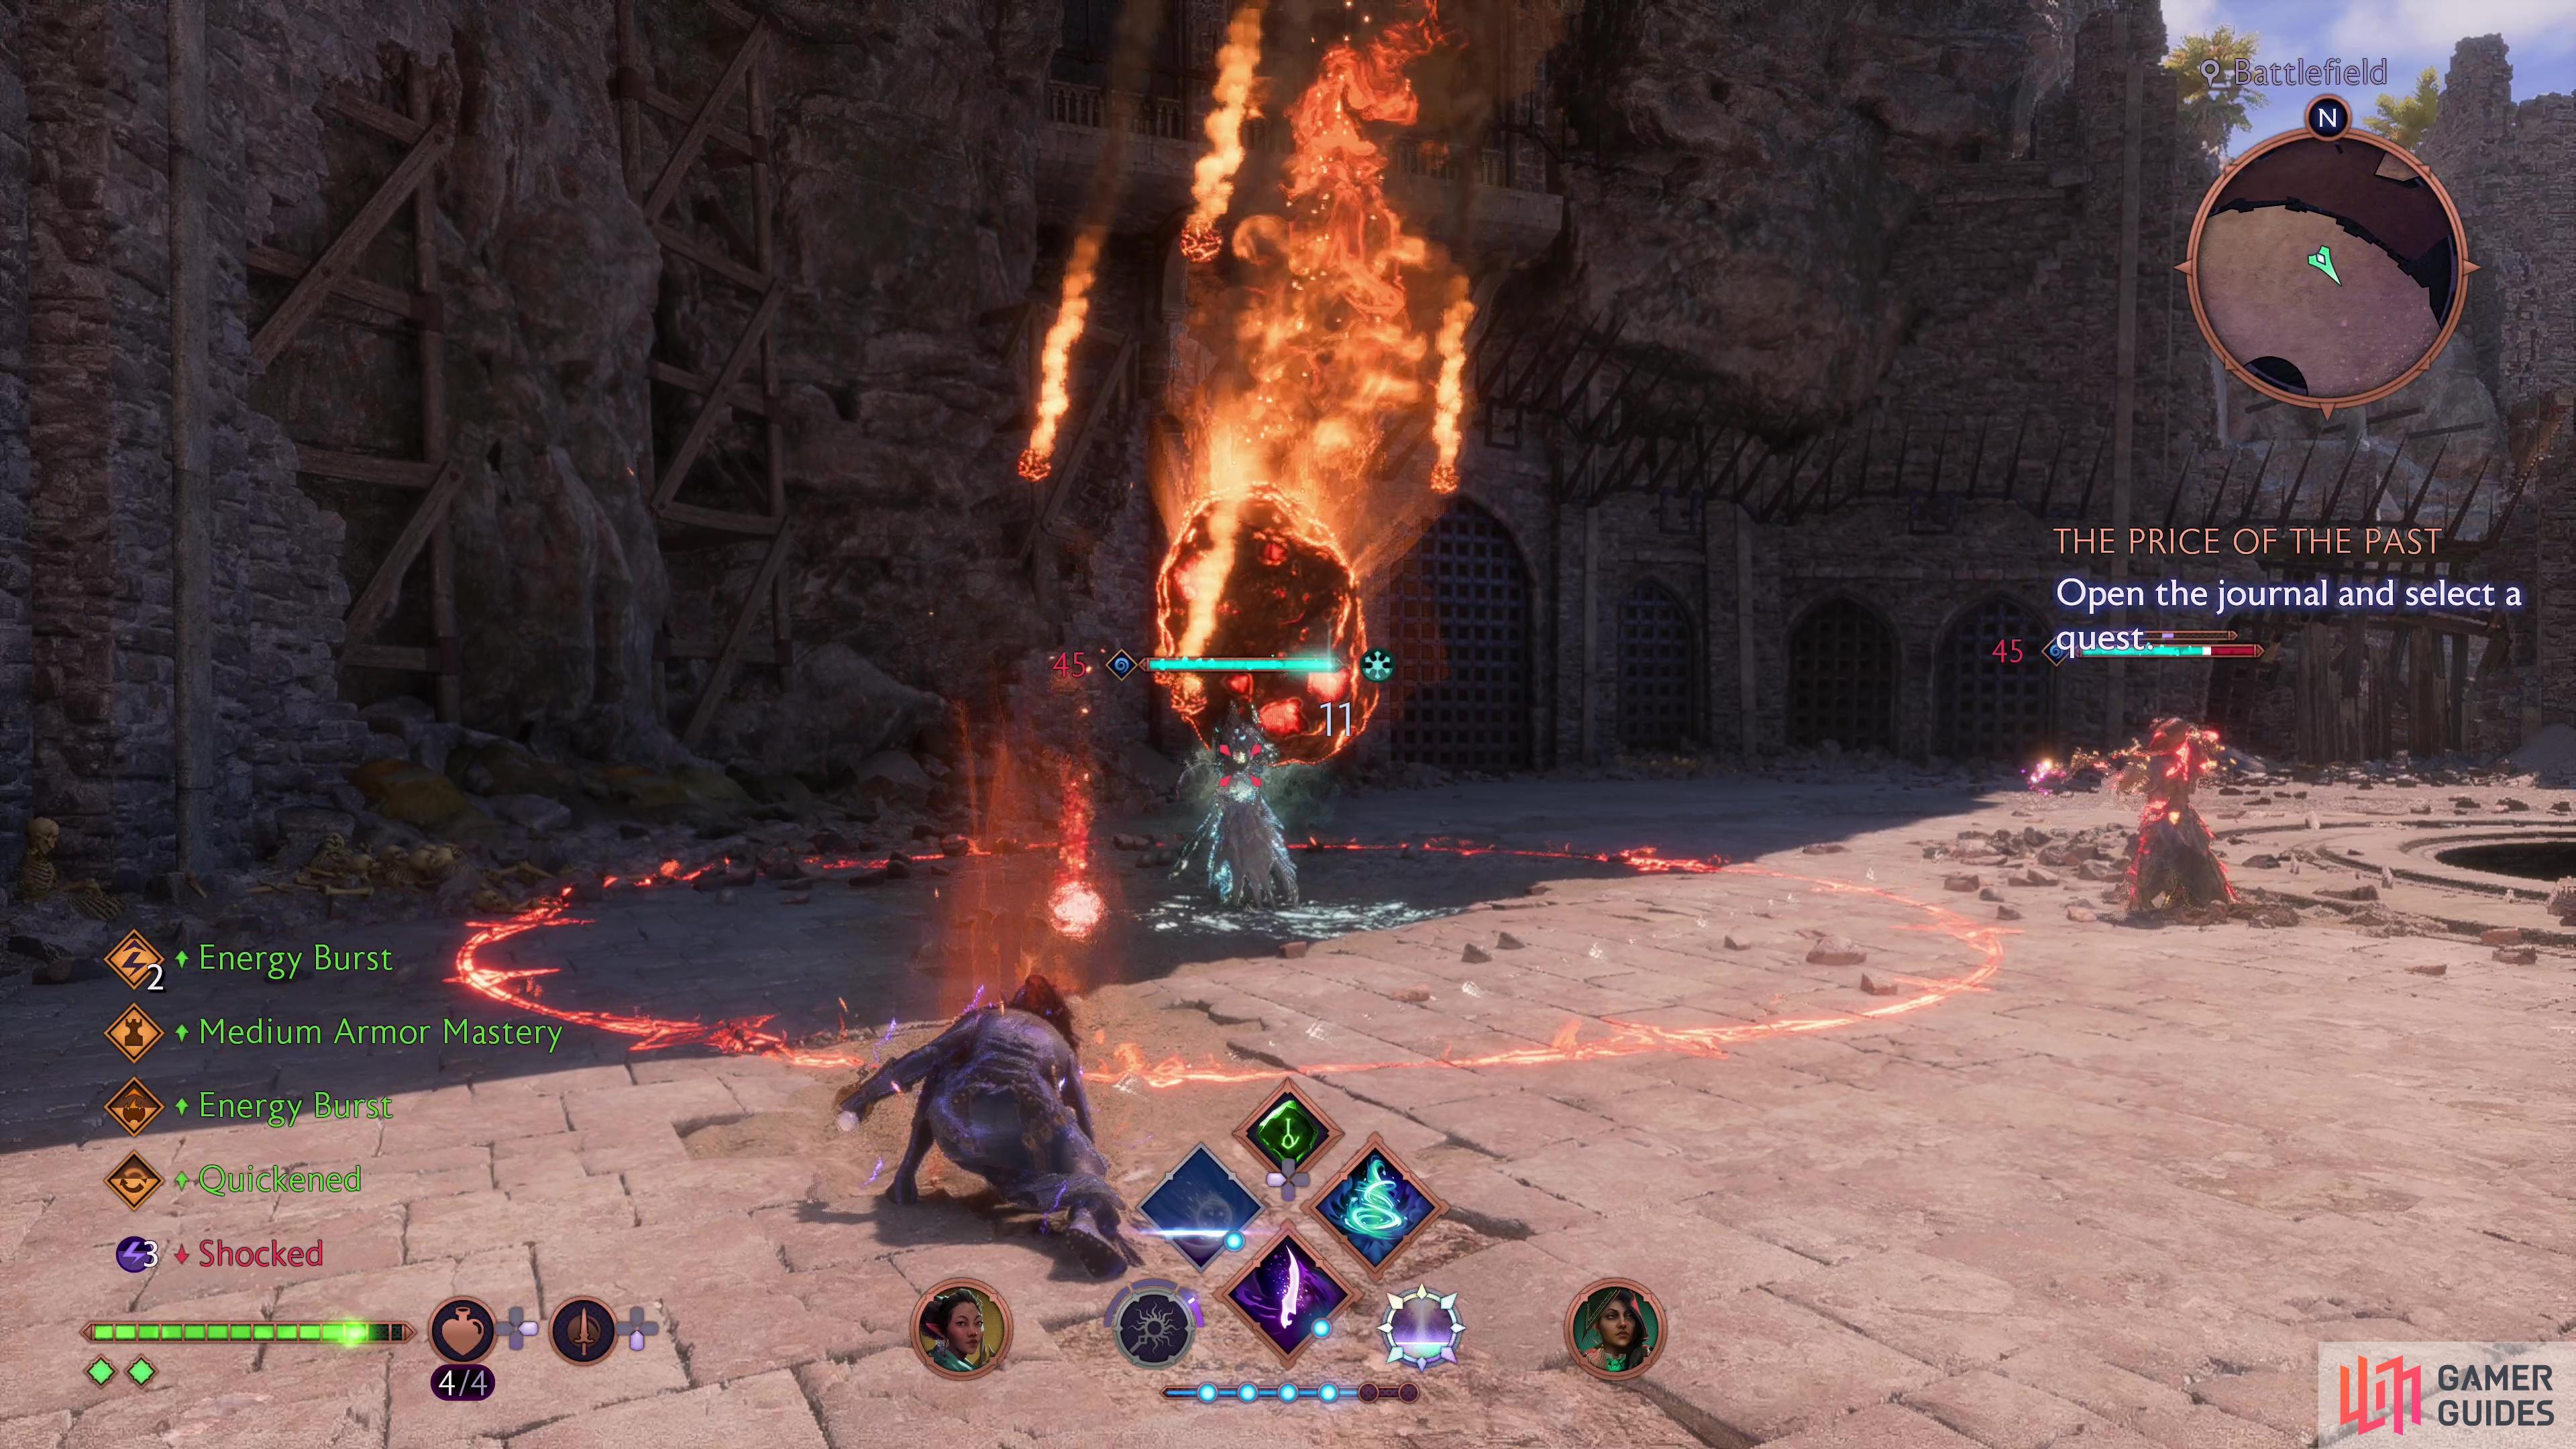
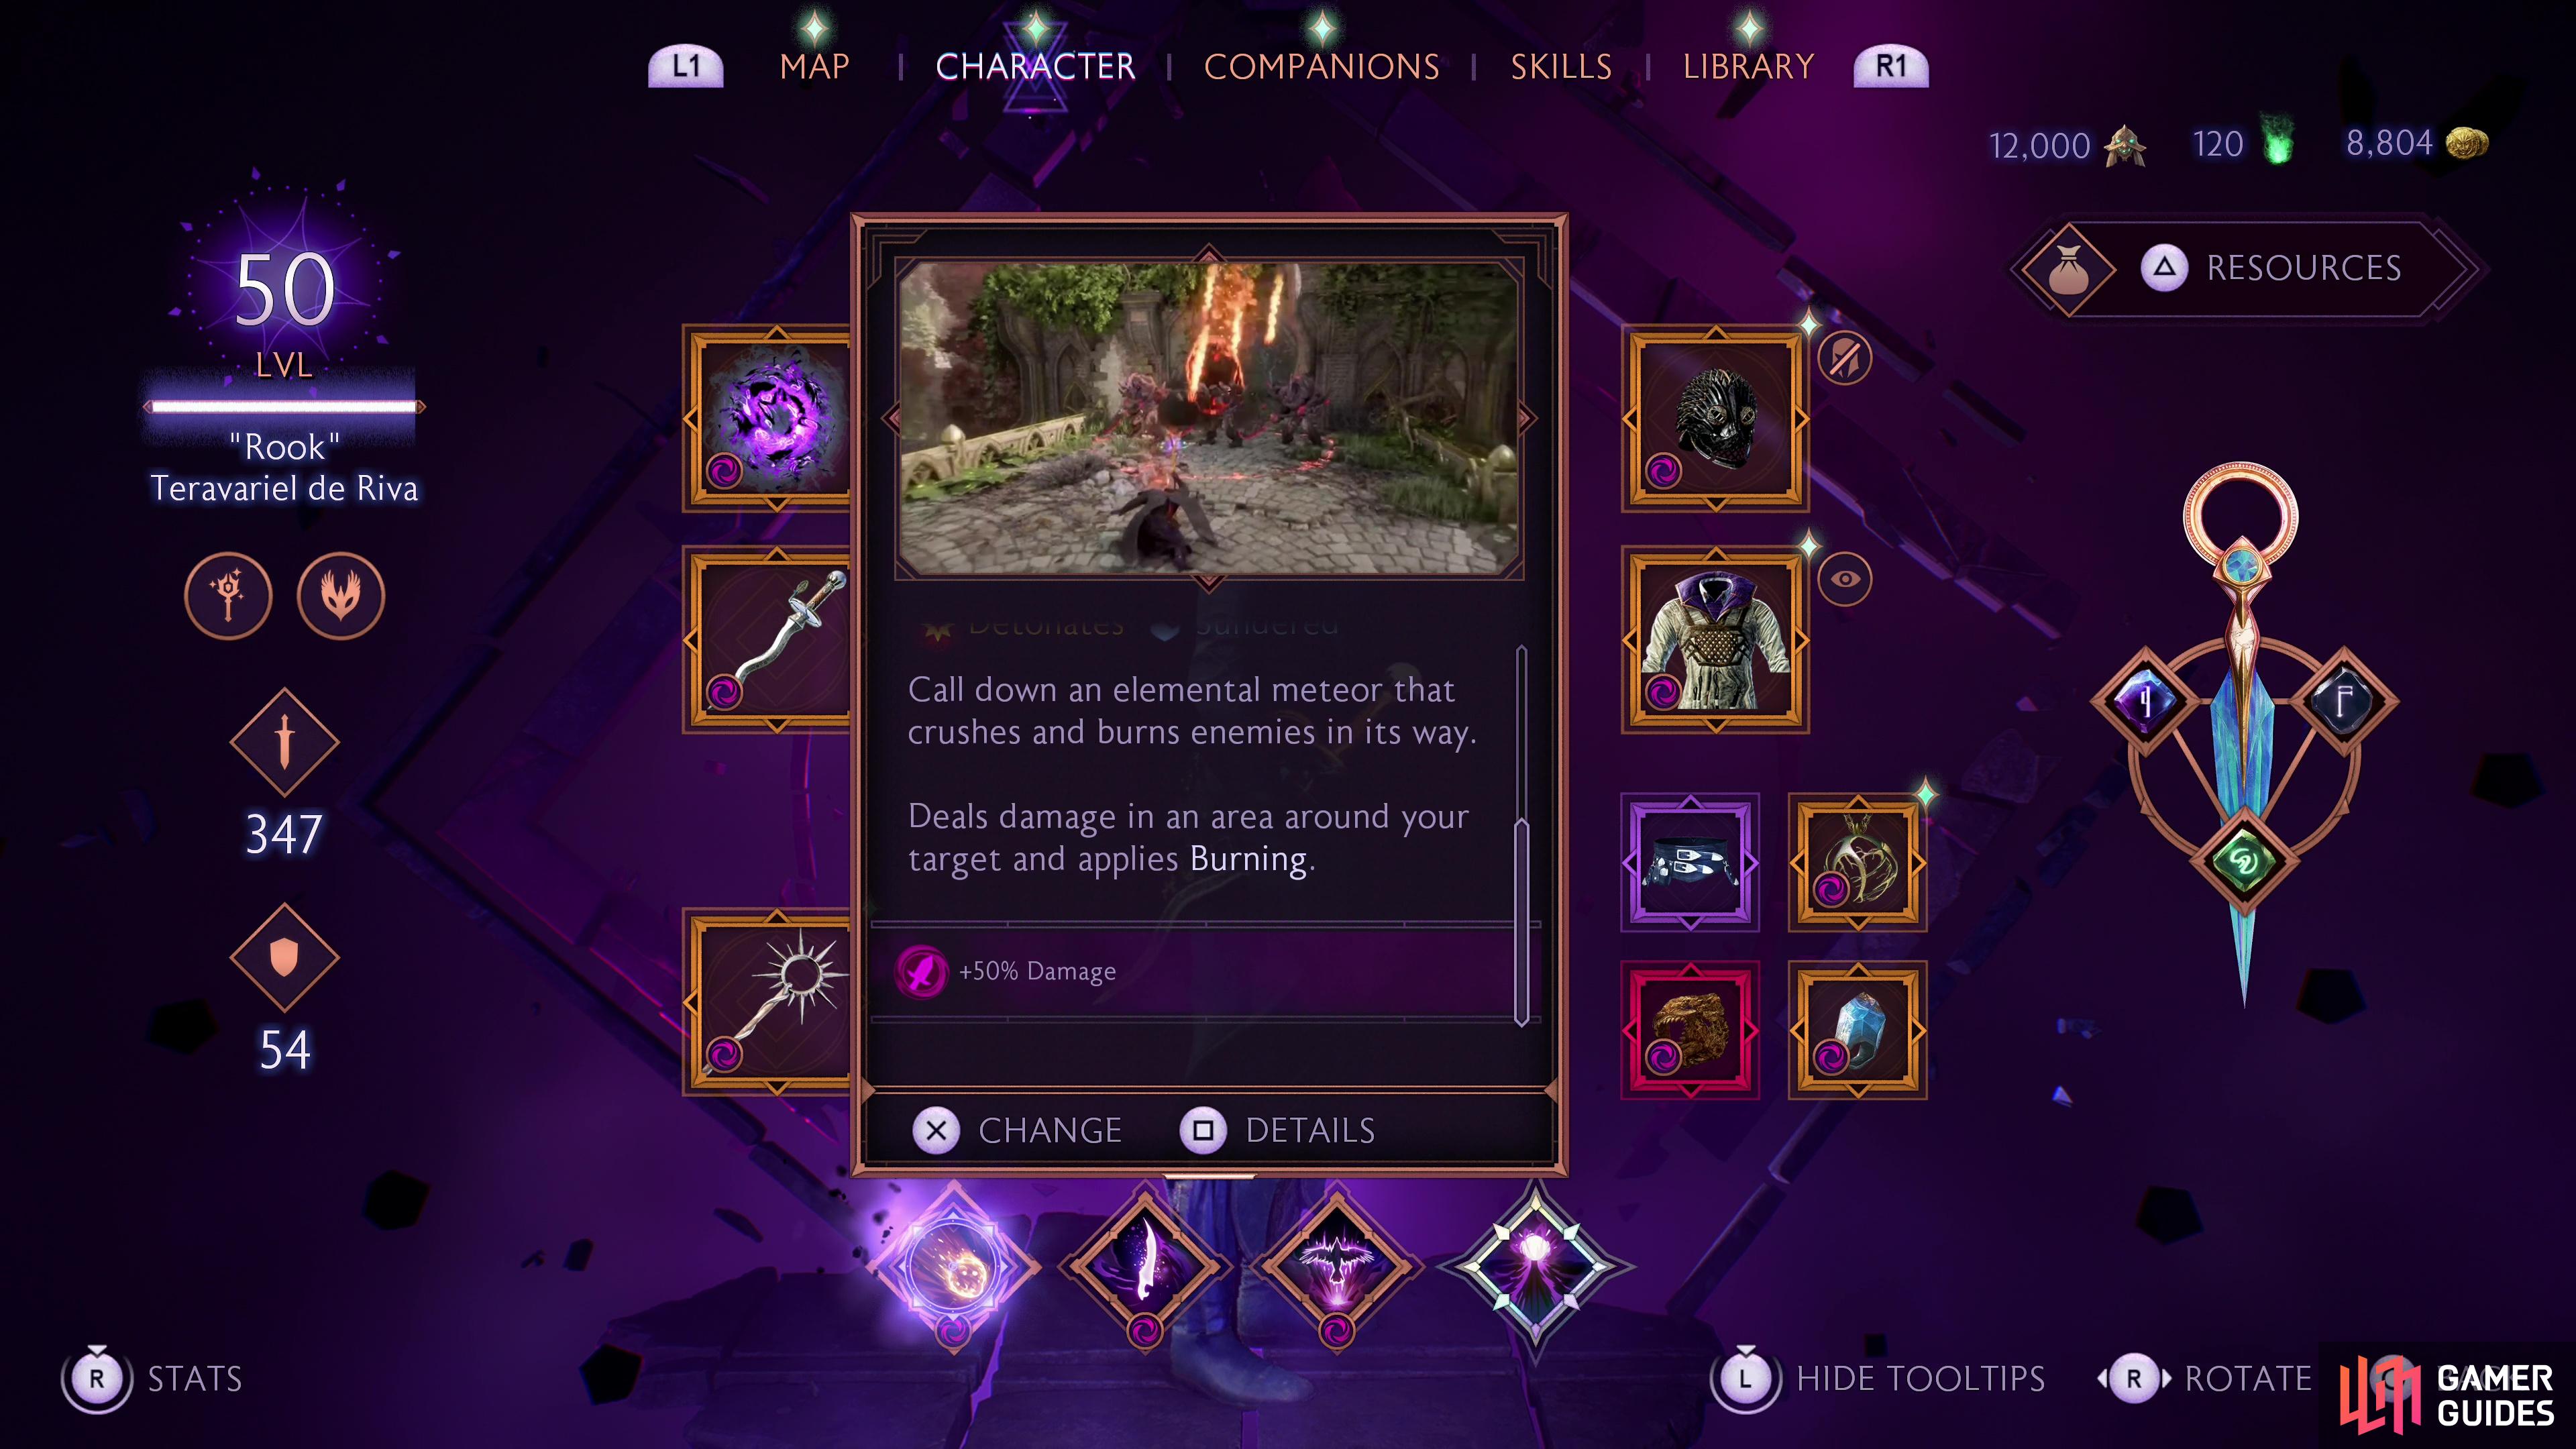
| Meteor | Ability | [Area] [Blast] Call down an elemental meteor that crushes and burns enemies in its way. Deals damage in an area around your target and applies Burning. |
| Demolisher | Passive | Massive Arcane Bomb stacks: +1 |
| Desolate Malady | Passive | Affliction damage: +10% |
| Further Torment | Greater Passive | Deal 20% more bonus Stagger to enemies with an Affliction. |
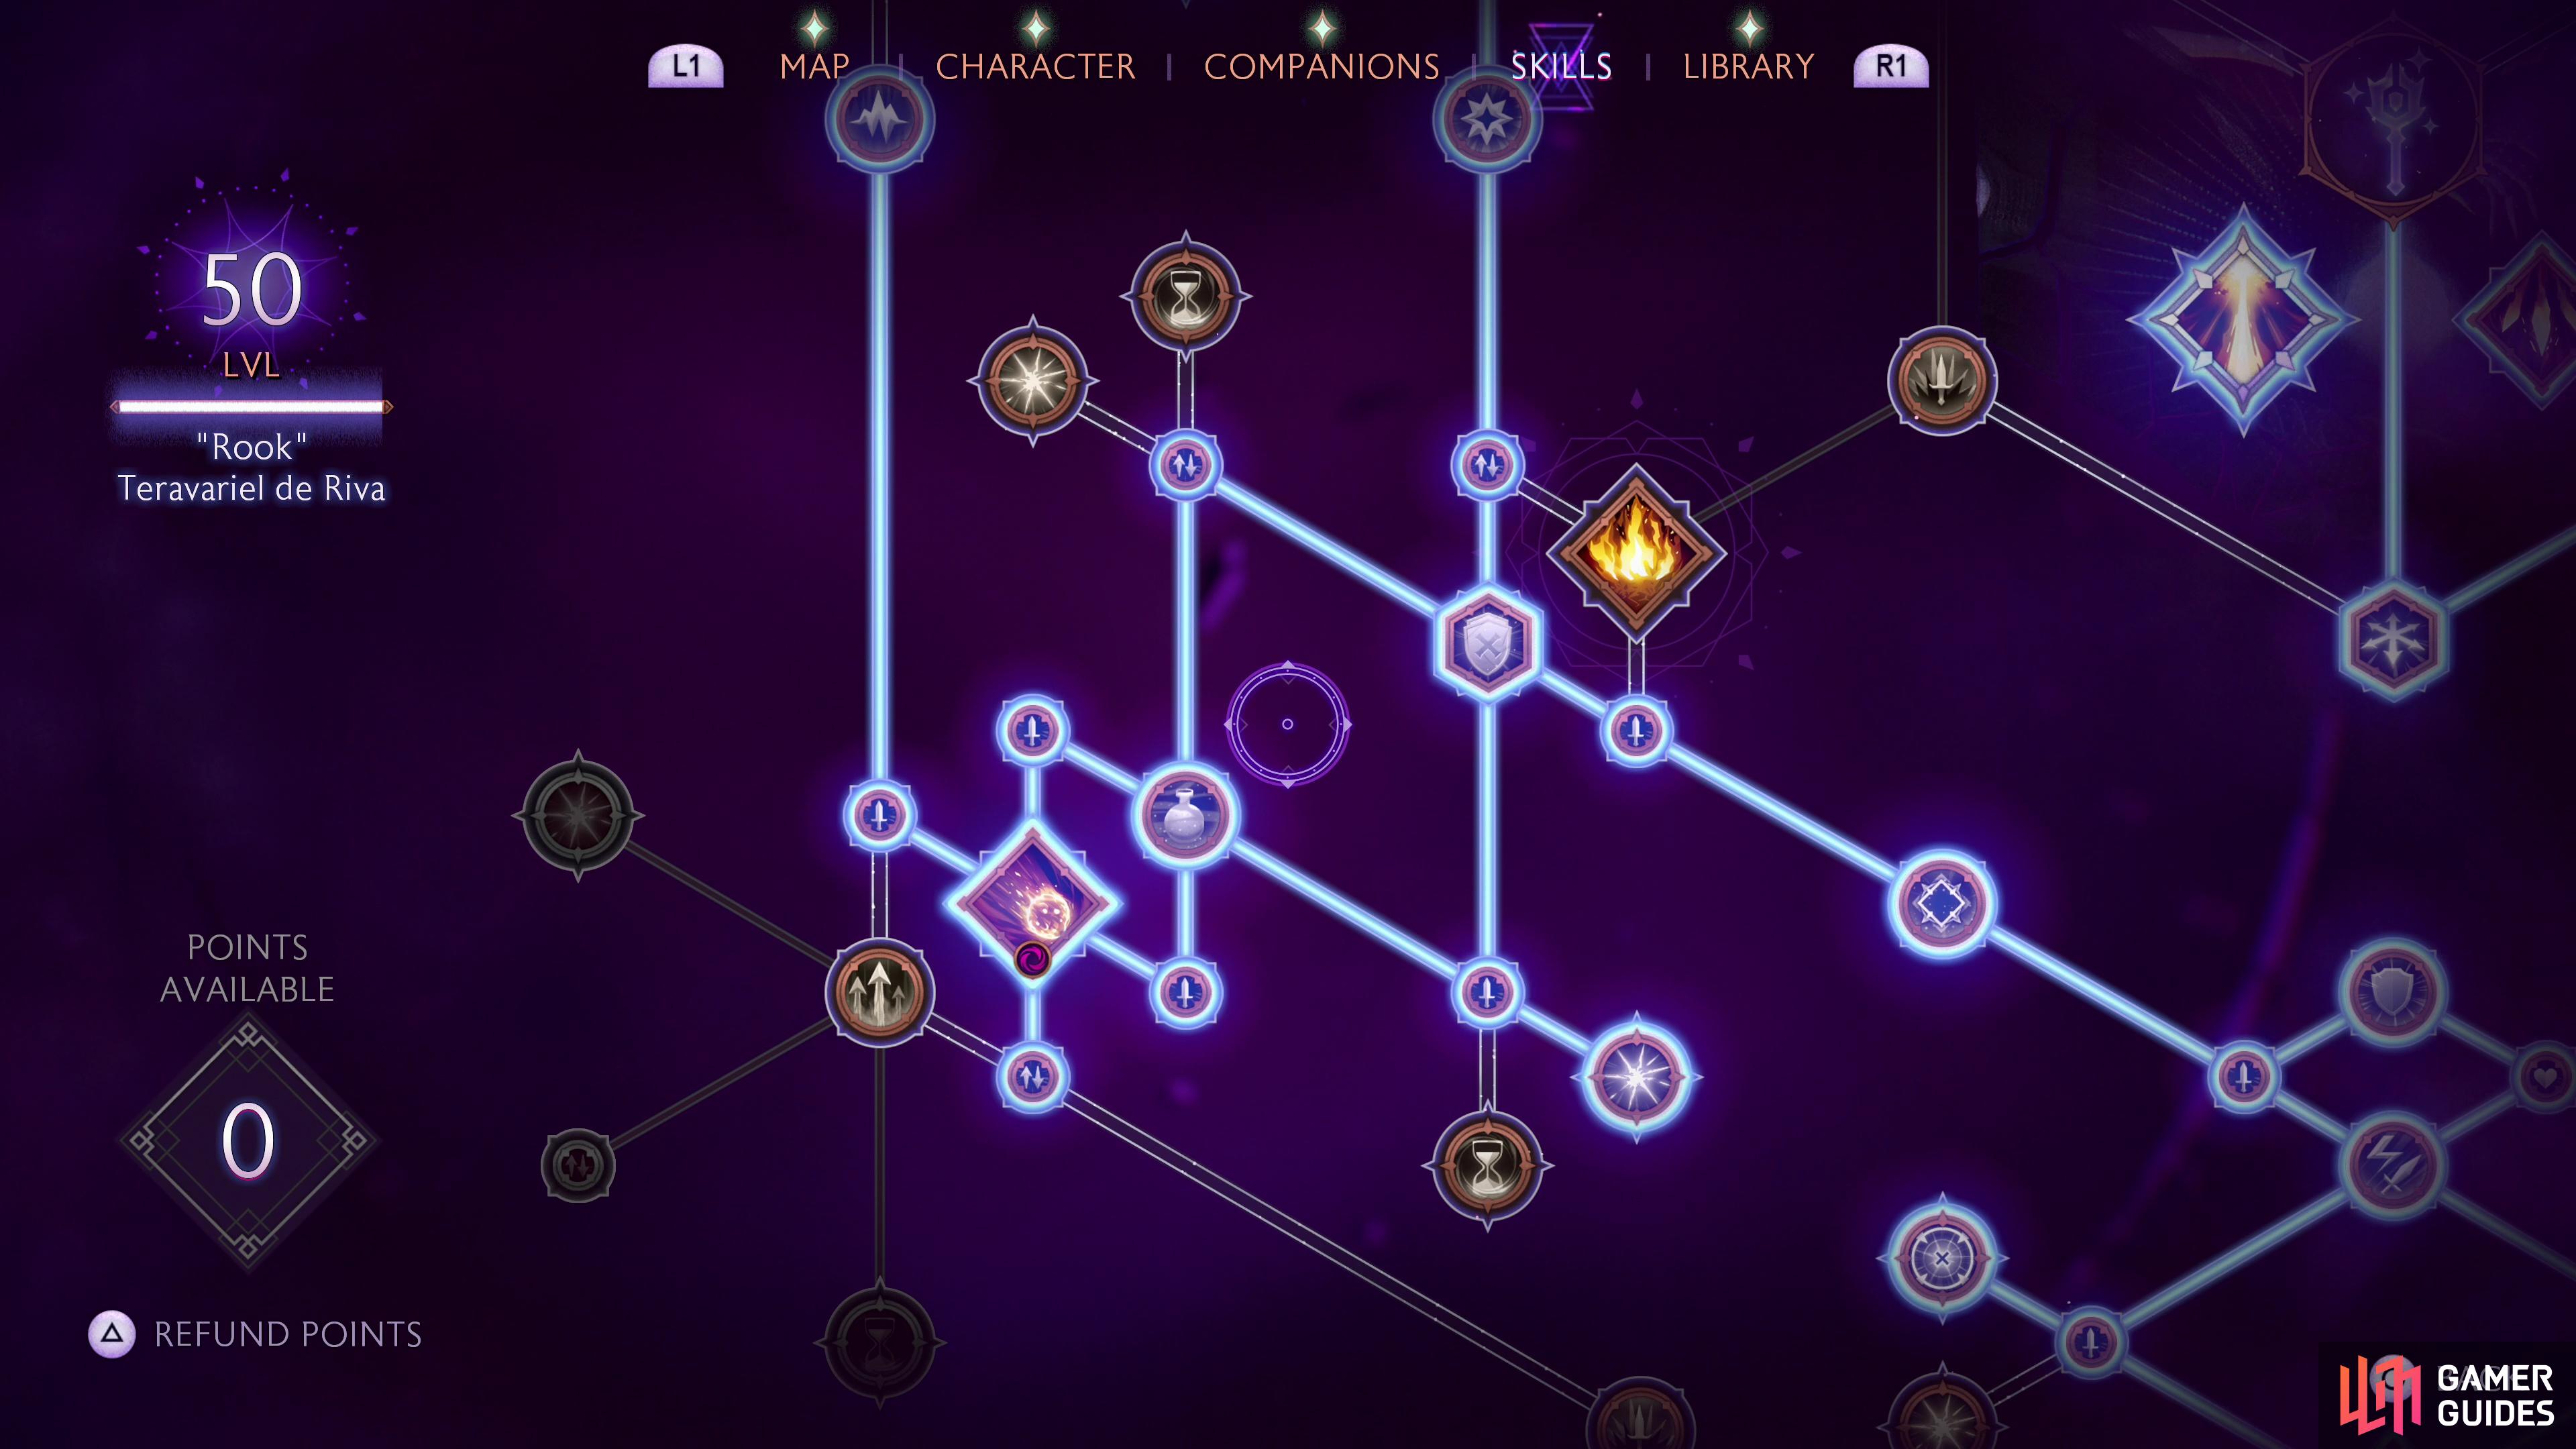
Lots of good stuff here. Demolisher will boost your maximum Arcane Bomb stack count, allowing you to maximize the damage from Spirit Blade and Bigger Blast gives a flat bonus to Arcane Bomb detonations. Meteor is a staple ability, giving this build a long range option and allowing you to alternate between Meteor and Void Blade to boost damage via Energy Burst. Inner Focus will help keep your Mana up, especially when you’re able to proc afflictions at will, and Degrade further boosts your damage the more afflictions you inflict. Considering this build will usually have three afflictions on an enemy towards the end of the game, this is another nice damage boost. Finally, Veil Blasts will boost your Blast ability damage by 15% of your current mana.
(1 of 3) The Sustain tree, although oddly named, is a good source of this build’s range and damage output.
Mourn Watch - 6 Skill Points
| Skill | Type | Description |
|---|---|---|
| Passive | Ranged attack damage: +15% | |
| Imbued Duration | Greater Passive | Executing a Detonation on an enemy grants Shocking Weapons. The duration of Shocking Weapons is extended by 50%. |
| Necessary Steps | Passive | Primer Duration: +20% |
| Breathing Room | Ability Upgrade | The radius of Area Ability effects is increased by 50%. |
| Enervation | Passive | Damage vs. Barrier: +20% |
| Collateral Damage | Ability Upgrade | Hitting multiple enemies with a single Area Ability deals 10% more damage for each enemy hit. |
Getting near the bottom of the barrel now. Breathing Room will greatly increase the area of abilities like Meteor and Storm Surge (or Frost Nova), while Collateral Damage will cause these abilities to deal more damage the more enemies they hit. It’d be nice to get the other Breathing Room skill above Frost Nova, but alas, there just aren’t quite enough skill points.
Spellblade - 14 Skill Points
| Skill | Type | Description |
|---|---|---|
| Thunderous End | Ultimate Ability | Conjure a deadly avatar of the storm to seek vengeance on your enemies. Deals heavy damage and applies 2 stacks of Shocked to enemies within a large radius. |
| Void Blade | Ability | [Strike] [Blast] Harness the agility of the Antivan Crows, dashing forward in a flash of dark energy before landing a deadly slash that explodes a moment later. Deals damage twice. |
| Finale | Passive | Final attack damage: +10% |
| Blast Efficiency | Ability Upgrade | Blast Abilities cost 50 less Mana. |
| Deterioration | Passive | Penetration: +15% |
| Arcane Strike | Ability Upgrade | Strike Abilities now hit with an Arcane Bomb. |
| Spirit of Vengeance | Trait | You can now throw your Spirit Blade a second time by pressing  / /  when it returns to you. Requires Orb and Dagger. when it returns to you. Requires Orb and Dagger. |
| Demolisher | Passive | Maximum Arcane Bomb stacks: +1 |
| Orbital Burst | Greater Passive | When triggering an Arcane Bomb, deal 100% of the damage in a 6-meter radius. Also deals significant Stagger to targets. |
| Conductivity | Greater Passive | Defeating an enemy with one or more Arcane Bombs still active causes the effect to jump to the nearest enemy within 10 meters. |
| Veil Flurry | Trait | Hold  / /  at the end of a Light Attack Chain and release at the right moment to unleash your Orb in a circle around you. at the end of a Light Attack Chain and release at the right moment to unleash your Orb in a circle around you. |
| Antivan Kiss | Passive | Maximum Shocked stacks: +1. Maximum Burning stacks +1. |
| Shocking Tactician | Greater Passive | Achieving maximum Shocked stacks on an enemy triggers an Electric burst in an area around them. |
| Electrical Burns | Greater Passive | Applying Burning also applies Shocked. Applying Shocked also applies Burning. |
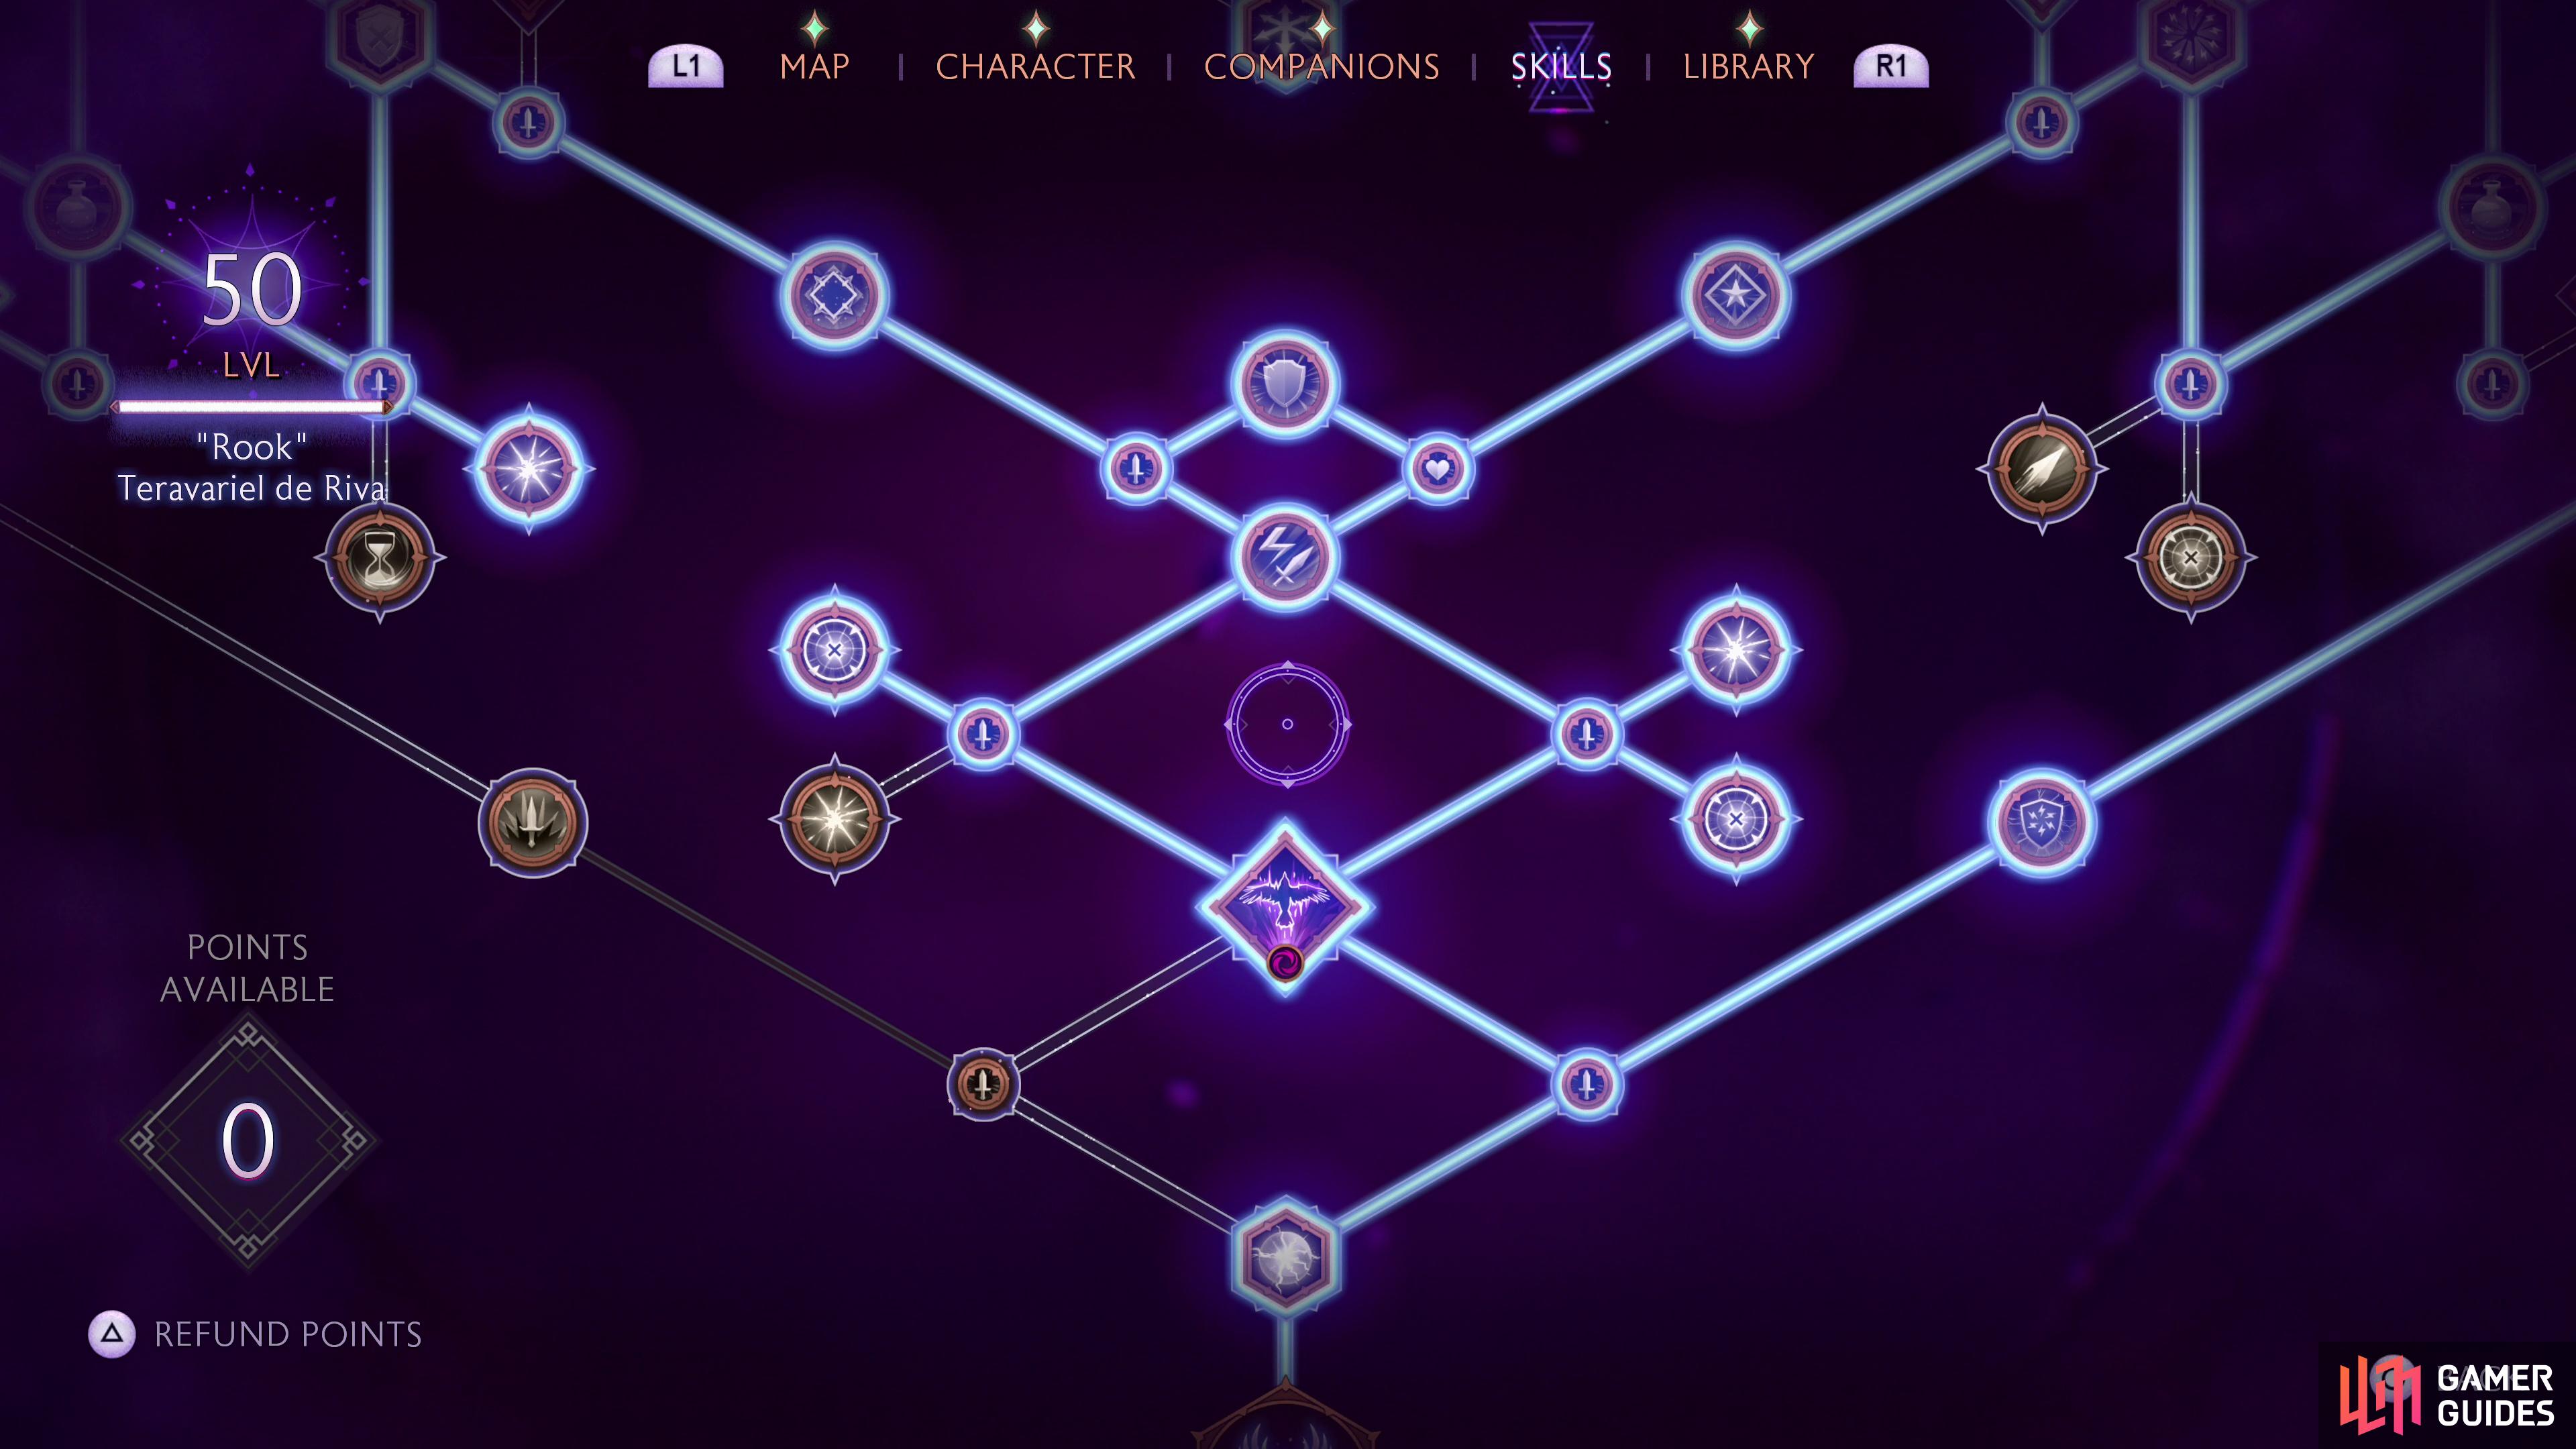
The Spellblade focuses on the orb and mageknife, which means it’s going to be a great fit for this build, and within six skill points you’ll have unlocked three absolutely build-defining skills. First is the ability Void Blade, which should quickly become your favorite ability and the build’s secondary source of damage - as your gear gets better, the gap will close between it and Arcane Bomb,. This is largely in part due to the Blast Efficiency passive, which reduces the cost of Blast abilities like Void Blade and Meteor to 50 Mana. Once you end up with 300~ Mana, you can just spam these two abilities as the situations demands, and with Arcane Strike your Strike abilities will set up Arcane Bombs, adding some synergy with the standard Arcane Bomb combo.
The rest of the specialization is fine - Spirit of Vengeance allows you to toss a second Spirit Blade (useful if there are two enemies with Arcane Bombs within range that aren’t close enough to hit with one throw), another rank of Demolisher adds a third Arcane Bomb stack and Orbital Burst gives your Arcane Bombs more AoE. On the other wing, Electrical Burns will ensure that Shocked and Burning are applied in tandem, boosting your damage over time and spreading afflictions at a frightful rate.
(1 of 3) Given the name of the build, it’s not surprising that we max out the Spellblade specialization.
Gear, Runes and Enchantments
Skills will get you pretty far on their own, but to trim down the Arcane Mark requirements of your Arcane Bombs, boost your Mana to nigh undepletable levels, ensure all your Arcane Bombs and Abilities are critical hits and that your Strike or Blast skills recover Mana on crit, you’re going to need the right gear. The following section will cover the best in slot gear for the Arcane Bomb Spellblade, along with potential alternates.
Weapons
| Weapon | Type | Properties |
|---|---|---|
| Arcane Orb | +20% Final attack damage. Hitting with a Final attack will alternate the damage type of this weapon between Electric and Fire. +15% Fire and Electric damage. Critical hits apply Burning or Shocked based on the current damage type of the Orb. | |
| Mageknife | +20% Critical damage. Triggering an Arcane Bomb now deals Critical damage. Critical hits with this weapon now apply an Affliction based on your type of Orb. Creating an Arcane Bomb requires 1 fewer Arcane Mark. | |
| Mageknife | +20% Arcane Bomb trigger damage. Triggering an Arcane Bomb now also Staggers enemies around your target. Gain 250 health on triggering an Arcane Bomb. Triggering Arcane Bombs now costs 10 Mana but deals its damage in an area. | |
| Elemental Stave | +15% Mana generation. Hitting a Burning enemy with this weapon generates +2 Mana. +50 maximum Mana. Deal +25% bonus Fire Ability damage for every 50 Mana spent. |
The Arcane Bomb Spellblade build focuses on a wide variety of stats, which makes it somewhat surprising that there’s a clear winner for the Orb and Stave. Mage’s Gambit will boost your final attack damage, fire and electric damage and apply Burning or Shocked, while the Flamebranch boosts your Mana and the damage of fire abilities like Meteor.
The Mageknife has a bit more variety, although for our money the Thorn of Misfortune is the best option. When fully upgraded this weapon will cause all your Arcane Bombs to deal critical damage, boosts critical damage and applies afflictions on critical hits. Best of all, it’ll reduce the number of Arcane Marks you need to inflict to spawn an Arcane Bomb, allowing you to reduce your golden combo from 

(1 of 3) Mage’s gambit boosts fire and electrical damage while proliferating Shocked and/or Burning,
Armor
| Armor | Type | Properties |
|---|---|---|
| Medium Helm | +20% Critical damage. +25% Stagger with Critical hits. +10% Critical damage relative to Shadow Dragons Allied Strength. You now have a 10% chance to deal Critical damage with any weapon attacks. | |
| Jumper’s Deft Leathers | Light Armor | +50 maximum Mana. +15% Mana generation. Gain 20% of maximum Mana value as Defense. After using an Ability with a Mana cost, gain bonus damage equal to 20% of the cost for 6 seconds. |
| Medium Armor | +20% damage while at Low Health. Leech 5% of your damage as health. Defense is increased by 1 for each percent of missing health. Leech effectiveness is tripled vs. Bleeding enemies. |
Defiant Silence is just a no-brainer, boosting your critical damage and stagger in various ways, with its legendary boon being a nice add on, but weapon crits are increasingly irrelevant when every ability and Arcane Bomb is a guaranteed critical hit. Researcher’s Coat counters Maw of the Black City, but the latter is a late-game acquisition, making Researcher’s Coat rather moot until you get the aforementioned ring. In the meantime we’re content with the Mana gains, defense and ability damage offered by Jumper’s Deft Leathers, which will be worn for much of the game.
(1 of 2) Defiant Silence boosts crit damage - which is very useful for this build.
Defiant Silence boosts crit damage - which is very useful for this build. (left), The Researcher’s Coat leeches damage, but you need to get the Maw of the Black City and enchant it to inflict Bleeding on Ability Criticals to get the most of out it. (right)
Accessories
| Accessories | Type | Properties |
|---|---|---|
| Utility Belt | Grants Quickened on Potion use. +29% duration of Potion effect. +10% Ability Damage. Grants Enhanced Damage on Potion use. Heal for 100 upon using any Ability while Quickened. | |
| Utility Belt | +25% Ultimate charge rate. Using a Potion no longer grants health. Using a Potion now grants 35% Ultimate. Whenever you activate your Ultimate, heal to full. | |
| Amulet | +20% Blast Ability damage. +25% Blast Ability damage vs. Barrier. Gain 25 Mana when a Blast Ability deals Critical damage. Blast Abilities gain added damage from Shocking Weapons. | |
| Amulet | +20% Strike Ability damage. +25% health damage from Strike Abilities. Gain 25 Mana on Critical hits with Strike Abilities. Gain Immovable when you Stagger an enemy with a Strike Ability. | |
| Ring | +10% Weapon damage. +10% Final, Agile and Charged attack damage. +25% Armor and Barrier damage with weapons. +15% weapon Critical and Weakpoint damage. | |
| Ring | +6 Mana on kill. +15% Mana generation. +50 maximum Mana. Damage increases with your current Mana. | |
| Essence Vortex | Ring | Abilities now cost +50 Mana to activate. +30% Ability damage. Using an Ability now heals you for 1 health per Mana spent. |
| Maw of the Black City | Ring | Your Ability damage is always a Critical hit. Using an Ability consumes 20% of your maximum health as Physical damage. |
There are lots of belt options, but none that stand head and shoulders above the rest. Twin Buckle Binding is our choice for a safe, simple belt that, when upgraded will always boost Ability damage and recover 100 health when using an Ability while Quickened (which should be almost every time you use an ability thanks to Pressure Point) as well as buffing with Enhanced Damage every time we use a potion. You could also make a case for ![]() Warden’s Straps or
Warden’s Straps or ![]() Jumper’s Binding for bonus fire or electrical damage, respectively,
Jumper’s Binding for bonus fire or electrical damage, respectively, ![]() Reinforced Binding for a passive +10% Resistances, or you could toss healing out the window entirely and lean into ultimate spamming by using Glorious Ultimatum - it’s a bit riskier, but this build leeches well and your companions can always heal. The only downside is the build’s ultimate just really isn’t that much more powerful than their standard ability spam.
Reinforced Binding for a passive +10% Resistances, or you could toss healing out the window entirely and lean into ultimate spamming by using Glorious Ultimatum - it’s a bit riskier, but this build leeches well and your companions can always heal. The only downside is the build’s ultimate just really isn’t that much more powerful than their standard ability spam.
Amulets present two good options with All-Mother’s Copse and Crow’s Perch Medallion, being Blast and Strike variants of the same template. All-Mother’s Copse boosts Blast Ability damage, which affects both Meteor and Void Blade - this build’s main abilities - but it’s bonus vs. Barriers and Shocking Weapons synergies aren’t the best. Crow’s Perch Medallion, on the other hand, boosts Strike Abilities, which means Void Blade and the much less relevant Storm Surge. Its bonus damage vs. health is arguably better, but immovable on Stagger isn’t a great boon, either. At the end of the day, it’s really a choice between more damage on your Meteor and regenerating 25 Mana each Blast Ability cast (All-Mother’s Copse) or more Storm Surge damage, no Mana generation when you cast Meteor, but a more useful damage vs. health mod (Crow’s Perch Medallion).
Rings, on the other hand, are quite competitive. You’ve got various rings that boost physical damage (Bleeding Corvus), fire damage (![]() Warden’s Signet), electrical damage (
Warden’s Signet), electrical damage (![]() Focus of the Veil) and defense (
Focus of the Veil) and defense (![]() Paragon’s Knuckle) which are alll useful in the early-to-mid game, but once you’ve stacked some upgrades on it you’ll want to switch to Glacial Talus for its bonus to Mana, Mana generation and ultimately a damage bonus that scales based on your current Mana. Late game, however, you’ll get your hands on two interesting rings, one of which is great for most casters and another which is more useful in an alternate build variant that’s less an “Arcane Bomb” build and more of a Blast Ability spammer.
Paragon’s Knuckle) which are alll useful in the early-to-mid game, but once you’ve stacked some upgrades on it you’ll want to switch to Glacial Talus for its bonus to Mana, Mana generation and ultimately a damage bonus that scales based on your current Mana. Late game, however, you’ll get your hands on two interesting rings, one of which is great for most casters and another which is more useful in an alternate build variant that’s less an “Arcane Bomb” build and more of a Blast Ability spammer.
First there’s Maw of the Black City, which consumes 20% of your health every time you use an ability (along with the standard Mana cost) to guarantee all abilities always critically hit. Enchant this ring with the “Apply Bleeding on Ability Critical” and wear the Researcher’s Coat and you’ll leech 15% of the damage you deal against Bleeding enemies - which is every enemy you hit with an Ability. Equip the ![]() Hunger rune to boost leech effectiveness by +10% and you’ll easily leech more damage than the Maw of the Black City deals, allowing you to benefit from higher damage abilities and any effects that proc off ability crits, including Quickened via Pressure Point. It’s a big damage boost and it significantly increases your leech, making it an excellent choice offensively and defensively.
Hunger rune to boost leech effectiveness by +10% and you’ll easily leech more damage than the Maw of the Black City deals, allowing you to benefit from higher damage abilities and any effects that proc off ability crits, including Quickened via Pressure Point. It’s a big damage boost and it significantly increases your leech, making it an excellent choice offensively and defensively.
The other unique ring worth considering - at least if you don’t mind ditching Arcane Bomb - is Essence Vortex, which increases Ability costs by +50 Mana, boosts Ability damage by +30%, and causes your abilities to heal you for 1 health per Mana spent. On its own not that interesting, but when you combine it with the ![]() Enchanted Athame mageknife and
Enchanted Athame mageknife and ![]() The Bargain stave, you’ll functionally end up with a build that consumes health instead of Mana when using Abilities - a build that also leeches far more health back than its Abilities consume, allowing you to simply spam abilities wantonly while healing every cast (see the [Alternate Build: Endless Mana Engine Spellblade Build] header below for more details). For the standard Arcane Bomb build (which itself is pretty Ability-spammy at the end game), stick with Maw of the Black City and Glacial Talus.
The Bargain stave, you’ll functionally end up with a build that consumes health instead of Mana when using Abilities - a build that also leeches far more health back than its Abilities consume, allowing you to simply spam abilities wantonly while healing every cast (see the [Alternate Build: Endless Mana Engine Spellblade Build] header below for more details). For the standard Arcane Bomb build (which itself is pretty Ability-spammy at the end game), stick with Maw of the Black City and Glacial Talus.
(1 of 3) All-Mother’s Copse provides some nice boons for Blast Abilities - end game damage staples for this build.
Runes
Solas’s lyrium dagger isn’t just a pretty MacGuffin that allows you to use companion abilities without having them present, you can also use it to equip various runes, which can be used to trigger an active effect that operates on a cooldown while also giving you a passive boon while equipped. The lengthy cooldown of runes means they probably won’t become a major part of your arsenal, but the passive effects, while somewhat minor, function as scaled-down Enchantments (see below). All in all you can get some decent boons by equipping certain runes, and the top runes for this build will be discussed below:
| Rune | Active | Passive |
|---|---|---|
| Your health drops to 1, and you cannot heal any higher for 10 seconds. You gain Enhanced Damage, Quickened, and Shocking Weapons, and your Mana is restored to its maximum. | +10% damage | |
| Consume | You use all of your current Mana to deal damage within 6 meters. The damage is proportional to the amount of Mana consumed. | +50 maximum Mana |
| Your next Ability is greatly enhanced, dealing much higher damage or increasing its intensity. | +10% Ability damage | |
| Your weapon attacks leech 25% of their damage for 10 seconds. | +10% leech effectiveness | |
| Deal 50% more damage vs. Health for 20 seconds | +10% damage vs Health | |
| Instantly gain 100% of your Mana. | +10% Ability damage |
We like damage, and the +10% damage buff is the entire reason the ![]() Ascend rune is considered for that reason alone - there’s no good reason to actually use this rune save for its passive. The Consume rune is another one you’ll want for the passive, not the active - a solid +50 bonus to Mana is always welcome, but with the rest of our gear, it’s probably overkill. The
Ascend rune is considered for that reason alone - there’s no good reason to actually use this rune save for its passive. The Consume rune is another one you’ll want for the passive, not the active - a solid +50 bonus to Mana is always welcome, but with the rest of our gear, it’s probably overkill. The ![]() Escalate rune, on the other hand, has a decent active that boosts the damage output of the next ability and also grants a +10% Ability damage boost, while the
Escalate rune, on the other hand, has a decent active that boosts the damage output of the next ability and also grants a +10% Ability damage boost, while the ![]() Redouble rune can fully restore your Mana if used (a very rare emergency measure, to be sure) while boosting your Ability damage by +10% just for having it equipped. The Hunger rune pairs well with the Researcher’s Coat** and Maw of the Black City to boost leech, both with its active and passive effect. Finally, the
Redouble rune can fully restore your Mana if used (a very rare emergency measure, to be sure) while boosting your Ability damage by +10% just for having it equipped. The Hunger rune pairs well with the Researcher’s Coat** and Maw of the Black City to boost leech, both with its active and passive effect. Finally, the ![]() Ravage rune boosts health damage by 50% for 20 seconds - a very nice damage boost once you strip away armor and barriers! - and gives a solid +10% damage vs. health boost as a passive.
Ravage rune boosts health damage by 50% for 20 seconds - a very nice damage boost once you strip away armor and barriers! - and gives a solid +10% damage vs. health boost as a passive.
We ultimately go with Escalate, Hunger and Redouble for this build.
(1 of 2) The Hunger rune boosts your leech effectiveness, which will help keep you healthy,
The Hunger rune boosts your leech effectiveness, which will help keep you healthy, (left), while other runes, like Redouble, boosts ability damage. (right)
Enchantments
Gear comes with set stats on them, and while you can unlock new stats by increasing the gear’s rarity (finding duplicates of the same item), you can’t really customize the equipment too much. That’s where enchanting comes in - visit the Caretaker in the Lighthouse and he’ll allow you to add a stat of your choosing to each piece of gear (except belts, for some reason). You don’t have unlimited freedom when it comes to picking stats, mind you - different types of gear have access to different stats, and duplicates stats are not allowed. Still, this allows you to nudge your gear in more build-friendly directions, and enchantments cost nothing, so you can add or remove them as you please. You’re leaving damage and survivability on the table if you don’t enchant, so you might as well!
Oh. Also you can enchant your abilities. Crazy stuff!
Below we’ll list our chosen enchantments for the Arcane Bomb Spellblade build!:
| Gear/Skill | Enchantment |
|---|---|
| +25% Stagger | |
| +25% Arcane Bomb Trigger Damage | |
| +15% Damage at High Health | |
| +20% Advantage Duration | |
| +15% Affliction Duration | |
| – | |
| +15% Critical Damage | |
| Maw of the Black City | Apply Bleeding on Ability Critical |
| +25% Blast Ability Damage | |
| Meteor | +50% Damage |
| Void Blade | +25% Ability Critical Damage |
| -15% Cooldown Duration | |
| – | |
| – | |
| – |
(1 of 2) Enchant your gear with stats that enhance your build,
Enchant your gear with stats that enhance your build, (left), and don’t neglect to enchant your abilities! (right)
Best Companions
Almost everything in Dragon Age: The Veilguard has some influence on your build, and this includes companions. They might not have as big of a role to play as your skills and equipment, but it’s still worth noting who adds what. The first thing to note is that a Spellblade focused Rook inflicts Overwhelm and detonates Sundered, which makes her a poor match for warriors, who themselves inflict Overwhelm and detonate Weakened. It’s not a deal-breaker, but since mage companions get Time Slow (useful for landing 

What this choice comes down to, then, is who out of Bellara, Emmrich, Harding and Lucanis/Neve have the best equipment synergies and Veilguard skills? This functionally cuts things down to Bellara, Emmrich and Harding, for reasons which will be explained below:
Bellara
Bellara has the standard mage suite of skills that includes Time Slow and Replenish. In addition, she tends to deal electrical damage with options to inflict Shocking, which combos well with Spellblade Rook, who also deals electrical damage and inflicts Shocking. Bellara’s Concentration bow inflicts Vulnerability to Electric damage when you use “Attack My Target”, which is nice, her ![]() Sunspoked Spectrometer Keepsake boosts critical damage by +25% per Shocked stack on an enemy and increases the max Shocked Stacks by +2 - a huge boon to a Rook who almost always lands critical hits - and her
Sunspoked Spectrometer Keepsake boosts critical damage by +25% per Shocked stack on an enemy and increases the max Shocked Stacks by +2 - a huge boon to a Rook who almost always lands critical hits - and her ![]() Humming Curiosity Trinket boosts Shocked Duration by +25%. Her ultimate armor and Veilguard ability aren’t great, but she adds a lot even without those pulling much weight!
Humming Curiosity Trinket boosts Shocked Duration by +25%. Her ultimate armor and Veilguard ability aren’t great, but she adds a lot even without those pulling much weight!
Emmrich
Everybody’s favorite, overly politie necromancer pal, he also brings Time Slow and Replenish with him, but his main damage type - necrotic - doesn’t synergize well. On the other hand his ![]() Crested Focus Keepsake causes Critical Ability hits to leech (boosting our latent leech healing), his
Crested Focus Keepsake causes Critical Ability hits to leech (boosting our latent leech healing), his ![]() Death’s Beacon staff gives the party +25% damage against demons and undead, and his
Death’s Beacon staff gives the party +25% damage against demons and undead, and his ![]() Funeral Finery robes cause Detonations to leech 50% of their damage and impose the Siphoned debuff. Some nice boons for keeping you alive, but lacking in raw power compared to Bellara and Harding.
Funeral Finery robes cause Detonations to leech 50% of their damage and impose the Siphoned debuff. Some nice boons for keeping you alive, but lacking in raw power compared to Bellara and Harding.
Harding
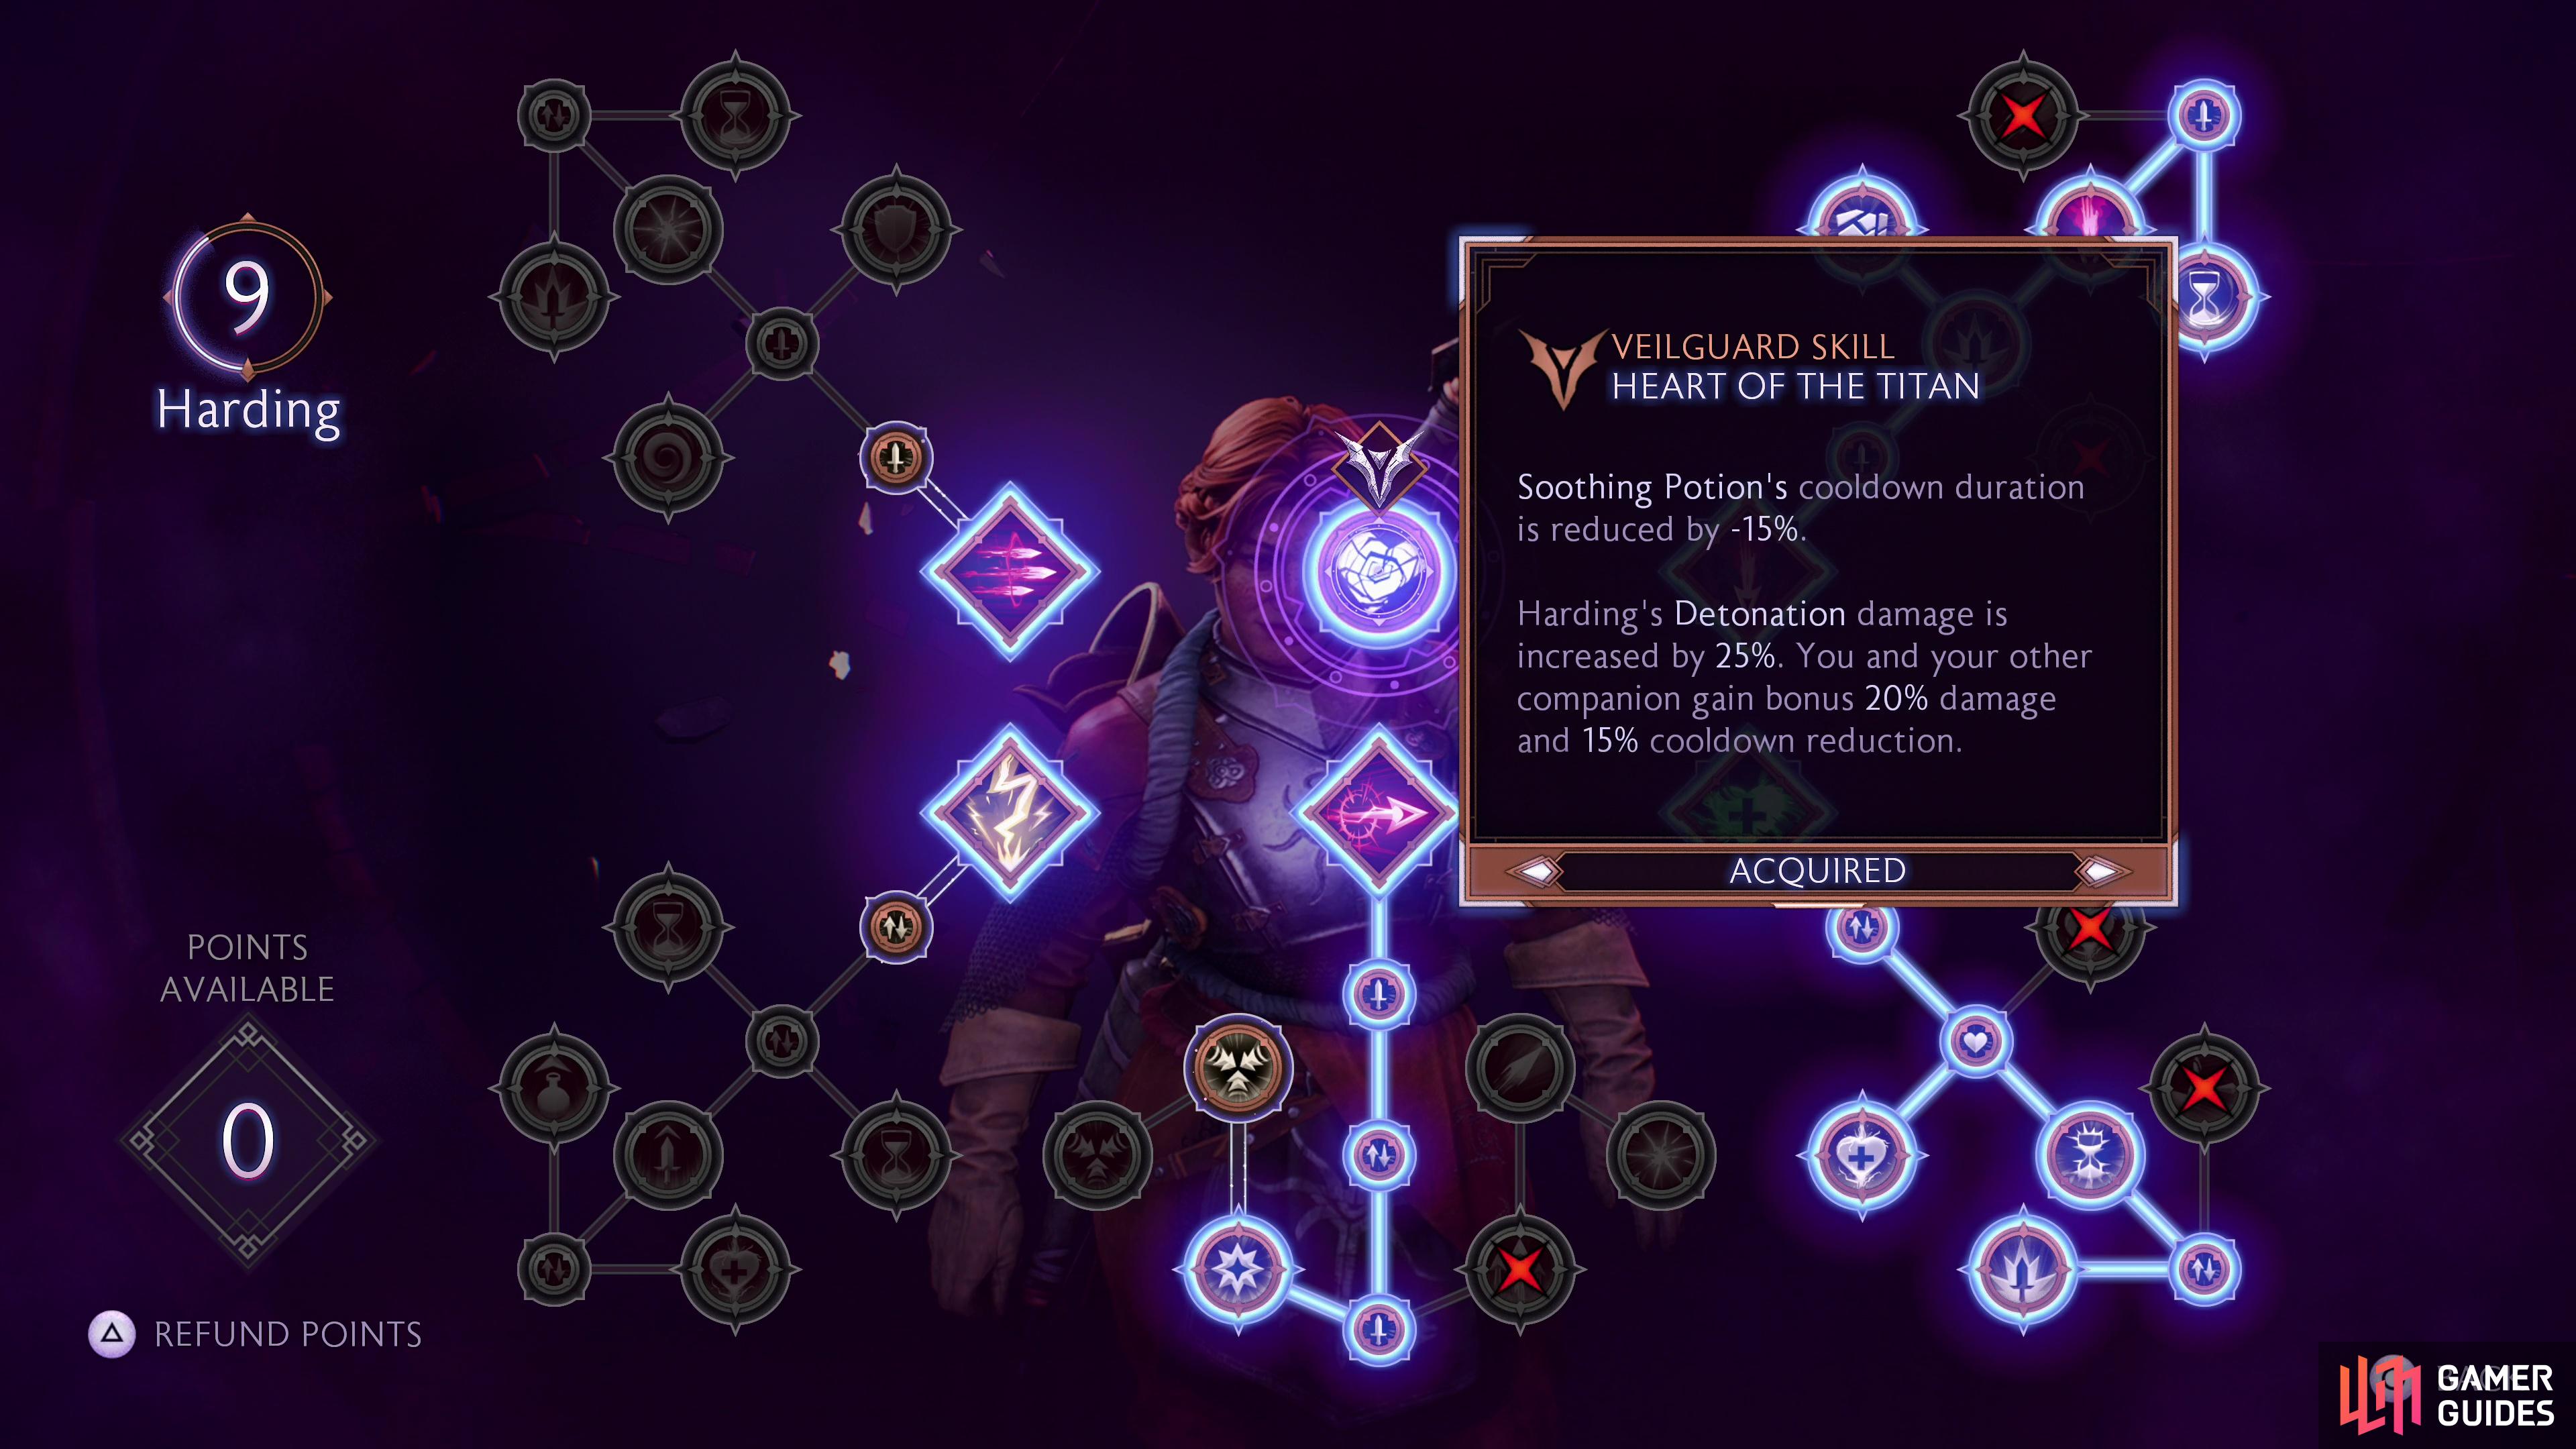
Harding is just an everything-booster. Her Veilguard ability, Heart of the Titan, boosts Rook’s damage by 20% and reduces cooldowns by 15%, while also reducing the cooldown on Harding’s Soothing Potion ability. This is already pretty killer, but Harding’s ![]() Secrets and Memories Keepsake also increases critical damage by +20% and causes critical hits vs Bleeding enemies to gain another stack of Bleeding, making her a great combo with a Rook equipped with Maw of the Black City. Finally, her
Secrets and Memories Keepsake also increases critical damage by +20% and causes critical hits vs Bleeding enemies to gain another stack of Bleeding, making her a great combo with a Rook equipped with Maw of the Black City. Finally, her ![]() Dwarven Key trinket gives you another potion and the chance to not consume potions when used, which is a generic, but welcome boon.
Dwarven Key trinket gives you another potion and the chance to not consume potions when used, which is a generic, but welcome boon.
All in all, we think Bellara and Harding are the best picks to accompany the Arcane Bomb Spellblade Rook into battle, but keep in mind that this only really applies when you get the aforementioned items and unlock the character’s Veilguard ability by completing their companion questline. This likely won’t be until very late in the game, and by this time Rook will be a one-person wrecking ball who can spam abilities freely, whomever else you have in the party!
(1 of 2) Some companions, like Bellara, have accessories which can help boost Rook’s damage output,
Some companions, like Bellara, have accessories which can help boost Rook’s damage output, (left), Harding is great in just about every party thanks to her “Heart of the Titan” Veilguard skill. (right)
Alternate Build: Endless Mana Engine Spellblade Build
You got the build you were promised, but now let’s look at a variant… just because we’re nice like that (and it wasn’t a lot of work - mostly a deadend during build testing that we thought we’d put to use!). As mentioned above, you can take Mana out of the equation entirely with the right gear, and while this greatly weakens the Arcane Bomb part of the build, it allows you to spam abilities a bit better. The damage will be roughly the same, and while the standard Arcane Bomb Spellblade build had a very hard time running out of Mana, this build eliminates it as a possibility. Because sometimes you just want to blow things up. You can use the same skills and general gameplay, save you’ll pretty much just alternate between Meteor and Void Blade until everything is dead, just change the gear as follows:
| Gear/Skill | Enchantment |
|---|---|
| +25% Stagger | |
| +20% Armor Damage | |
| +15% Damage at High Health | |
| +20% Advantage Duration | |
| +15% Affliction Duration | |
| – | |
| +15% Critical Damage | |
| Maw of the Black City | Apply Bleeding on Ability Critical |
| Essence Vortex | +25% Blast Ability Damage |
| Meteor | +50% Damage |
| Void Blade | +25% Ability Critical Damage |
| -15% Cooldown Duration | |
| – | |
| – | |
| – |
(1 of 3) The Bargain will substitute your Mana costs for health expenditure,
Enjoy the mindless fire and lightning spam!






![Void Blade is one of the better abilities in the game, being both a [Blast] and [Strike] ability,](/assets/media/17/368/dragonageveilguard_build_spellblade_skills_void_blade-fa4c6305.jpg)









 Sign up
No Comments