Stop to rest Your Weary Head, Paint The Bridge Where Adepti Tread - Difficulty 2
Objective
No more than 25 escaped monsters.
Introduction
This stage is quite easy due to the enemies only coming through one lane, on top of that, they have to cross a bridge which you can open up and let the enemies drop through at the cost of 40 Veneficus Sigils, this is especially helpful when the bigger enemies like the Lawachurls cross it.
Recommended Characters
Premium Party
| Characters |
What they offer |
 |
She can use her Elemental Skill to pick up the smaller enemies and throw them off ledges. |
 |
Her bow attacks can target and stun Ruin Guards, and her charged attack can put Cryo on in enemies in an AoE. |
 |
His Geo pillar from his Elemental Skill can stop enemies from moving forward if it’s placed in their path. |
 |
She can get around the arena quickly by using her Elemental Skill and she can also deal the Electro status on enemies in an AoE. |
 |
Has a Claymore which can break a lot of the enemies physical shields, he also has quick cooldowns and that can put Pyro elements on enemies quickly. |
Free to Play Party
| Characters |
What they offer |
 |
They can place their Geo construct in the way of the enemies to stop them moving, similar to Zhongli. |
 |
They can push enemies of the side, similar to Jean but not as easily. |
 |
Similar to Ganyu, she can target the enemies weakpoints and stun them briefly. |
 |
Has a Claymore to break enemies physical shields, can also lay down a Cryo field to put on the enemies if needed. |
 |
Can put Pyro on enemies and because of his low cooldowns, he can do it often. |
Recommended Mechanici
| Mechanici |
Level |
Name |
Effect |
 |
2 |
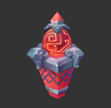
Veneficus Mechanicus: Spark |
Attacks opponents with Blazing Sparks that explode, dealing Pyro DMG in a small AoE. |
 |
2 |
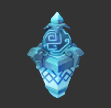
Veneficus Mechanicus: Thunderstrike |
Attacks opponents with a Thunder Strike that deals Electro DMG. |
 |
2 |
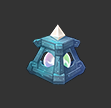
Veneficus Mechanicus: Thin Ice |
Periodically fires a Frost Bullet in a straight line. On hit, deals Cryo DMG to opponents. |
 |
2 |
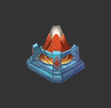
Veneficus Mechanicus: Tidal Flats |
Attacks opponents in a small AoE with Water Cannons that deal Hydro DMG and apply the Wet Status. |
 |
1 |
Recovery Mechanicus: Mark I |
Generates bonus Veneficus Points for each opponent defeated in an AoE around it. |
 |
1 |
Ambush Mine |
Ambush Mine will explode upon contact with opponents, dealing massive Pyro DMG to the surrounding opponents. |
Recommended Mystic Arts
| Mystic Art Type |
Effect |
| Other |
Pyro Mechanici perform 2 consecutive attacks against a single opponent |
| Other |
Max constructible Mechanici +1 |
| Other |
Cryo Mechanici fire at +1 target(s) per shot and deal +150% DMG against Frozen opponents |
| Other |
Electro Mechanici get a 50% DMG Bonus with each attack. Lasts for 30s. Max 5 stacks. |
| Other |
Pyro Mechanici ATK +50% |
| Other |
Electro Mechanici ATK +50% |
| Other |
Cryo Mechanici ATK +75% |
Enemies
| Wave |
Enemies |
| 1 |
20 |
| 2 |
40 |
| 3 |
40 |
| 4 |
19 |
Strategy
Wave 1
Monster Types
| Icon |
Name |
 |
Hilichurl |
 |
Hydro Samachurl |
The enemies will come from the purple portal in the middle for this wave so start by placing a Pyro Mechanici on the panel just after the bridge on your left nearest to the middle portal shown in the image, then place an Electro Mechanici on the panel below it and place a Recovery Mechanici in the middle of both of them, but just in front of them, so you can gather more Veneficus Sigils if the enemies are defeated inside of it. The Samachurls will sprint towards your portal, keep attacking them with a party member to slow it down, because of this, lay a couple of emergency Mines near your portal.
Wave 2
The enemies will come from the purple portal in the middle and the right for this wave. Now that you have the chokepoint setup, you can start building outwards from it, in this wave start by placing two Electro Mechanici, one in the middle panel in front of the Recovery Mechanici in front of the middle portal and one and in the panels to the right of the Recovery Mechanici, next, place one Cryo Mechanici in front of the Pyro one and then place two more Pyro Mechanici, one in, to the right of the Cryo and one to the far right near the right portal, if you don’t have the Veneficus Sigils to purchase them, add them mid wave. The Shield wall enemies should be attacked by a Claymore user to help break their shields and be wary of the Samachurls as they like to sprint through, attack them to slow them down. You can delete the emergency mines at the back if you’re feeling comfortable and make sure to use the device to make the bridge disappear if you are feeling overwhelmed with the larger monsters.
Monster Types
| Icon |
Name |
 |
Hilichurl |
 |
Wooden Shield Hilichurl Guard |
 |
Wooden Shield Mitachurl |
 |
Hydro Samachurl |
 |
Dendro Samachurl |
Wave 3
On this wave, the enemies come from both portals again but some of the enemies have changed, so you’ll need to change some things around. Deconstruct both of the Ambush Mines you placed near your portal and replace them with one Electro and put it on the panel in the middle, closest to your portal and then place one Pyro where the other Mine was, then place a Hydro Mechanici in between them on the right and then put another one in front of that. Place a Cryo one to the left of the Pyro one you placed down a second ago and then place an Electro one on the panel in the middle, just before the bridge.
The only thing left to do now is to replace the Pyro Mechanici nearest to the middle panel and put a Hydro Mechanici in its place. Once again the Shield wall enemies should be attacked by a Claymore user to help break their shields and be wary of the Samachurls as they like to sprint through, attack them to slow them down.
Monster Types
| Icon |
Name |
 |
Pyro Slime |
 |
Electro Slime |
 |
Wooden Shield Mitachurl |
 |
Ice Shieldwall Mitachurl |
 |
Cryo Samachurl |
 |
Dendro Samachurl |
Wave 4
For this last wave, keep the Mechanici as is and it should be able to deal with the change of enemies again, the only real problem being the Ruin Guards, with clever use of shooting the core on its head to stun them briefly with an Archer and activating the bridge at key times will make this easier, make sure to attack the enemies to slow them down.
Monster Types
| Icon |
Name |
 |
Anemo Slime |
 |
Large Anemo Slime |
 |
Large Electro Slime |
 |
Geo Slime |
 |
Large Geo Slime |
 |
Ruin Guard |



 Sign up
No Comments