Orin the Red will be one of the last boss battles you face in Baldur’s Gate 3 due to you needing her Netherstone, but getting to, and defeating her is a different predicament altogether. Before you can even begin to think of fighting her, you’ll have a lot of stuff you need to do beforehand. Read below to find out where you can find Orin as well as a guide on beating her.
Orin is one of the main antagonists in Baldur’s Gate 3.
Orin Location - Reaching Orin
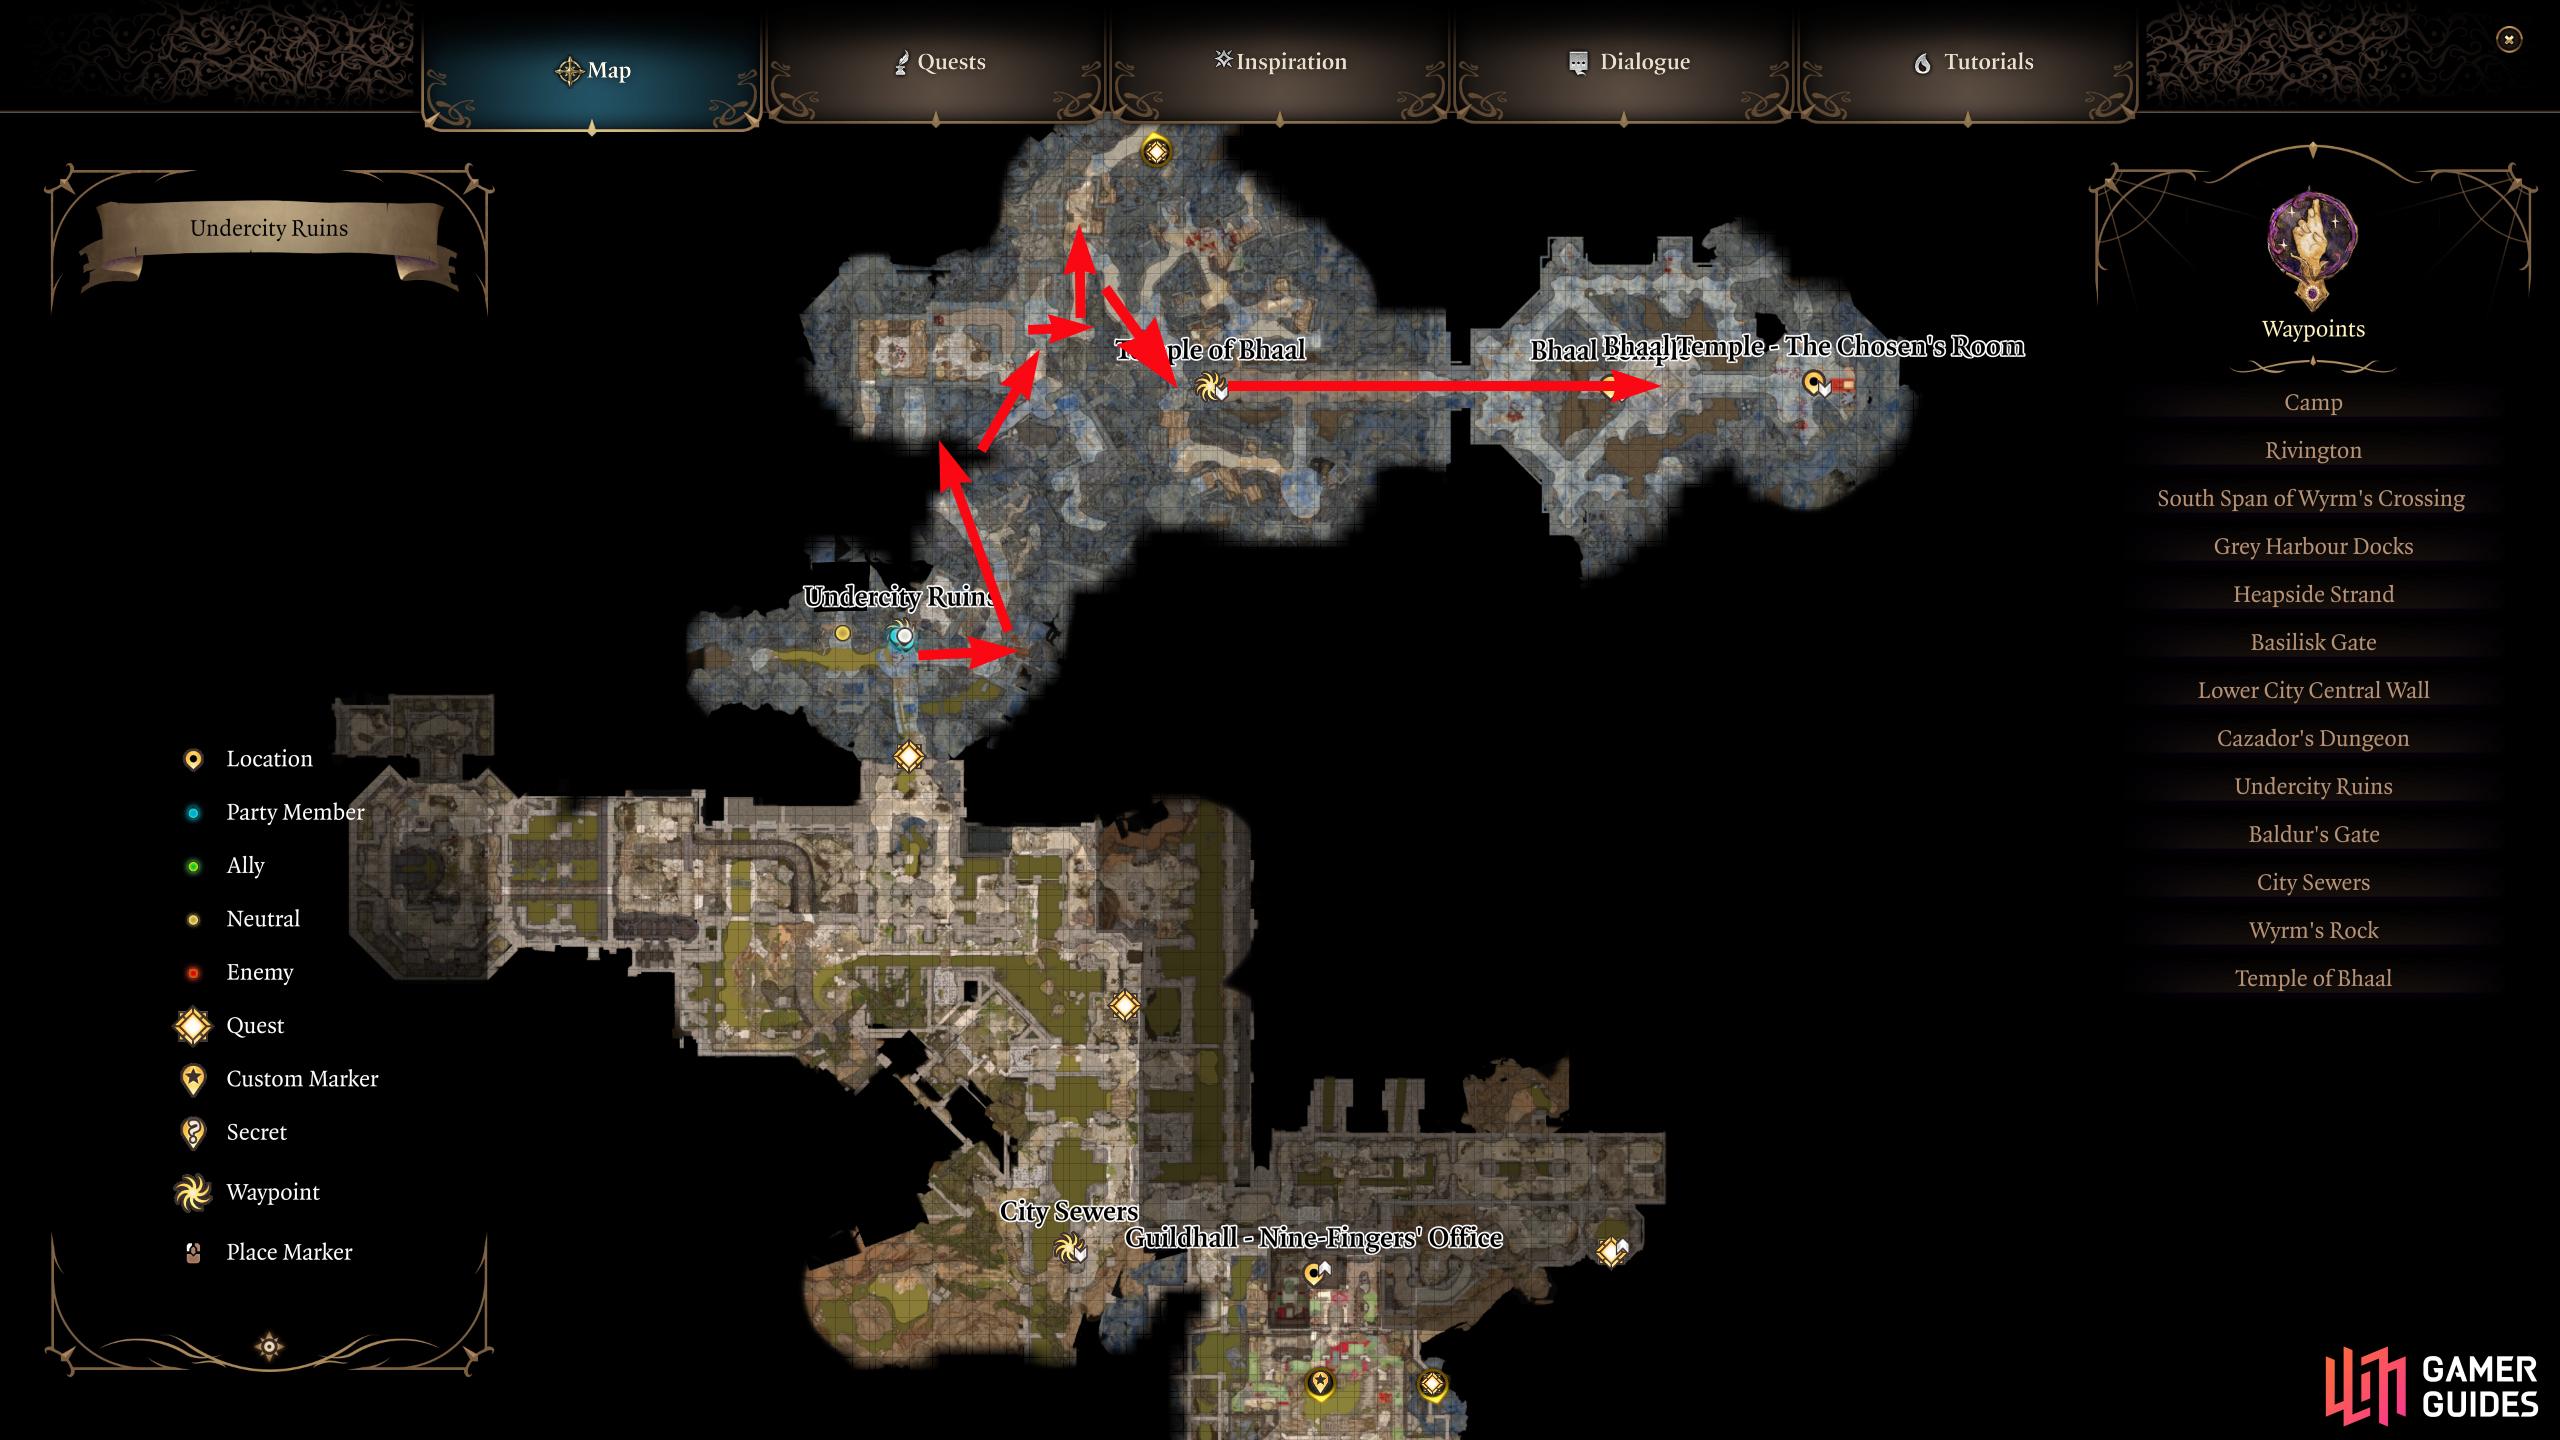
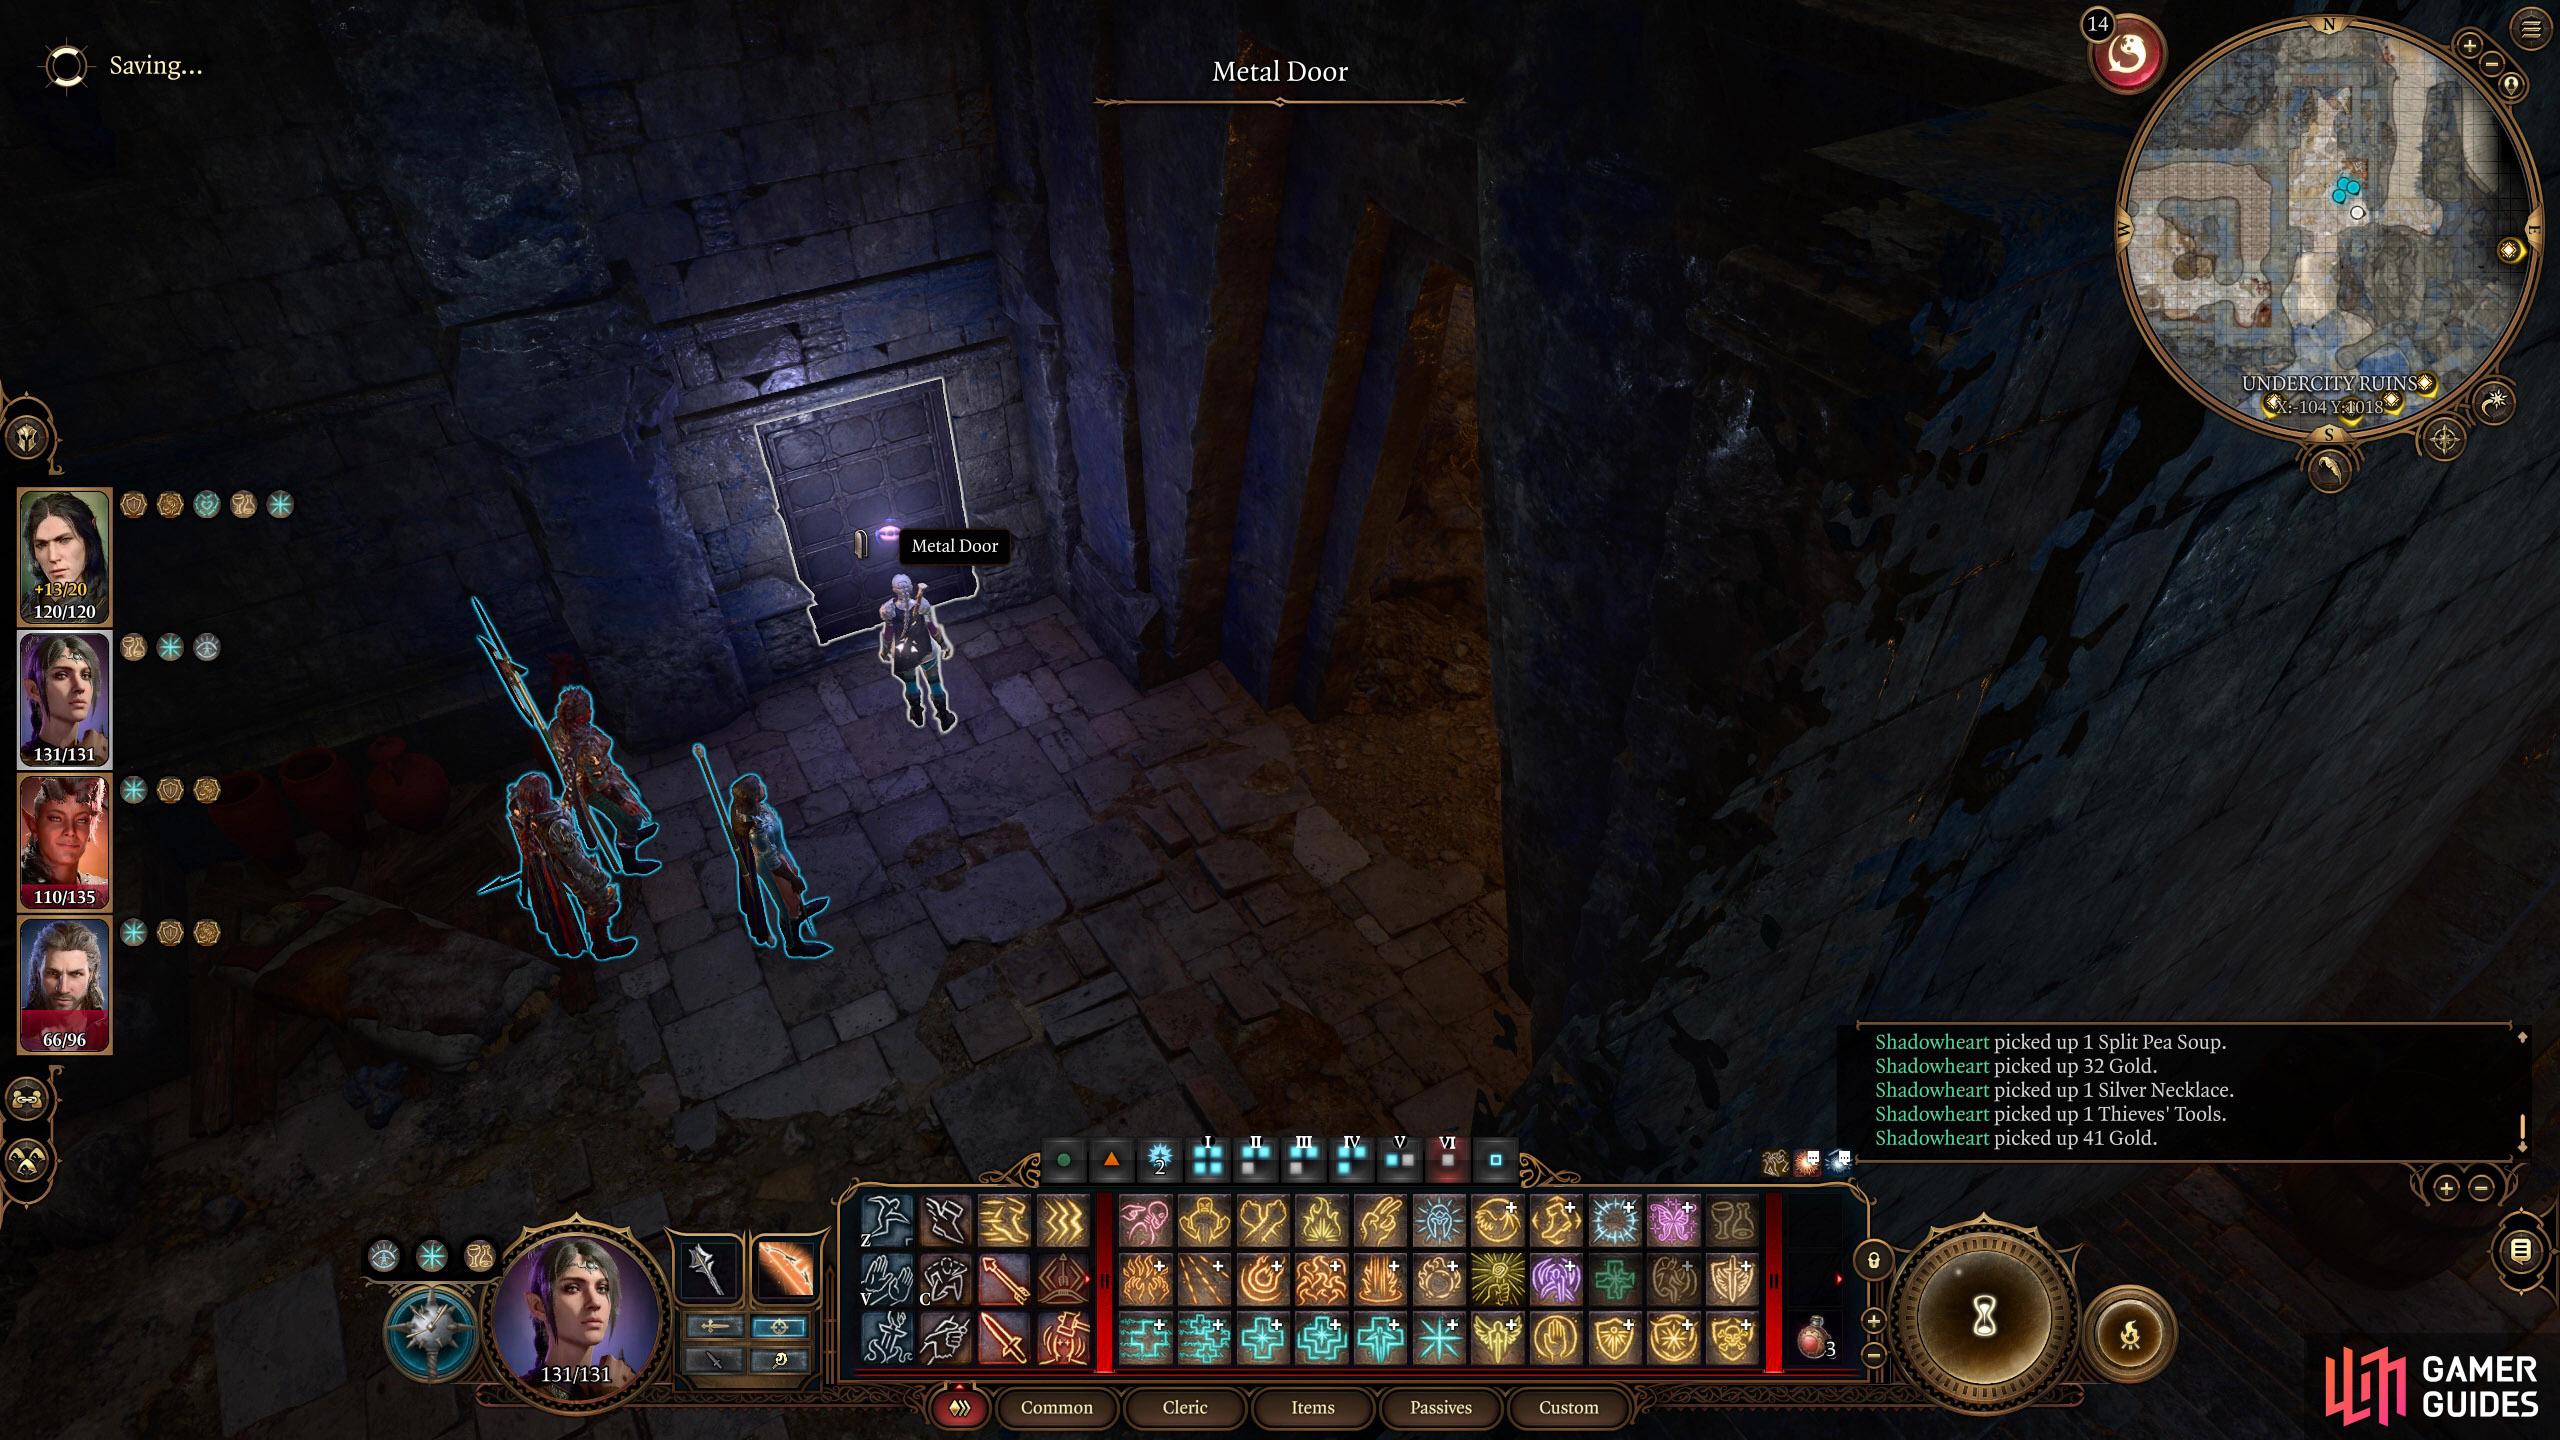
Orin can be found deep within the Temple of Bhaal which is situated behind the metal door next to the Undercity Ruins waypoint in the sewers, which is accessed from various entry points in the Lower City. When you reach the Undercity Ruins waypoint, you’ll notice that the nearby door is impossible to unlock, and you’ll get cryptic hints if you interact with it. However, if you use a ranged attack on the nearby hanging corpses, blood will drip down into the blood-smeared circle below them, and the door will proceed to open.
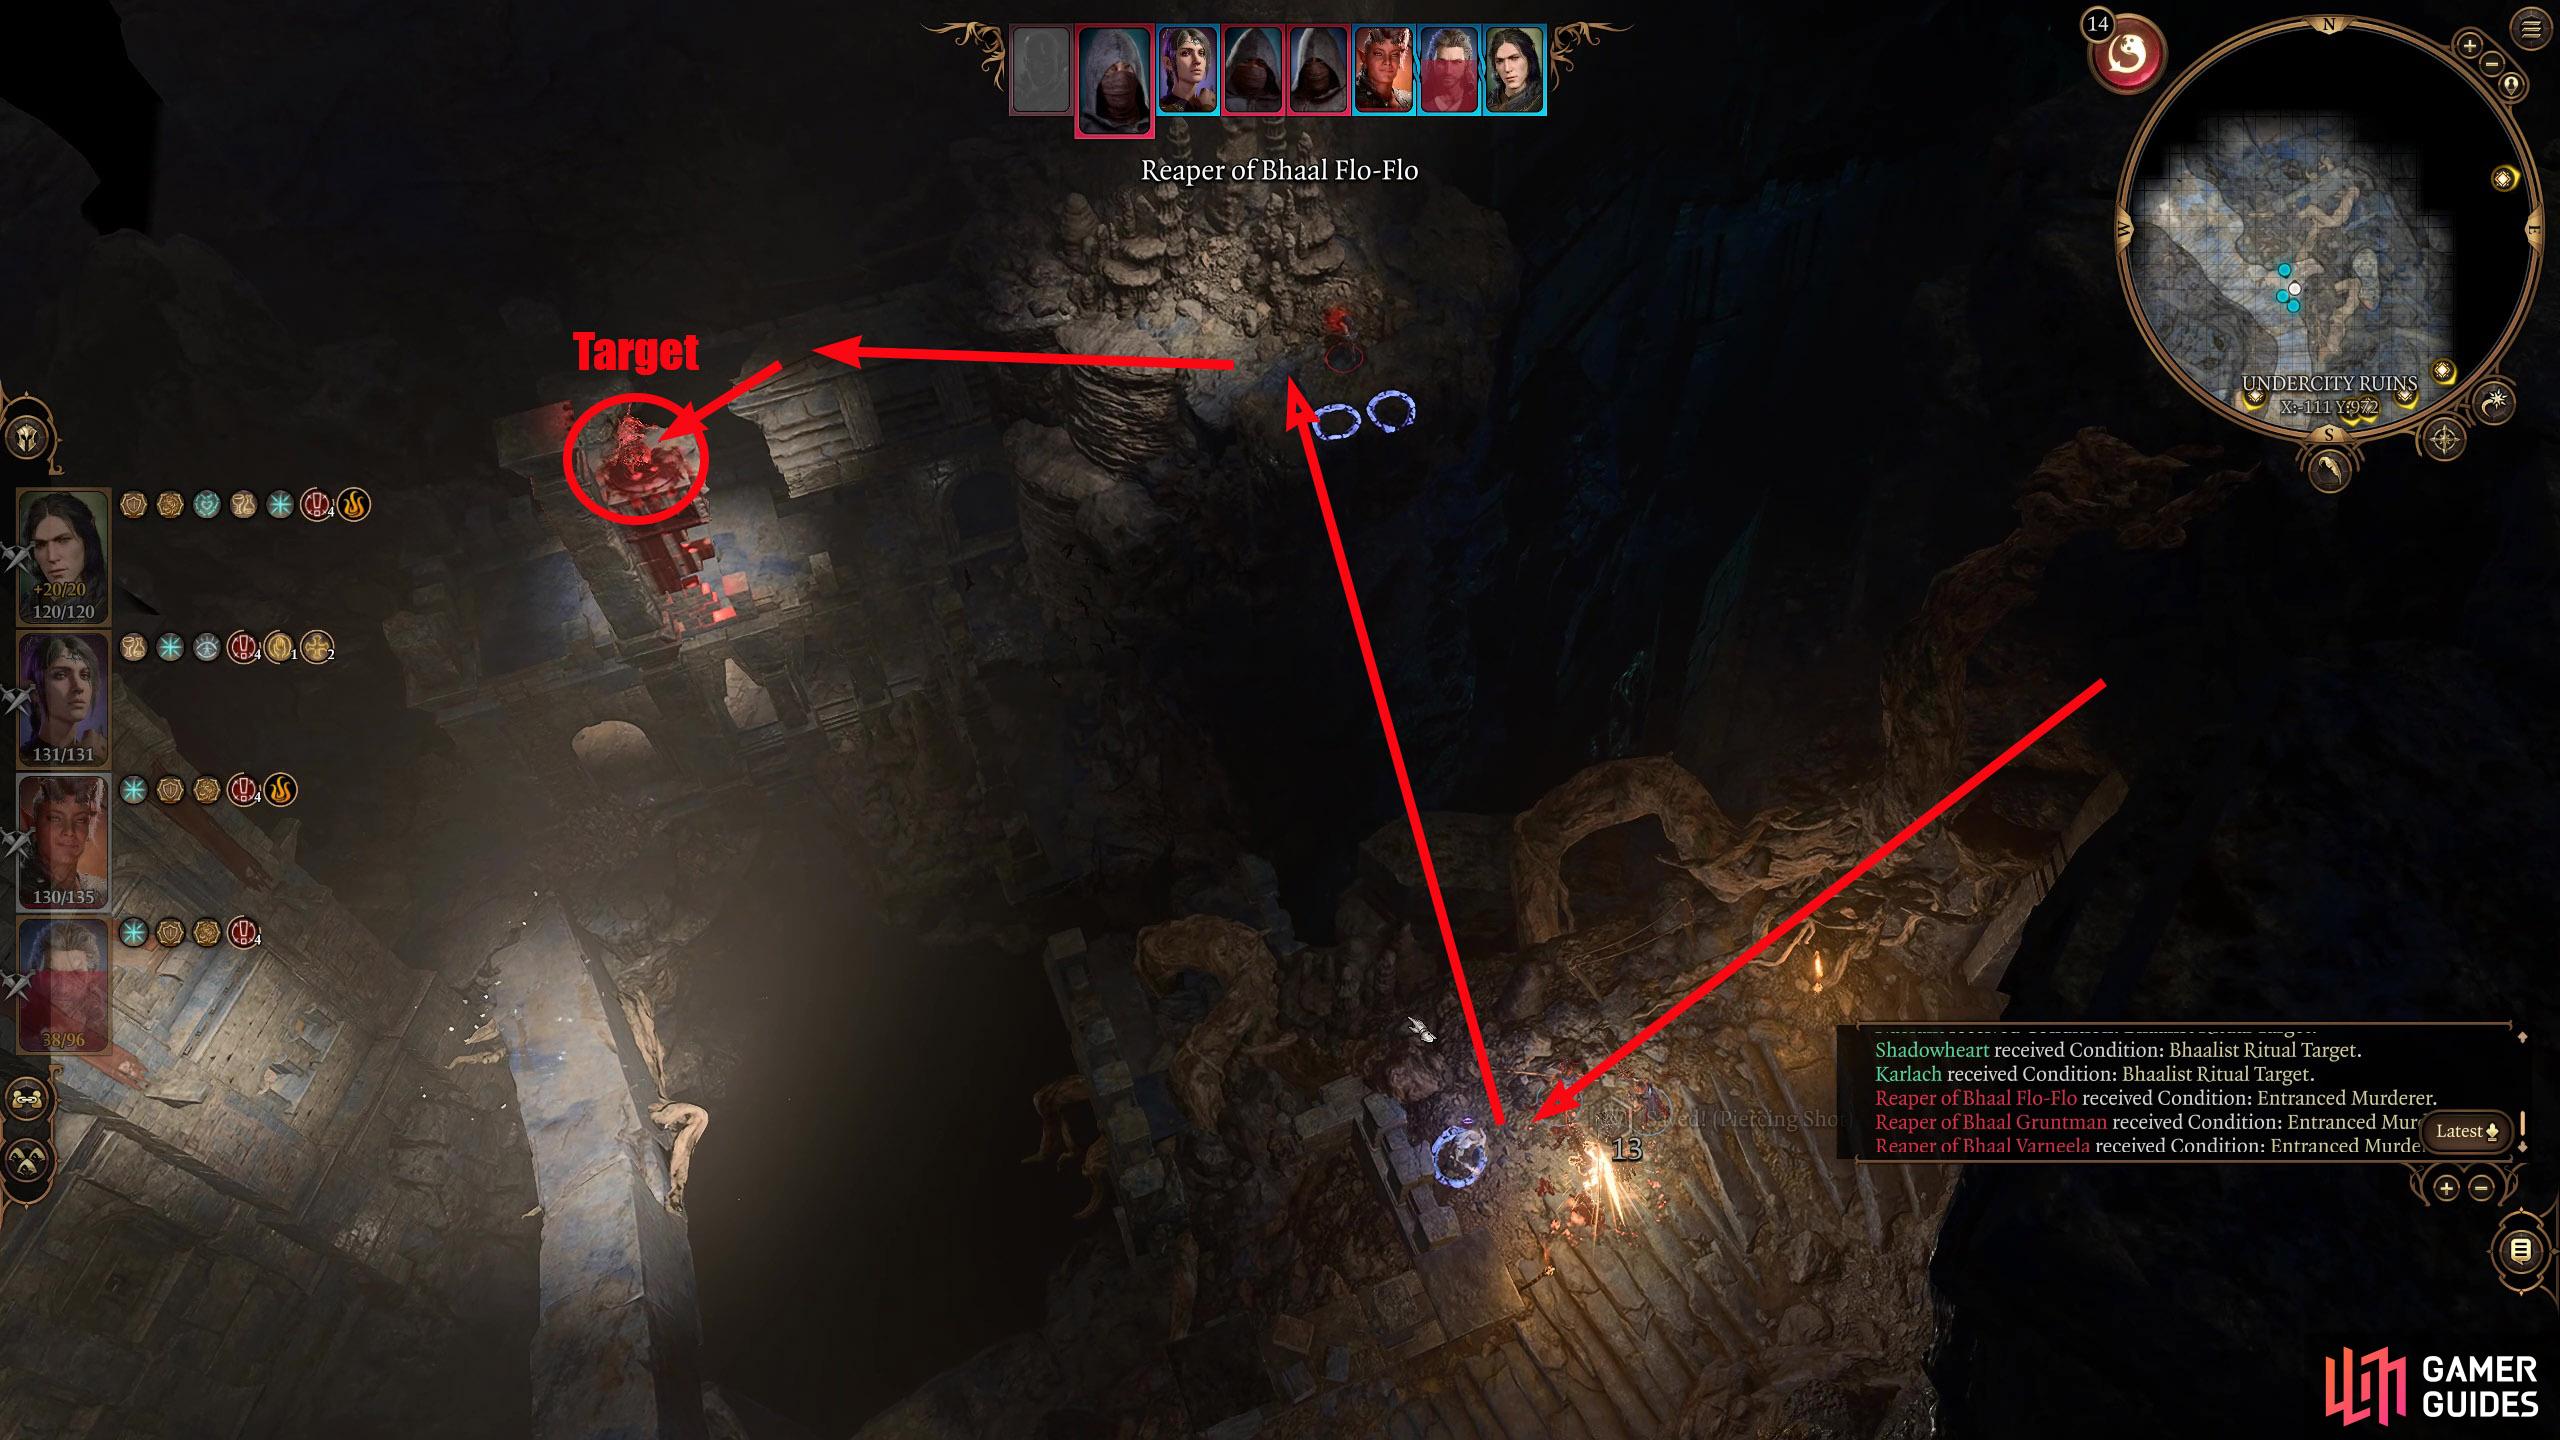
In the next room, you’ll have a long set of stairs leading down, but as you get about halfway you’ll get an encounter (trial if you killed Gortash first). At first, all the enemies will be invisible, but can be seen with See Invisible provided you pass the check. This is an unusual encounter where you will want to defeat Reaper of Flo-Flo as quickly as possible (within 5 turns) who can be found on the stone pillar to the northeast. The reason for this is he will be performing the Ritual Chant: Bhaal’s Power Word Kill, and what this does is kills everyone who is within the range of the chant (55m) which is pretty much the entire room.
Before you start the battle, make sure you bring as many traversal spells/potions/equipment (![]() Misty Step,
Misty Step, ![]() Dimension Door,
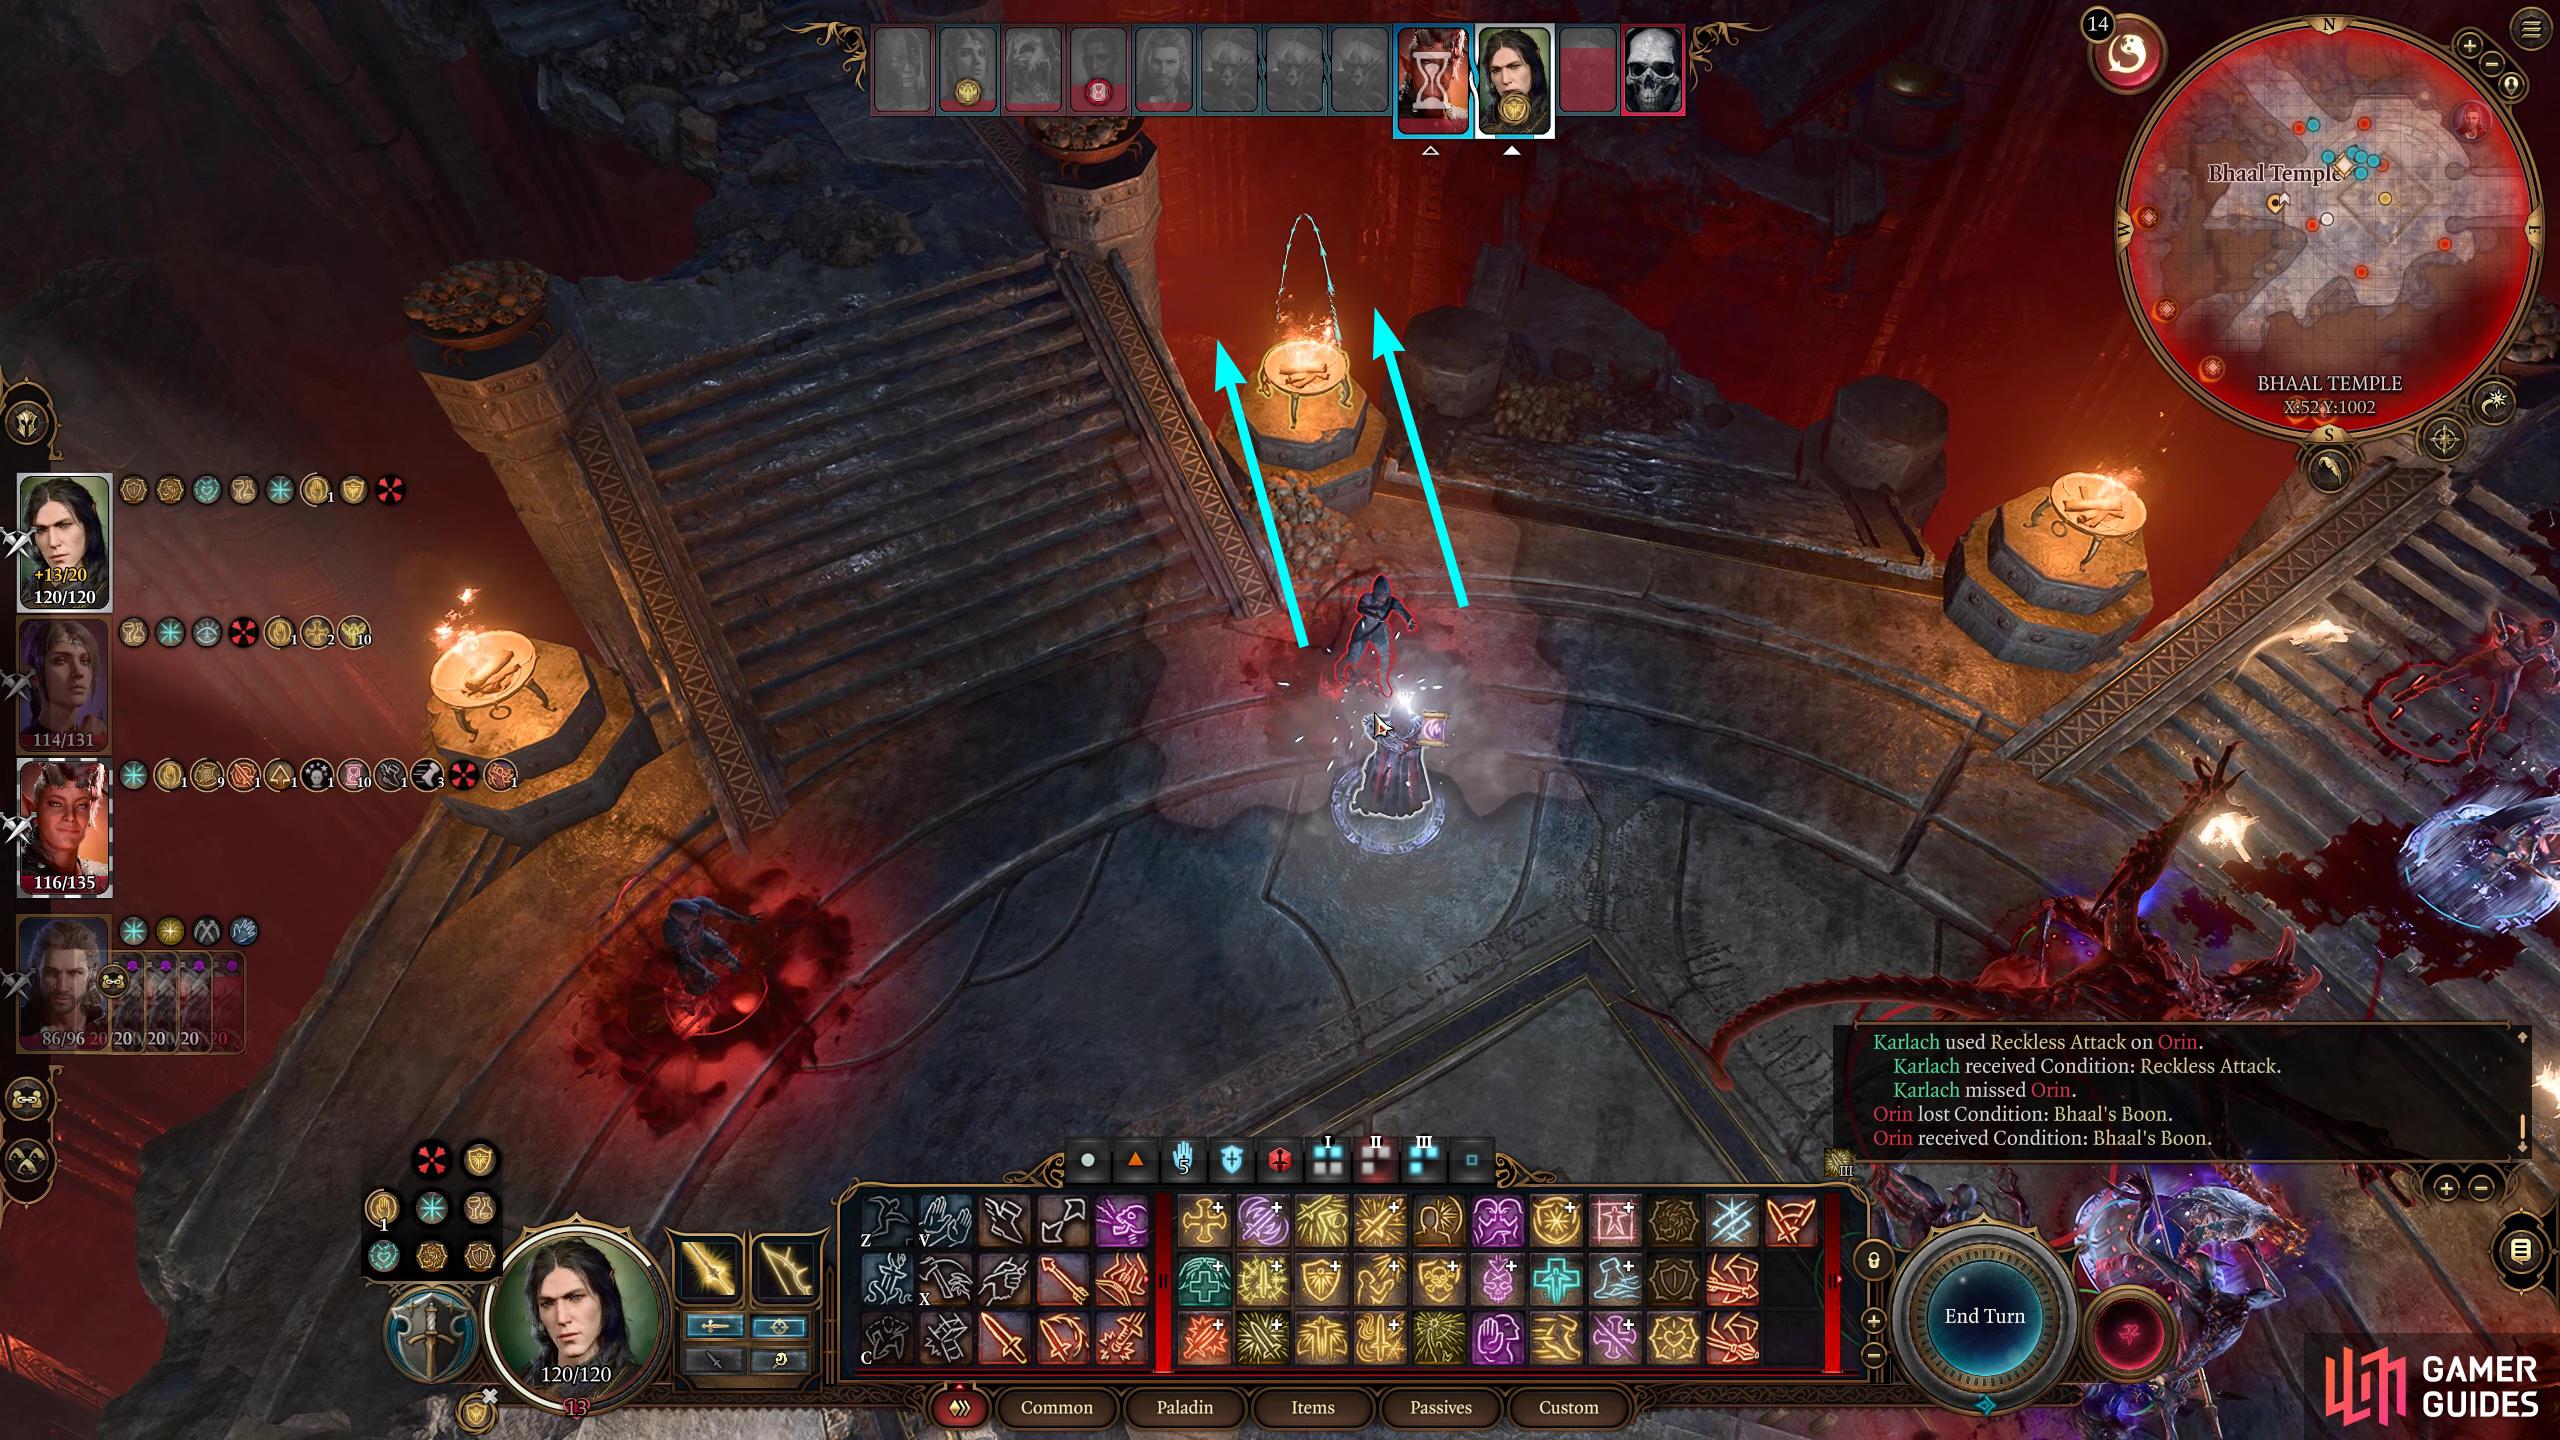
Dimension Door, ![]() Fly, and Potion of Glorious Vaulting) as possible as this will make this battle a lot easier. When the battle begins, and you get your turn, use one of the traversal abilities to reach the higher ledge to the north of the stairs (where you start the encounter). There will be three enemies up here who may still be invisible, but you can ignore these as your only target will be Flo-Flo.
Fly, and Potion of Glorious Vaulting) as possible as this will make this battle a lot easier. When the battle begins, and you get your turn, use one of the traversal abilities to reach the higher ledge to the north of the stairs (where you start the encounter). There will be three enemies up here who may still be invisible, but you can ignore these as your only target will be Flo-Flo.
(1 of 3) From the Undercity Ruins waypoint, follow this path to reach Orin.
From this ledge, you can reach Flo-Flo by heading northwest and then using another traversal ability. When you reach him, attack him with all you got, but be aware that you’ll need to break through his 5 stacks of Unstoppable (Drops your damage to 1 for 5 attacks), and he will teleport away if you don’t finish him in that turn. Normally, he’ll teleport to the floor below his starting spot, and if this happens, continue to use your traversal abilities to reach him. Once you defeat Flo-Flo, the trial will end, and the rest of the enemies will leave you alone.
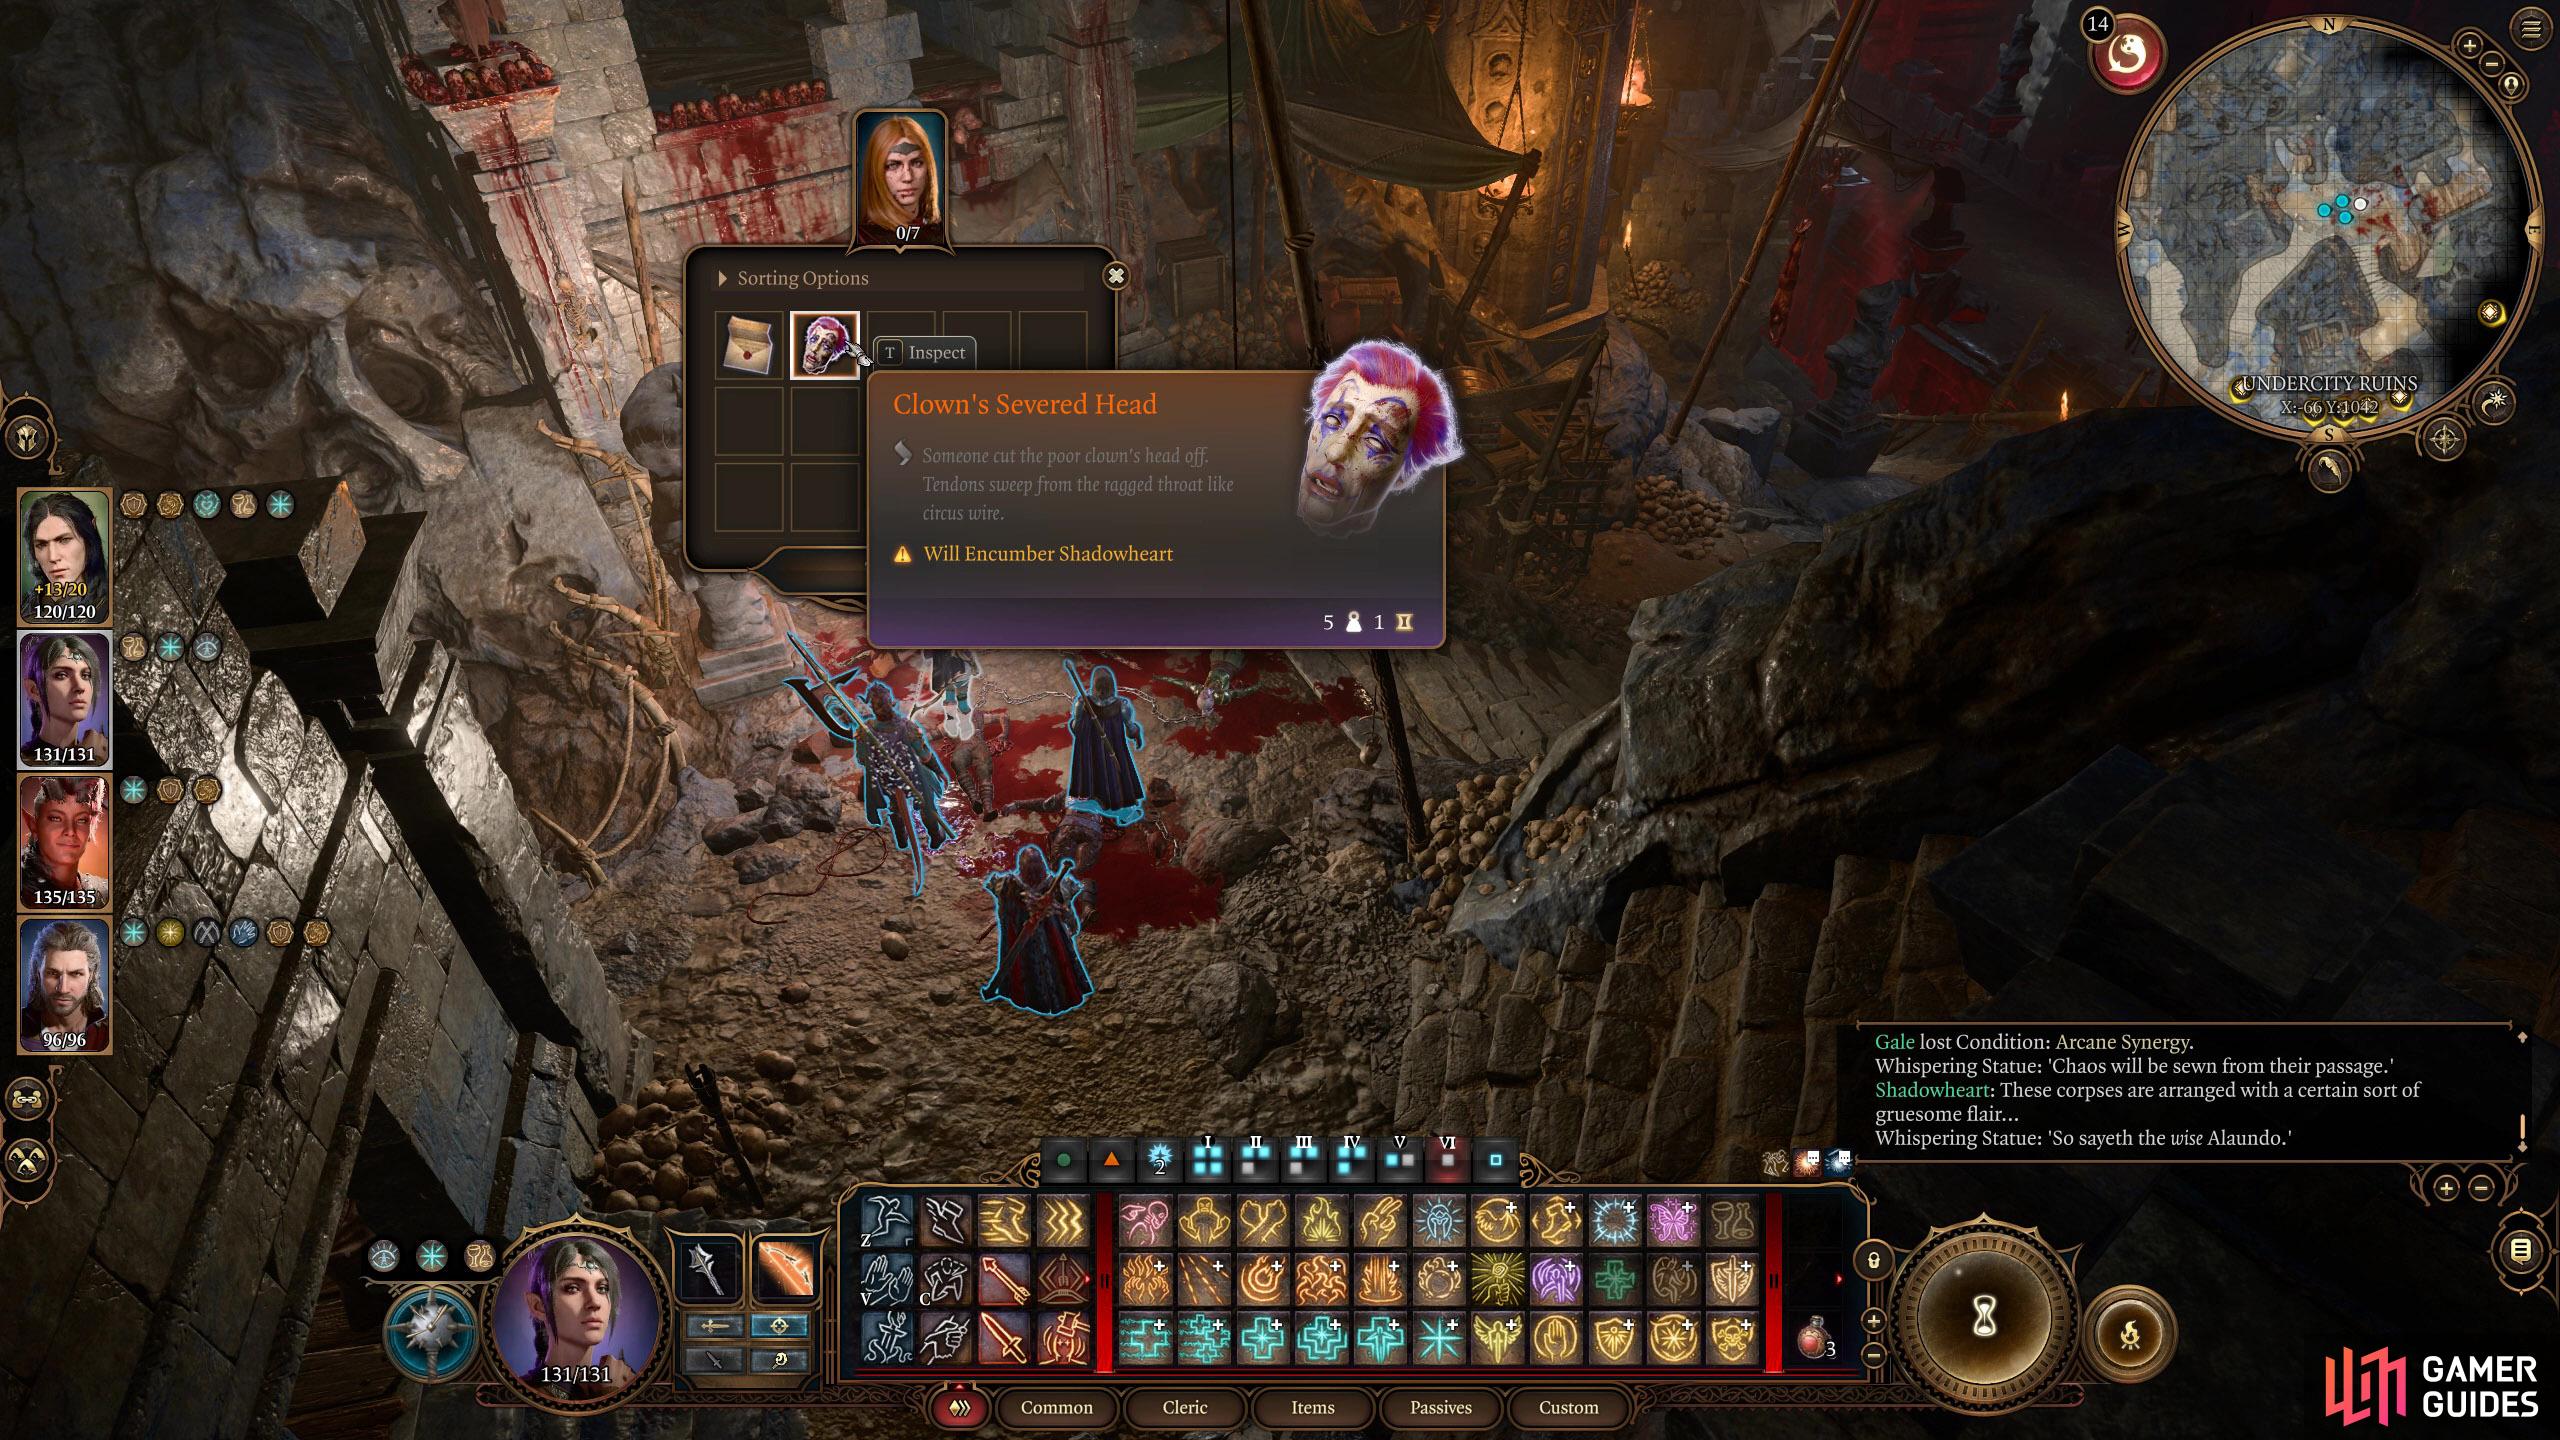
Now that the encounter is over, you can explore the area free from threat, but there isn’t anything special around here. When you’re ready, head through the Metal door in the northwest, on the lower level (near where Flo-Flo would’ve teleported to). In the next room, you’ll be free to search the area without getting into an encounter, so when you’re ready, proceed down the series of stairs while heading east, and you’ll come across an area with multiple corpses, if you search Wilt, you can find poor old Dribbles’ missing head for the Find Dribbles the Clown quest.
(1 of 2) On your way to Orin you can find Dribbles the Clowns head on the corpse of Wilt.
On your way to Orin you can find Dribbles the Clowns head on the corpse of Wilt. (left), You will need the Bhaalist Amulet to enter the Temple of Bhaal. You can get this through the secret entrance in Candulhallows’ Tombstones. (right)
When you’re done paying respects to the unfortunate clown, continue heading down the stairs towards the bridge. At the end of the path, you’ll unlock the Temple of Bhaal waypoint then you can head across the bridge into the temple. Note: As far as we know, you can only enter the temple by using an amulet you get from the boss (or pass the trial) of the Murder Tribunal quest. If you don’t have it, complete that quest first, then teleport back here.
Nearly there, inside the temple, everyone will be neutral to you until you reach the altar where your kidnapped ally lies. As you approach them, you’ll get a scene promptly followed up with a boss battle against Orin herself.
Orin the Red Overview
At first, the battle may look overwhelming with the six cultists performing a ritual that gives +1 AC to Orin for each cultist up still at the end of every turn phase while also having ![]() Sanctuary. Or it could be the monstrosity that is Orin in her Slayer Form. How about the other cultists who’ll cast
Sanctuary. Or it could be the monstrosity that is Orin in her Slayer Form. How about the other cultists who’ll cast ![]() Slow on you, or attack you? With that said, if you are well-prepared, and you are, as you’re here, you can defeat Orin in one turn (if luck goes your way). Even if you can’t defeat her in one turn, the battle is still manageable if you use the right strategy. We’ll break up this battle into sections with the first being how to deal with the Cultists who are buffing Orin.
Slow on you, or attack you? With that said, if you are well-prepared, and you are, as you’re here, you can defeat Orin in one turn (if luck goes your way). Even if you can’t defeat her in one turn, the battle is still manageable if you use the right strategy. We’ll break up this battle into sections with the first being how to deal with the Cultists who are buffing Orin.
Make sure you make a quick save before trying to save your ally. If you fail, they can die for good.
How to Defeat the Sanctuary-Enhanced Cultists
By now, you should know that when an enemy has Sanctuary on them, they can’t be hit by a direct source. In previous encounters, this effect would normally end after a turn or two. Unfortunately, it’s permanent for this battle, so you’ll need to get creative, and this creativity comes in the form of area-of-effect spells. The easiest/quickest method to deal with these is to use ![]() Thunderwave on them to knock them off the platform, but odds on, you won’t have enough spells/scrolls of it to deal with all of them. Another good way to knock them off the platform is to use
Thunderwave on them to knock them off the platform, but odds on, you won’t have enough spells/scrolls of it to deal with all of them. Another good way to knock them off the platform is to use ![]() Glyph of Warding: Detonation as this has a similar impact. If any of them are still standing, use area-of-effect spells such as
Glyph of Warding: Detonation as this has a similar impact. If any of them are still standing, use area-of-effect spells such as ![]() Fireball,
Fireball, ![]() Spirit Guardians,
Spirit Guardians, ![]() Cone of Cold, and
Cone of Cold, and ![]() Ice Storm to name just a few of the spells. As each one is defeated, Orin will receive less AC per turn starting at +6.
Ice Storm to name just a few of the spells. As each one is defeated, Orin will receive less AC per turn starting at +6.
(1 of 2) Use a combination of Area-of-effect spells
Use a combination of Area-of-effect spells (left), Spells like Thunderwave to knock the enemy off the platform. (right)
How to Defeat Orin in One Turn
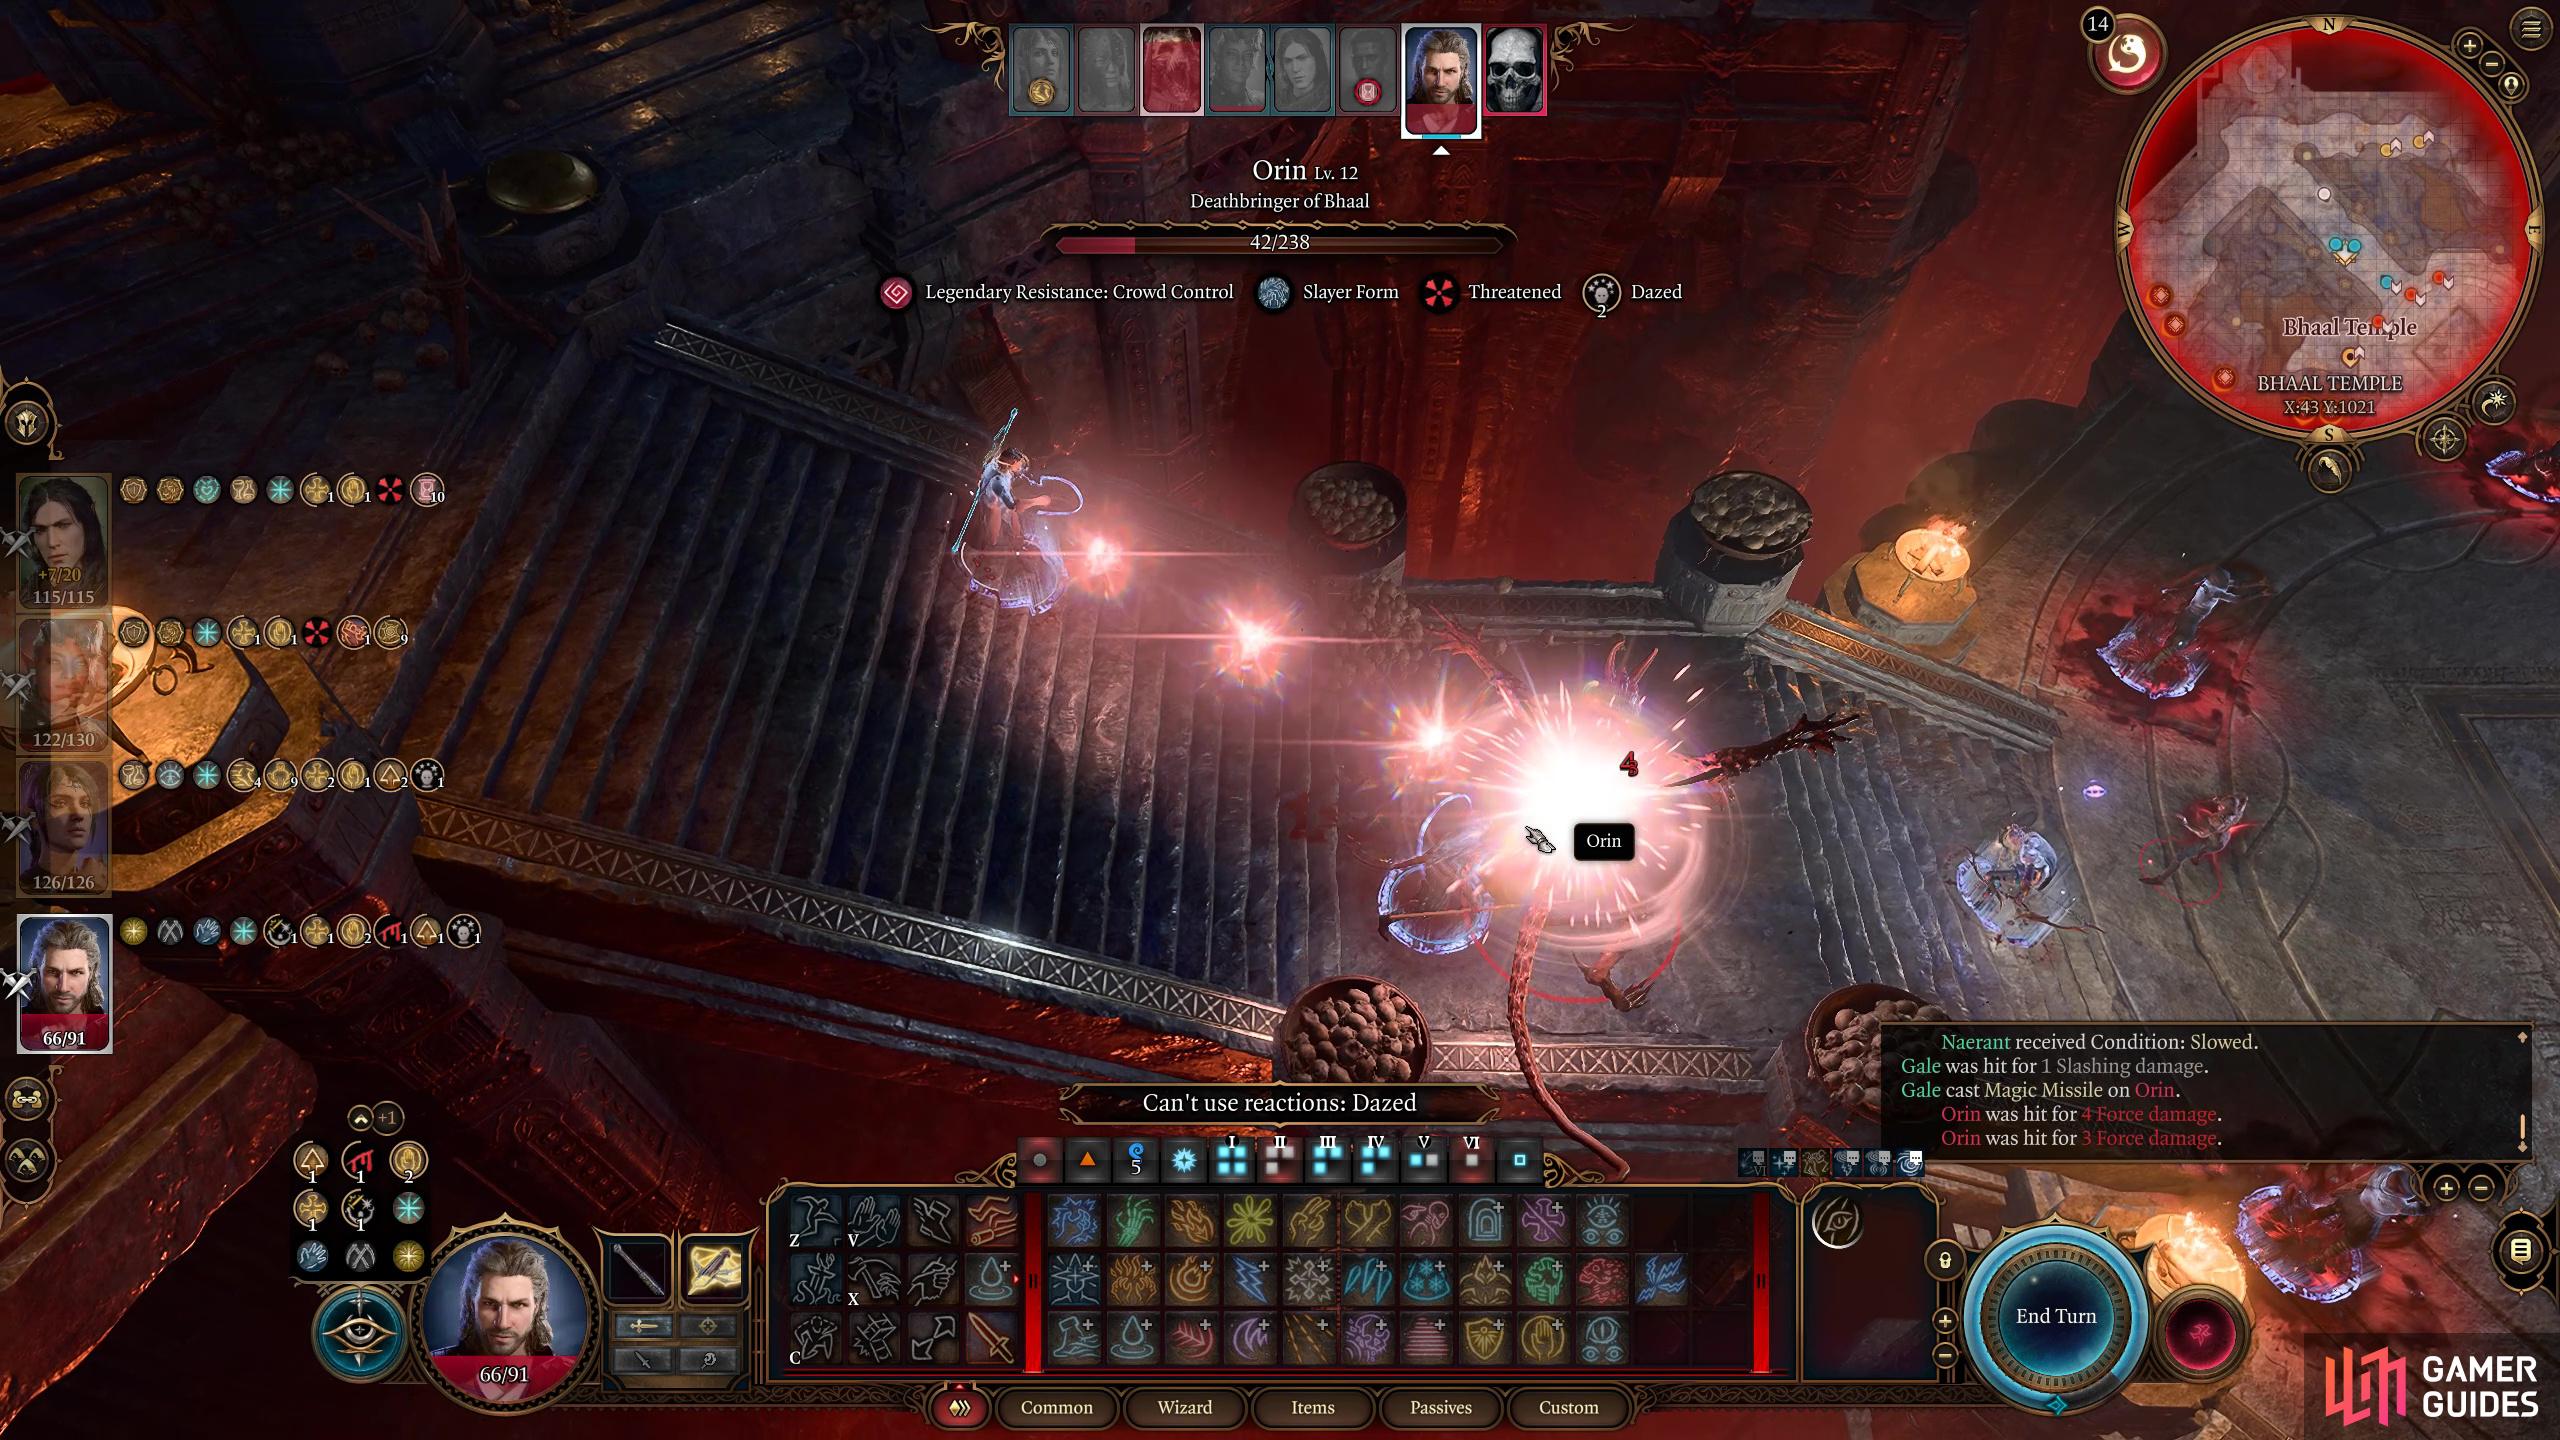
The most difficult challenge with Orin is her 10 stacks of Unstoppable she receives every turn phase. Unstoppable will reduce the damage of your attack to 1 provided there are stacks left, and each attack will take away one stack. For example: By hitting Orin once, you’ll take one stack of Unstoppable away from her until her next turn. When you hit her ten times, you’ll be able to deal damage to her like normal. If you think about it, it’s obvious that you’ll need multi-hit attacks to crack through her defenses, and there isn’t much better than a high level ![]() Magic Missile, or Fighters/Melee characters with a 3 Fighter dip due to
Magic Missile, or Fighters/Melee characters with a 3 Fighter dip due to ![]() Action Surge.
Action Surge.
For the party, we recommend you go with Fighter (![]() Lae’zel), Wizard (
Lae’zel), Wizard (![]() Gale), Paladin (You?), and a Cleric (
Gale), Paladin (You?), and a Cleric (![]() Shadowheart). If one of these are your kidnapped ally, try to use someone who can cover their role. So, Fighter = Action Surge/Multiple attacks, Wizard = AoEs/Magic Missiles, Paladin = Strong Radiant damage, Cleric = Healer/Tank. Note, you can unlock your kidnapped companion at the start of the battle by lockpicking their chains on the altar (DC25) which allows you to control them in battle, but you won’t be able to use items with them.
Shadowheart). If one of these are your kidnapped ally, try to use someone who can cover their role. So, Fighter = Action Surge/Multiple attacks, Wizard = AoEs/Magic Missiles, Paladin = Strong Radiant damage, Cleric = Healer/Tank. Note, you can unlock your kidnapped companion at the start of the battle by lockpicking their chains on the altar (DC25) which allows you to control them in battle, but you won’t be able to use items with them.
(1 of 2) Use Magic Missile at level 5 to remove the majority of Orin’s Unstoppable stacks.
Use Magic Missile at level 5 to remove the majority of Orin’s Unstoppable stacks. (left), If there are any left, you can finish it off with a Fighter (or Melee with 3 Fighter) to make multiple attack via using Action Surge. (right)
Now, how do you kill Orin in one turn you may ask? Well, the order you do things will change due to Initiative, but the general flow will be to cast Magic Missile at level 5 which should wipe out most if not all the Unstoppable stacks. Regardless if it does or doesn’t, use Magic Missile/![]() Scorching Ray (not a guaranteed hit) with your Cleric, multi-hit attacks including Actions Surge with your Fighter/other melee with a level 3 Fighter multiclassed, and the hardest hitting spells with your main DD. If it’s a Paladin, Divine Smite at Level 3 can deal significant damage. This turn of attacks all hitting can outright kill Orin in one turn, or at worst, leave her very low.
Scorching Ray (not a guaranteed hit) with your Cleric, multi-hit attacks including Actions Surge with your Fighter/other melee with a level 3 Fighter multiclassed, and the hardest hitting spells with your main DD. If it’s a Paladin, Divine Smite at Level 3 can deal significant damage. This turn of attacks all hitting can outright kill Orin in one turn, or at worst, leave her very low.
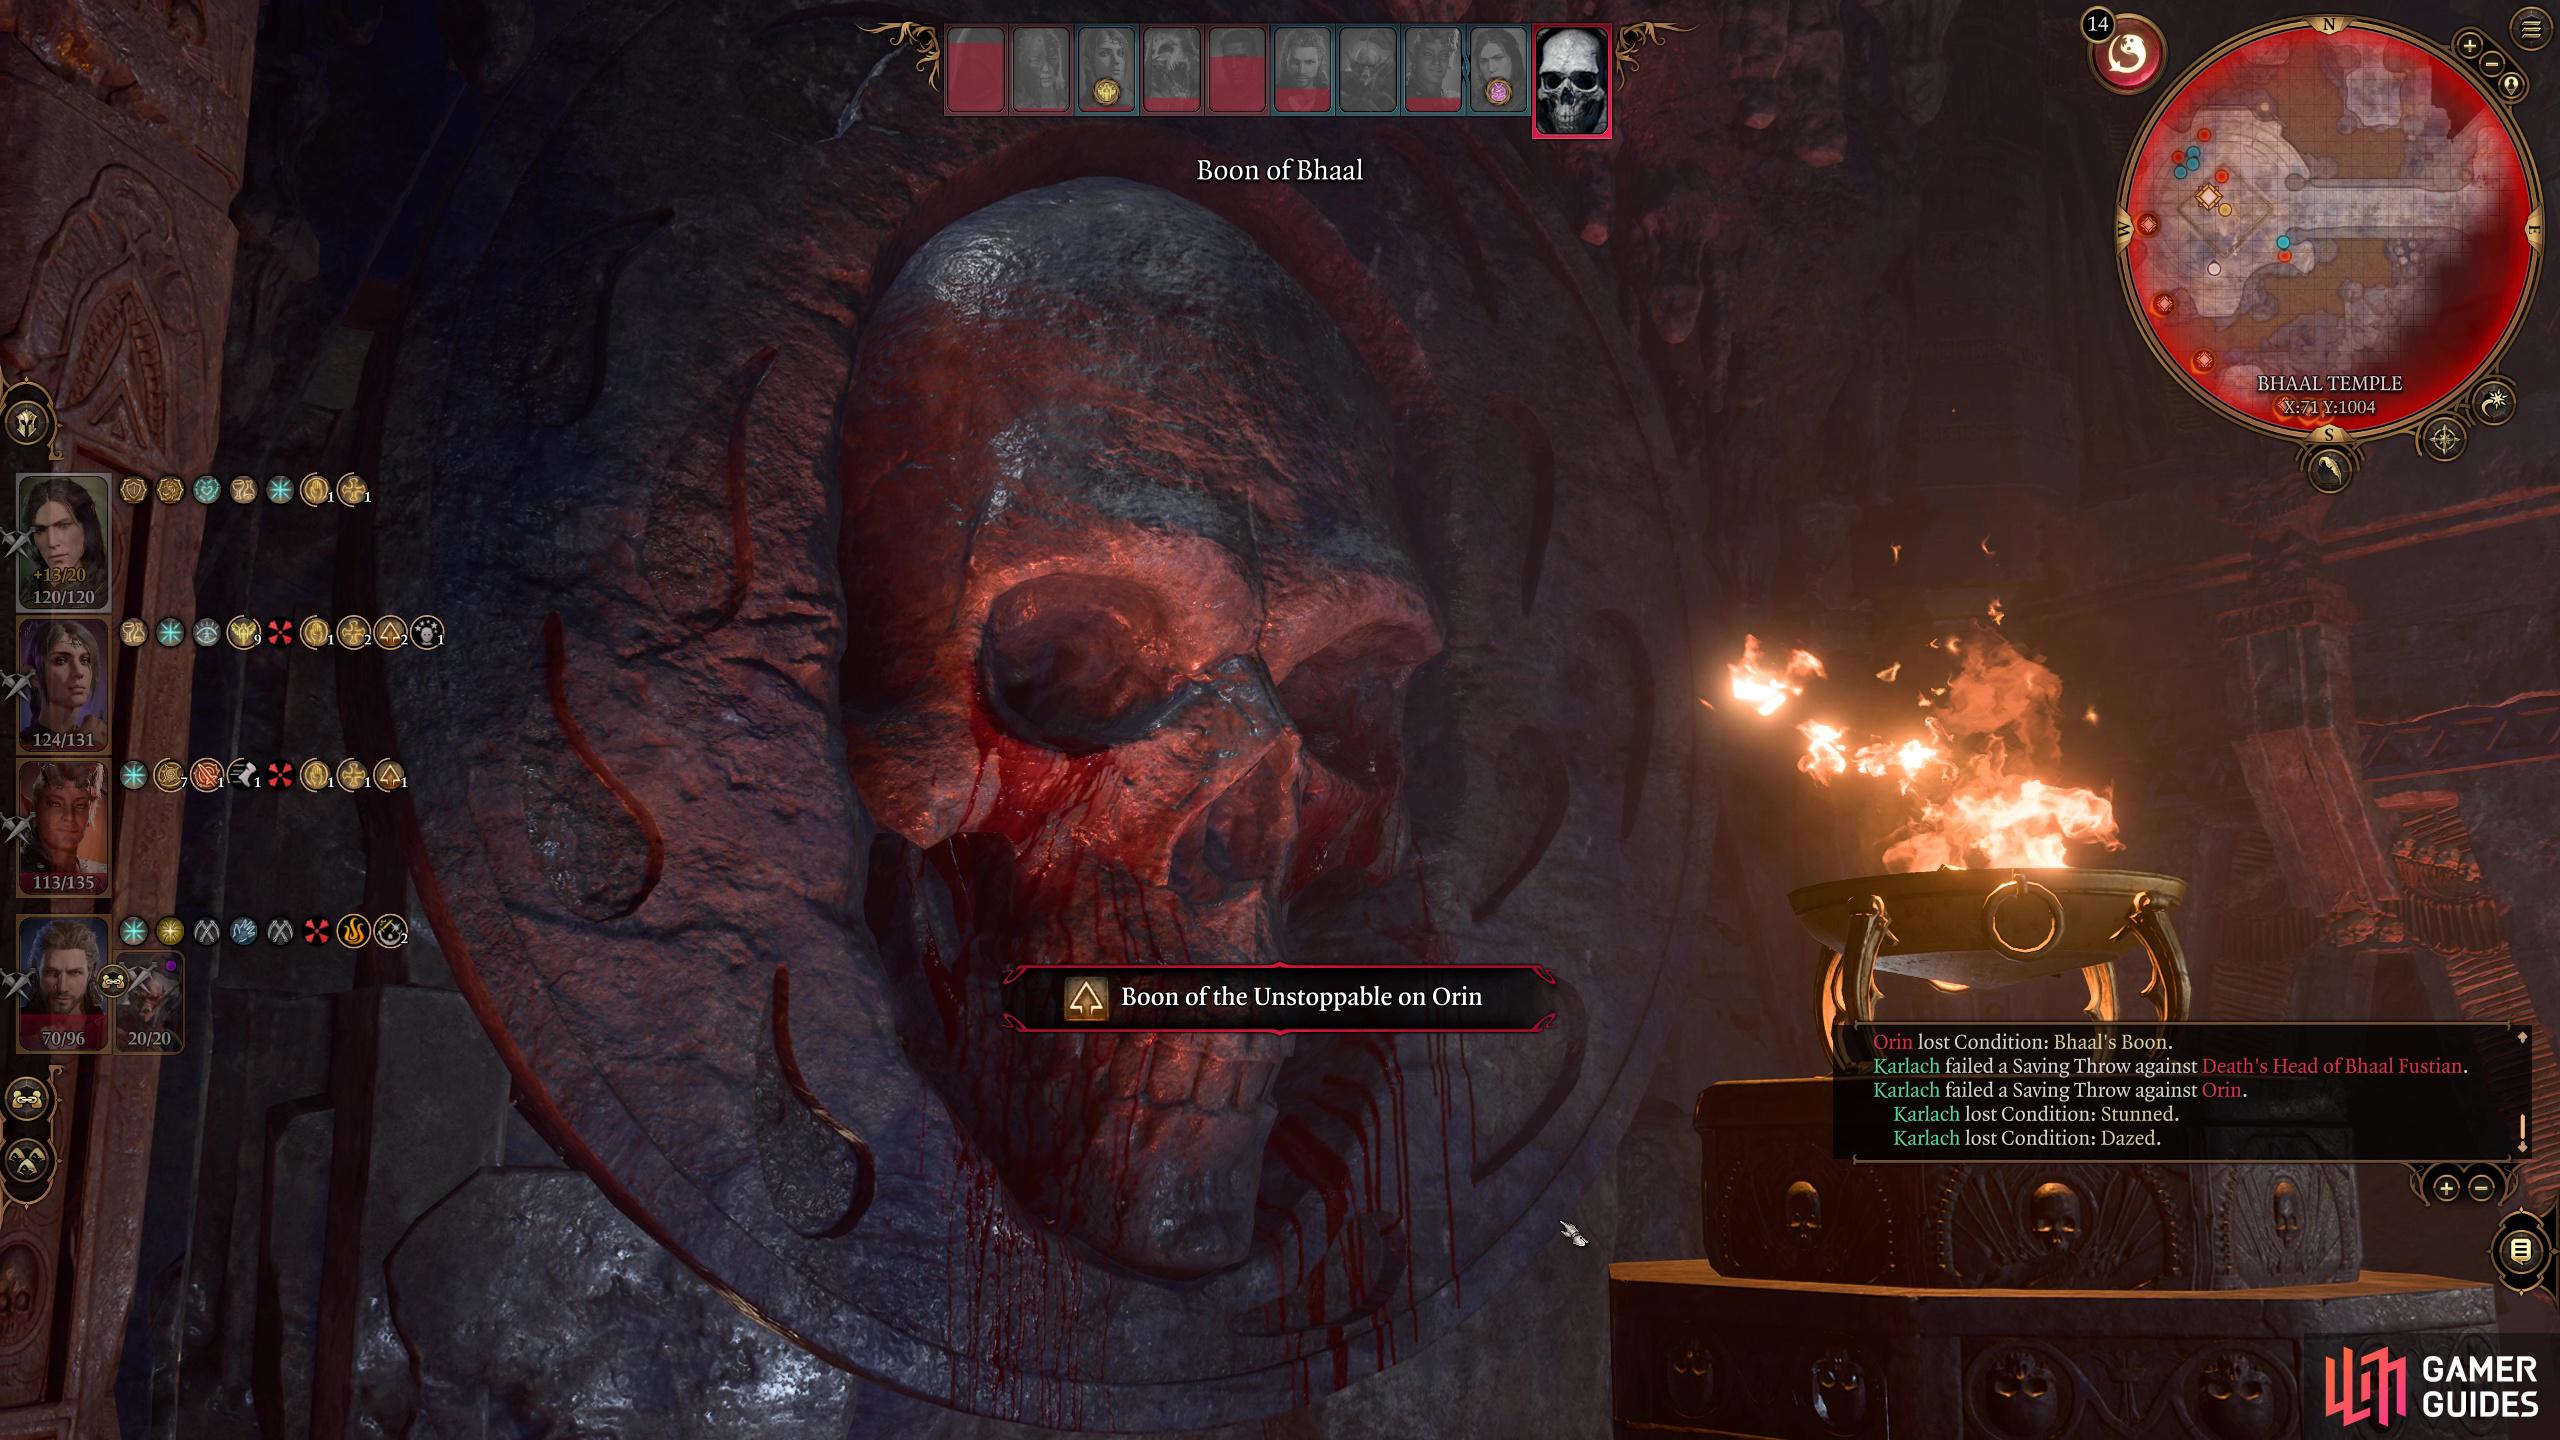
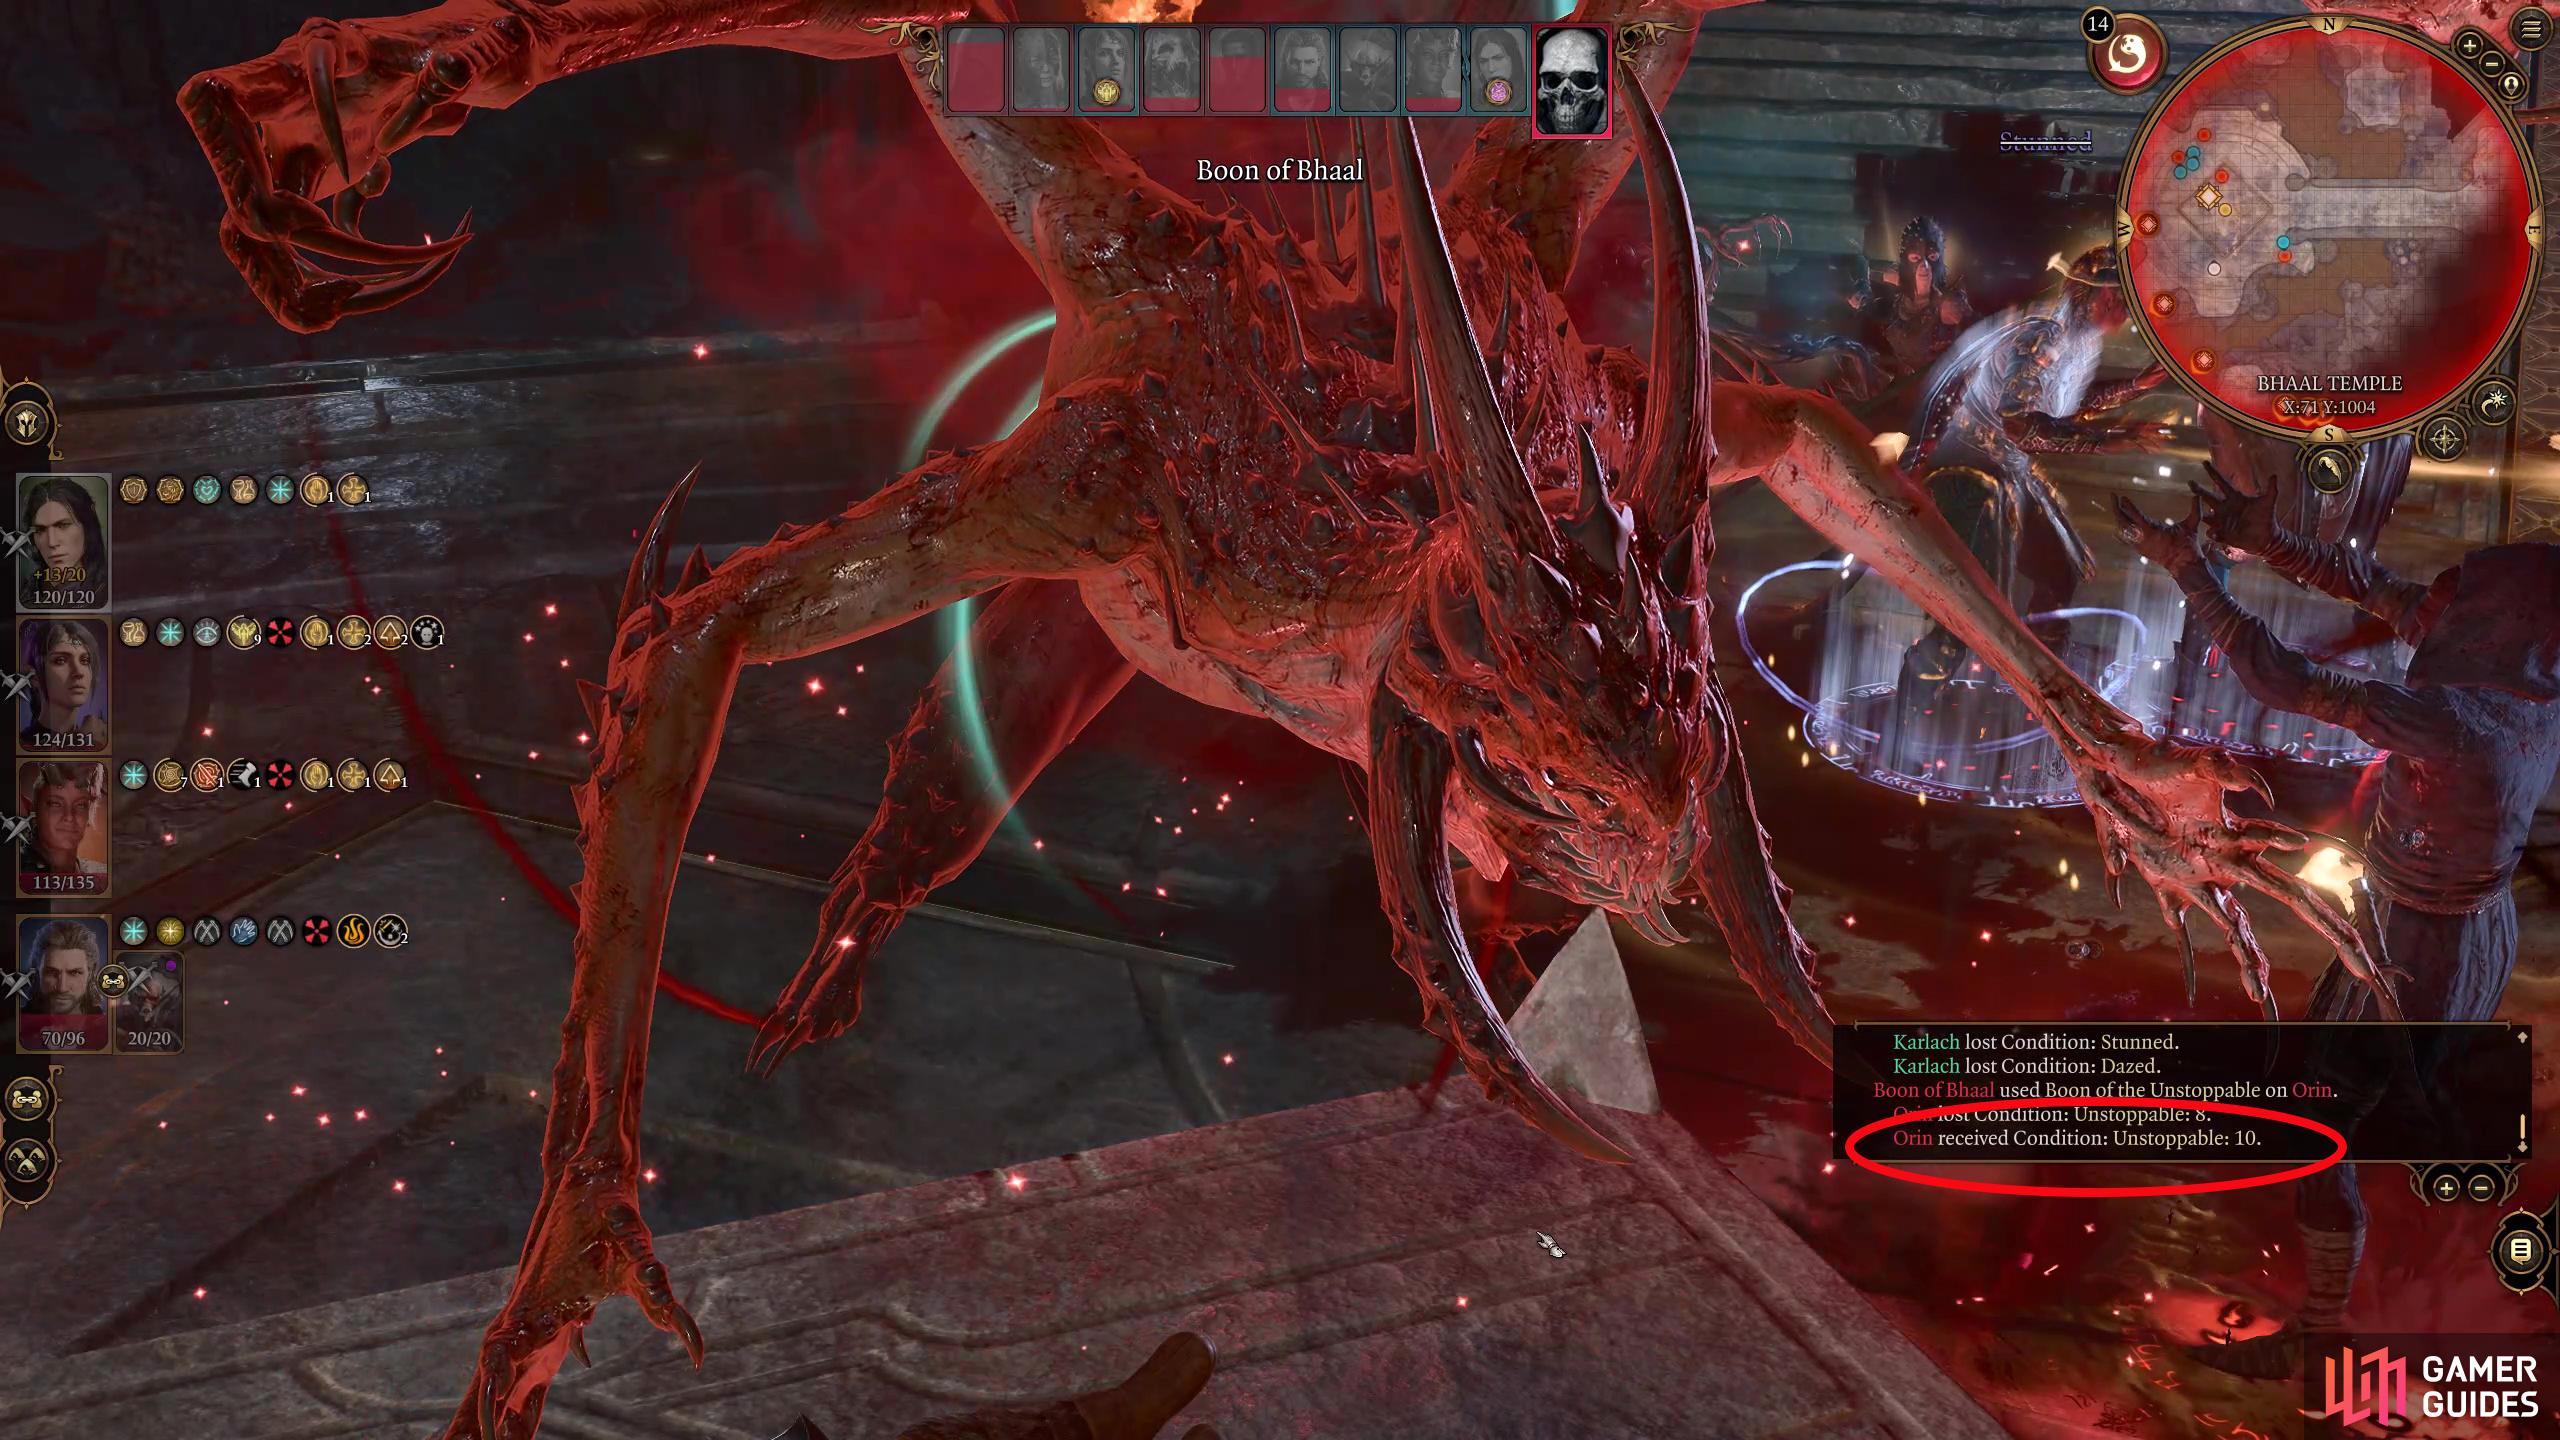
(1 of 2) Each turn phase, Boon of Bhaal will give Orin 10 stacks of Unstoppable.
Each turn phase, Boon of Bhaal will give Orin 10 stacks of Unstoppable. (left), This will make the next 10 attacks you do to her deal 1 damage. (right)
Orin the Red Boss Strategy Guide
If you’ve read the sections above, you’ll know that you need multi-hit attacks to deal with Orin’s 10 stacks of Unstoppable she gets every turn, or kill the Sanctuary-buffed cultists with area-of-effect spells and knock back attacks (like Thunderwave). Doing the fight the proper way can be frustrating until you get the six cultists down, so that should be your first priority while your best lockpicker rescues your ally provided you passed the DC25 checks with Orin before the battle. This will give you a fifth member for the battle, so it’s well worth using a turn up on it.
Now use your magic/scroll users to deal with the cultists, and use your melee character to take out the other cultists who’re attacking you, and finally, use your tank/the highest AC character to try to keep Orin at bay. Once you’ve dealt with cultists, Orin should be Unstoppable-free, although we had a bug where she kept getting the buff even with all the cultists down.
During the battle, you can rescue your kidnapped ally who will help in the battle. You’ll have to unlock their chains which is a DC25 check.
Orin has numerous attacks you need to know about which are:
- Unstoppable: Reduces the next attack to Orin to one damage. This has 10 stacks, and they refresh every turn unless you kill the cultists.
- Slay: 6d6+7 Weapon attack
- !Piercing Growl: Roars in a cone-like shape in a 12-meter range. 3d8+4 piercing damage. If the target fails a Con save, they will receive Bleeding, and Frightened for two turns.
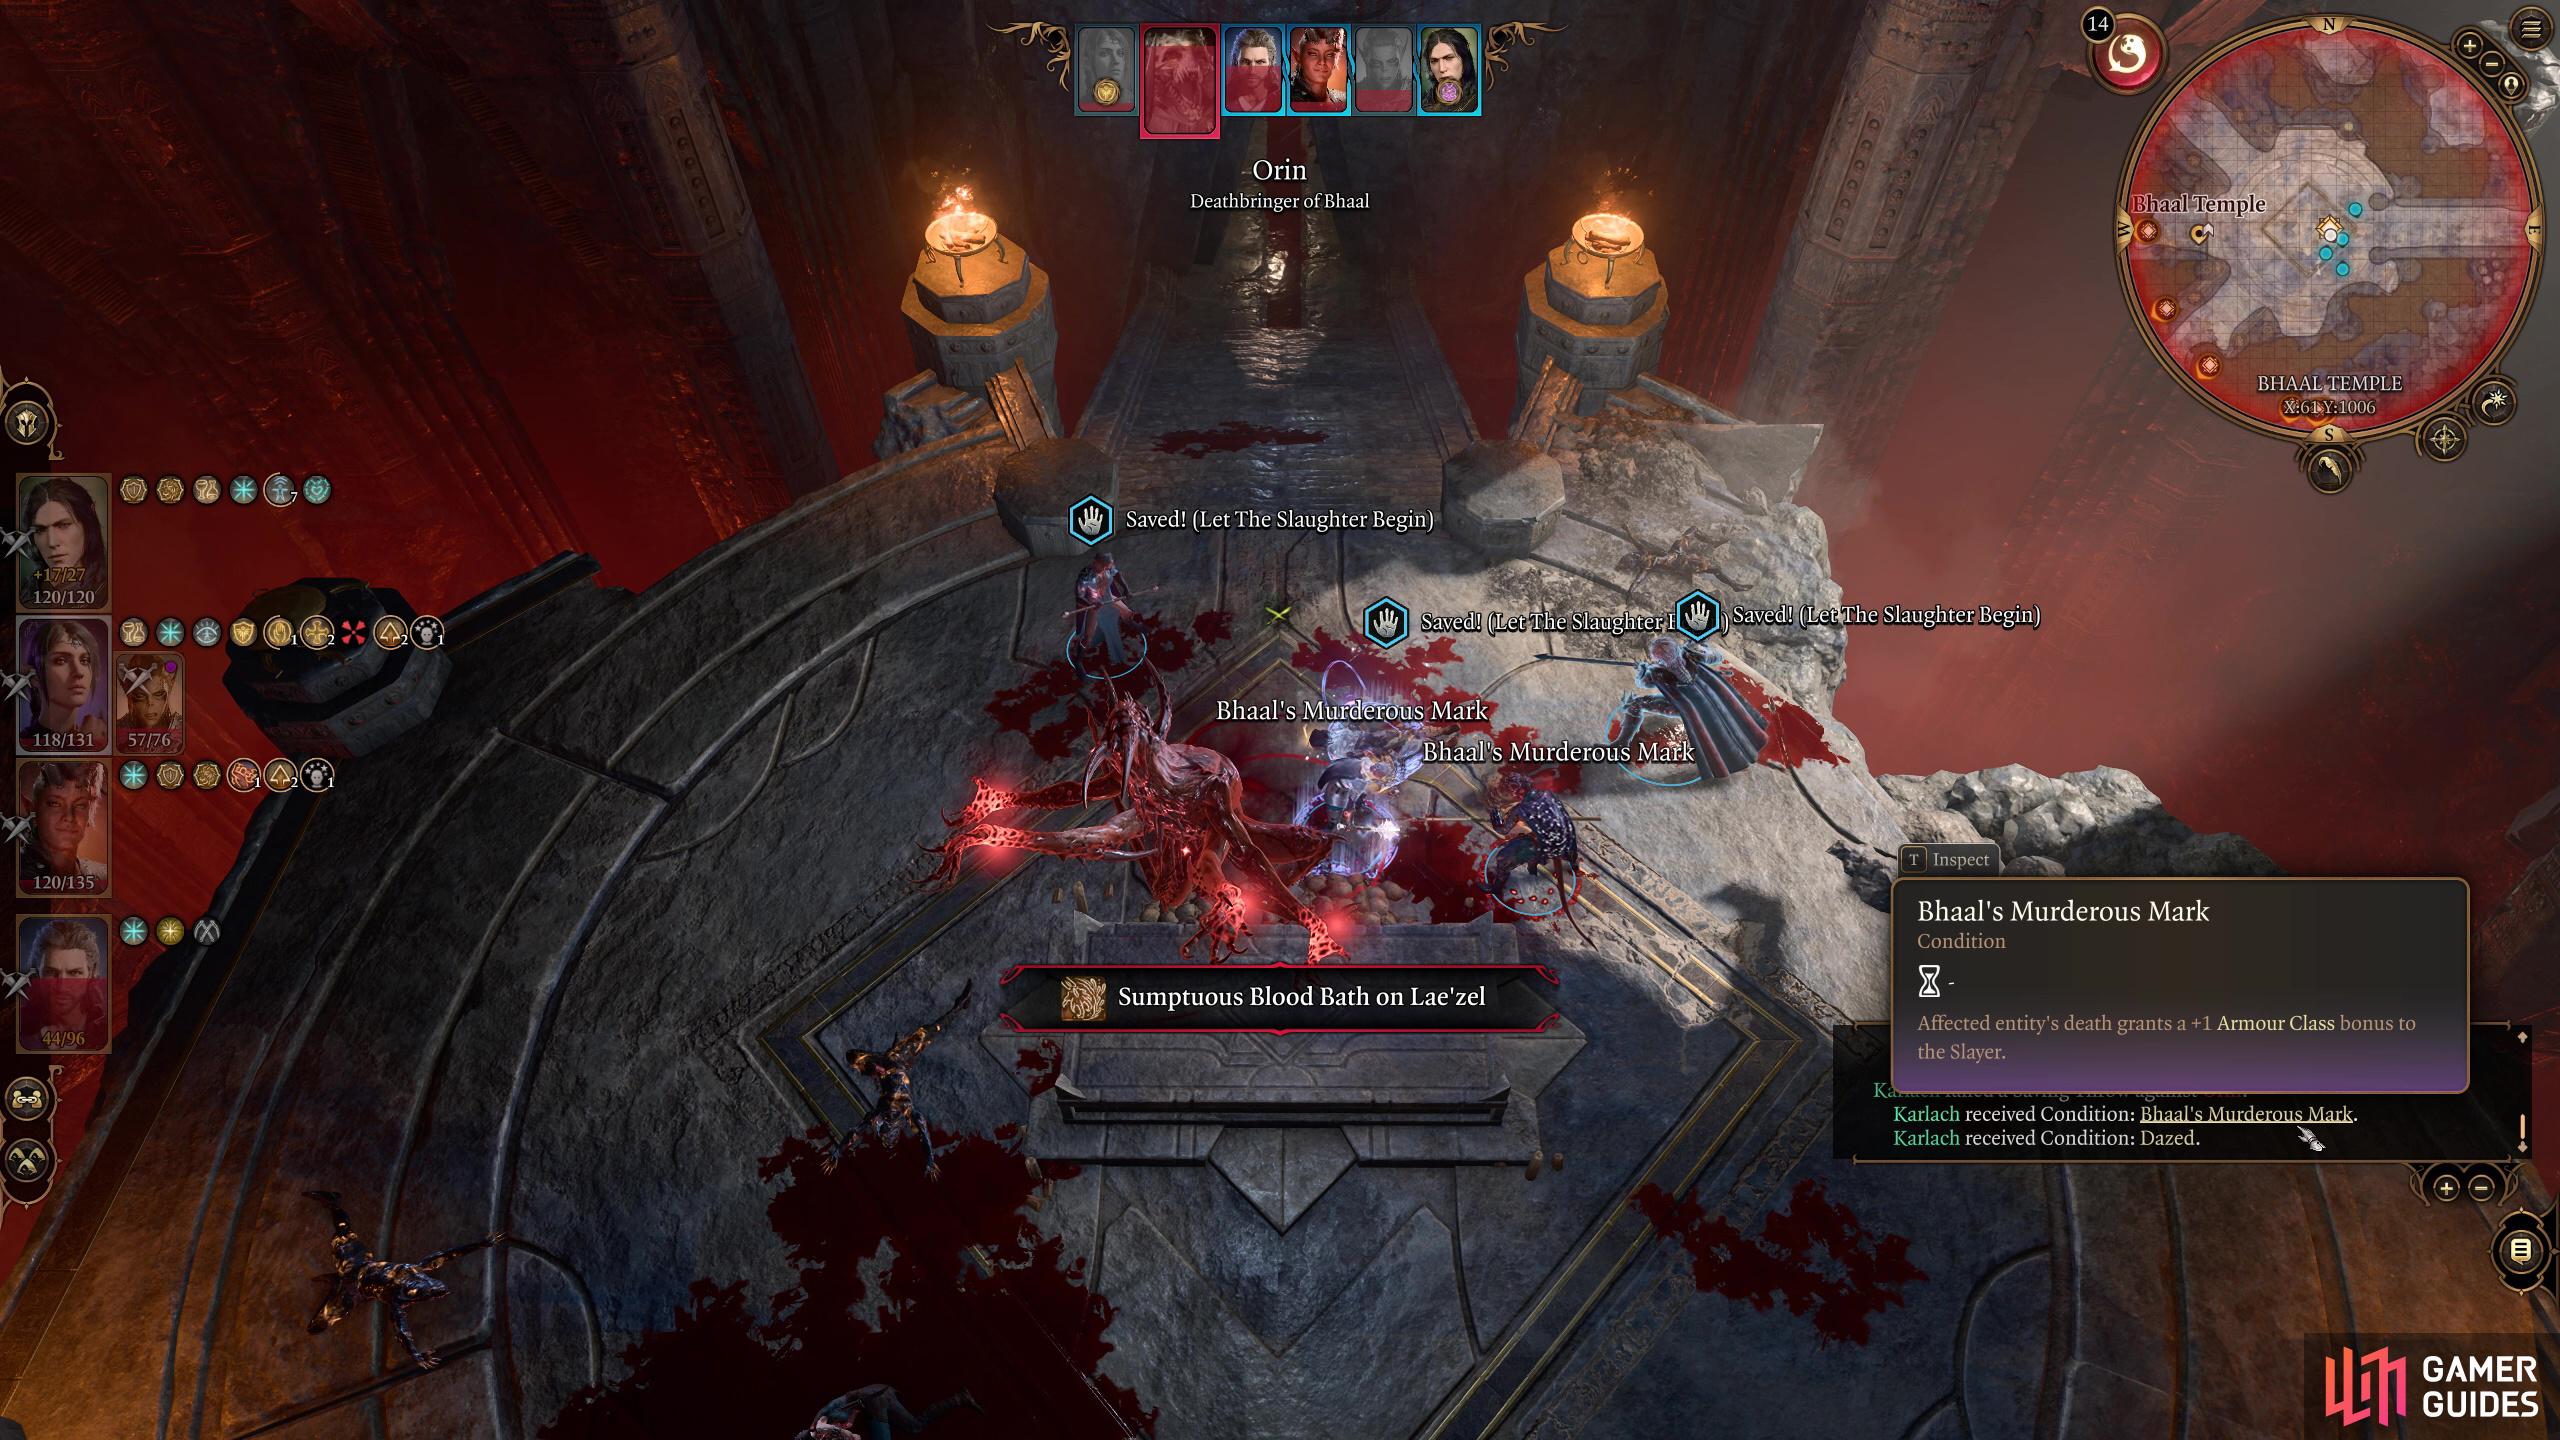
- Let the Slaughter Begin: Brands the target which makes them marked for death. If that member dies, it makes Orin harder to kill, giving her +1 AC.
- Sumptuous Blood Bath: 3d10 slashing damage that will Bleed you for three turns if you fail a Con save. Even on a save, you’ll still take half damage.
- Relentless Lunge: Orin leaps and smashes into you, dealing 4d6+7 bludgeoning damage. If you fail a strength save, that target will be Prone for 2 turns. It has a 12-meter range and only costs Orin a bonus action.
- Multiattack: Orin will perform four attacks that deal 1d4 each. She won’t use this a lot, but if she does, you’re lucky.
(1 of 4) Let the Slaughter Begin - Brands and Marks you for death. If that member dies, it’ll give Orin +1 AC.
Once you take Unstoppable away from Orin, the battle becomes more of who kills who first type of deal. Try to keep your party members apart as Orin has a lot of attacks that can hit multiple people, and don’t be afraid to use haste/speed potions to give you more actions. If you have ![]() The Reviving Hands gloves and Mass Heal Word on Shadowheart you can give everyone
The Reviving Hands gloves and Mass Heal Word on Shadowheart you can give everyone ![]() Blade Ward every time you use it which will reduce the damage by half for two turns. Now combine that with a Paladin’s Aura of Protection, and
Blade Ward every time you use it which will reduce the damage by half for two turns. Now combine that with a Paladin’s Aura of Protection, and ![]() Aura of Courage, and you’ll resist Frightened. Finally, if you get low on health, use Potions of Supreme Healing to top you back up, and hack away at Orin with Radiant attacks if you can and Orin will be down in no time.
Aura of Courage, and you’ll resist Frightened. Finally, if you get low on health, use Potions of Supreme Healing to top you back up, and hack away at Orin with Radiant attacks if you can and Orin will be down in no time.
Once you’ve defeated Orin, you’ll get a scene with The Emperor, and if you’ve already killed Lord Gortash, he’ll suggest taking out the last boss which makes this the point of no return. If you’re not ready for that battle just yet, tell it so, and you’ll be able to continue finishing up the rest of the content. After you’ve spoken to The Emperor, talk to the kidnapped ally to send them back to camp, and then loot everything to your heart’s desire including the Netherstone-Pommeled ![]() Bloodthirst dagger, and the legendary
Bloodthirst dagger, and the legendary ![]() Crimson Mischief shortsword.
Crimson Mischief shortsword.










 Sign up
No Comments