The Shadow Hunter is going down. We are finally in a position to give him a good kicking and our stats now allow us to defeat him easily and obtain 5* for the battle. On your way to the Den of Shadows, talk to the drunk sat down in the south end of the Warrens. Lackley’s quest “ Get The Girl ” sends you to Yusnaan, your next destination after returning to the Ark at 6am. You might as well pick up this quest since we are headed to Yusnaan soon.
After speaking with him, return to the Den of Shadows and the waypoint marker there. Setup your schemata before heading to the waypoint and the battle.
Boss Battle: Noel Kreiss
Schemata Setup
This setup is one of the best available at this stage of the game unless you have access to DLC garb. It will allow you to finish the battle in a matter of seconds and with 5*.
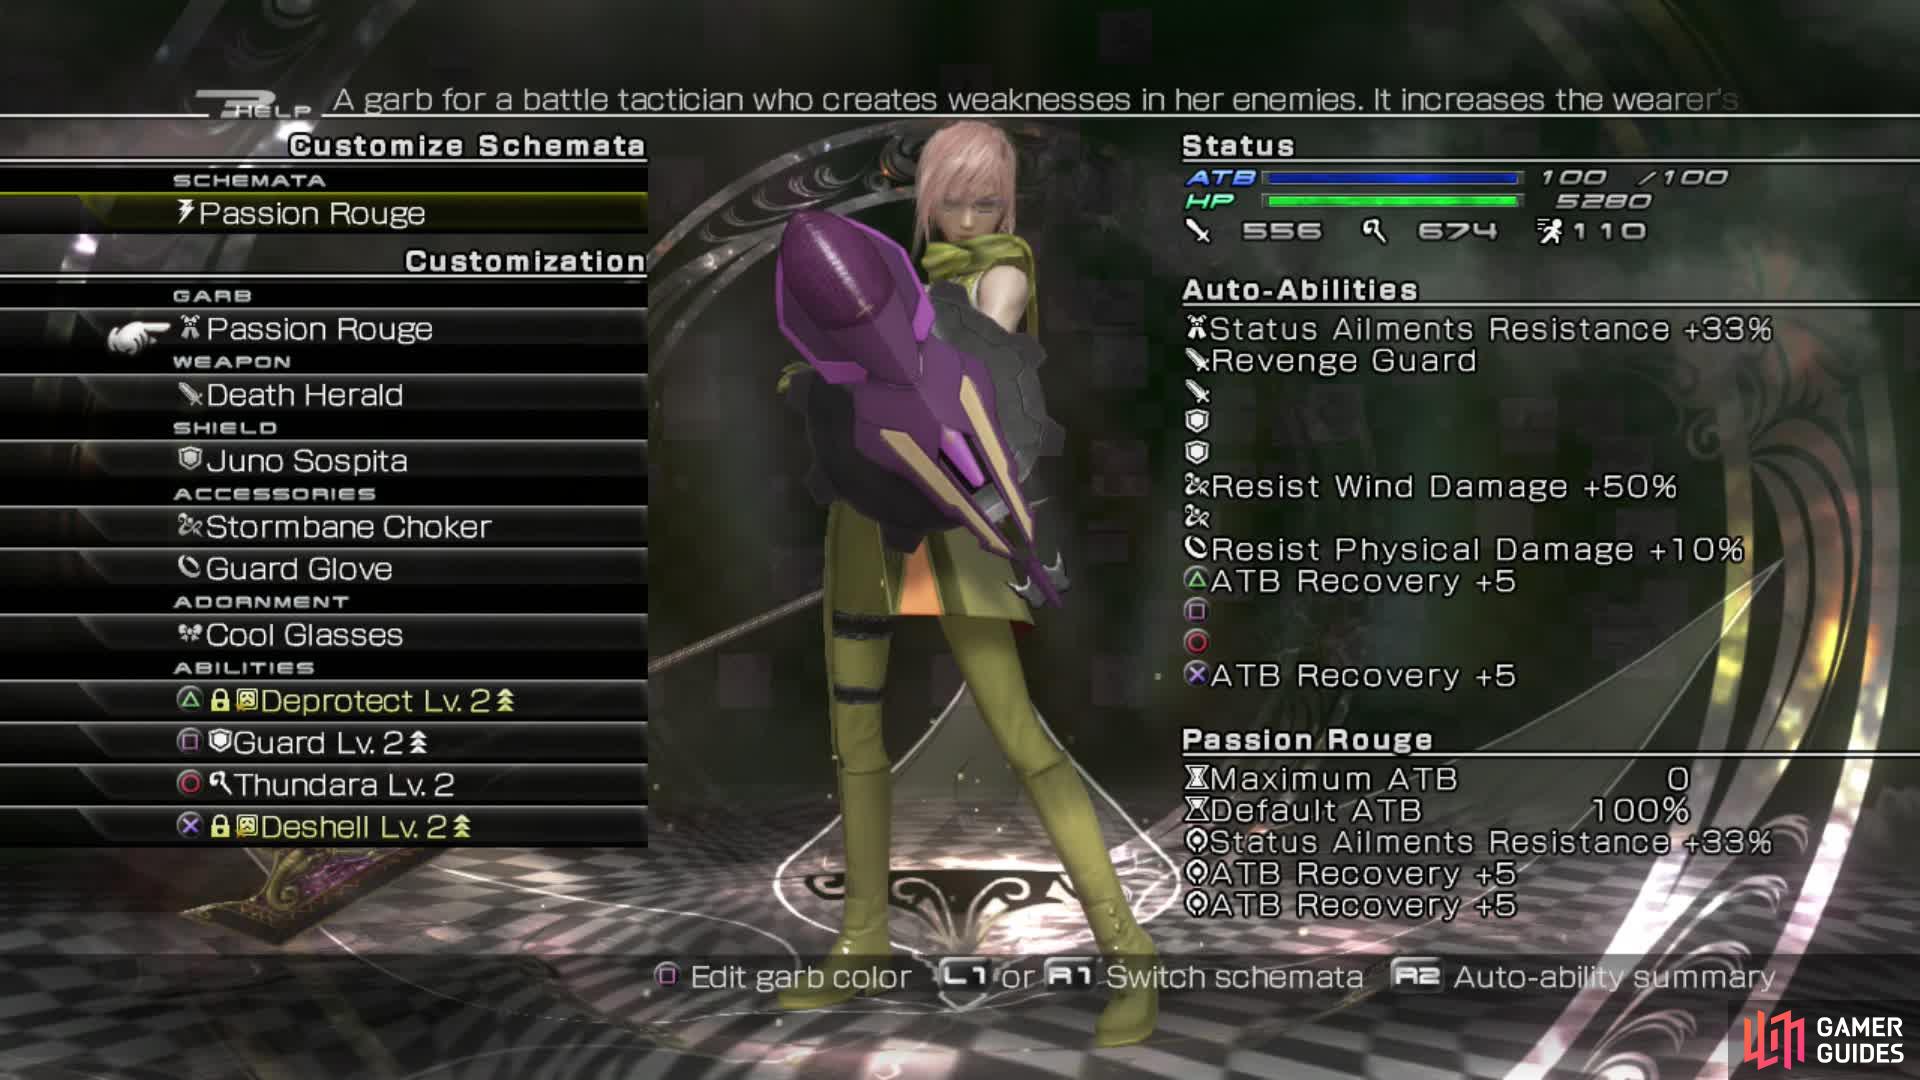
Passion Rouge (default)
| **Weapon** : | Death Herald or other high magic weapon |
|---|---|
| **Shield** : | Juno Sospita |
| **Accessories** : | Stormbane Choker, Guard Glove |
| **Abilities** : | Deprotect Lv 2 (locked), Guard Lv 2, Thundara Lv 2, Deshell Lv 2 (locked |
This will be your debuffing and defensive schema. The Stormbane Choker will protect you from the majority of Noel’s attacks and the high Guard level allows you to block all but the strongest attacks. You can start with a good debuff, guard and then go on the offensive with Thundara to build his gauge.
A good weapon is essential and hopefully you may have found one from fighting Anubys and other monsters. The Guard Glove and Stormbane Choker also help to reduce damage taken.
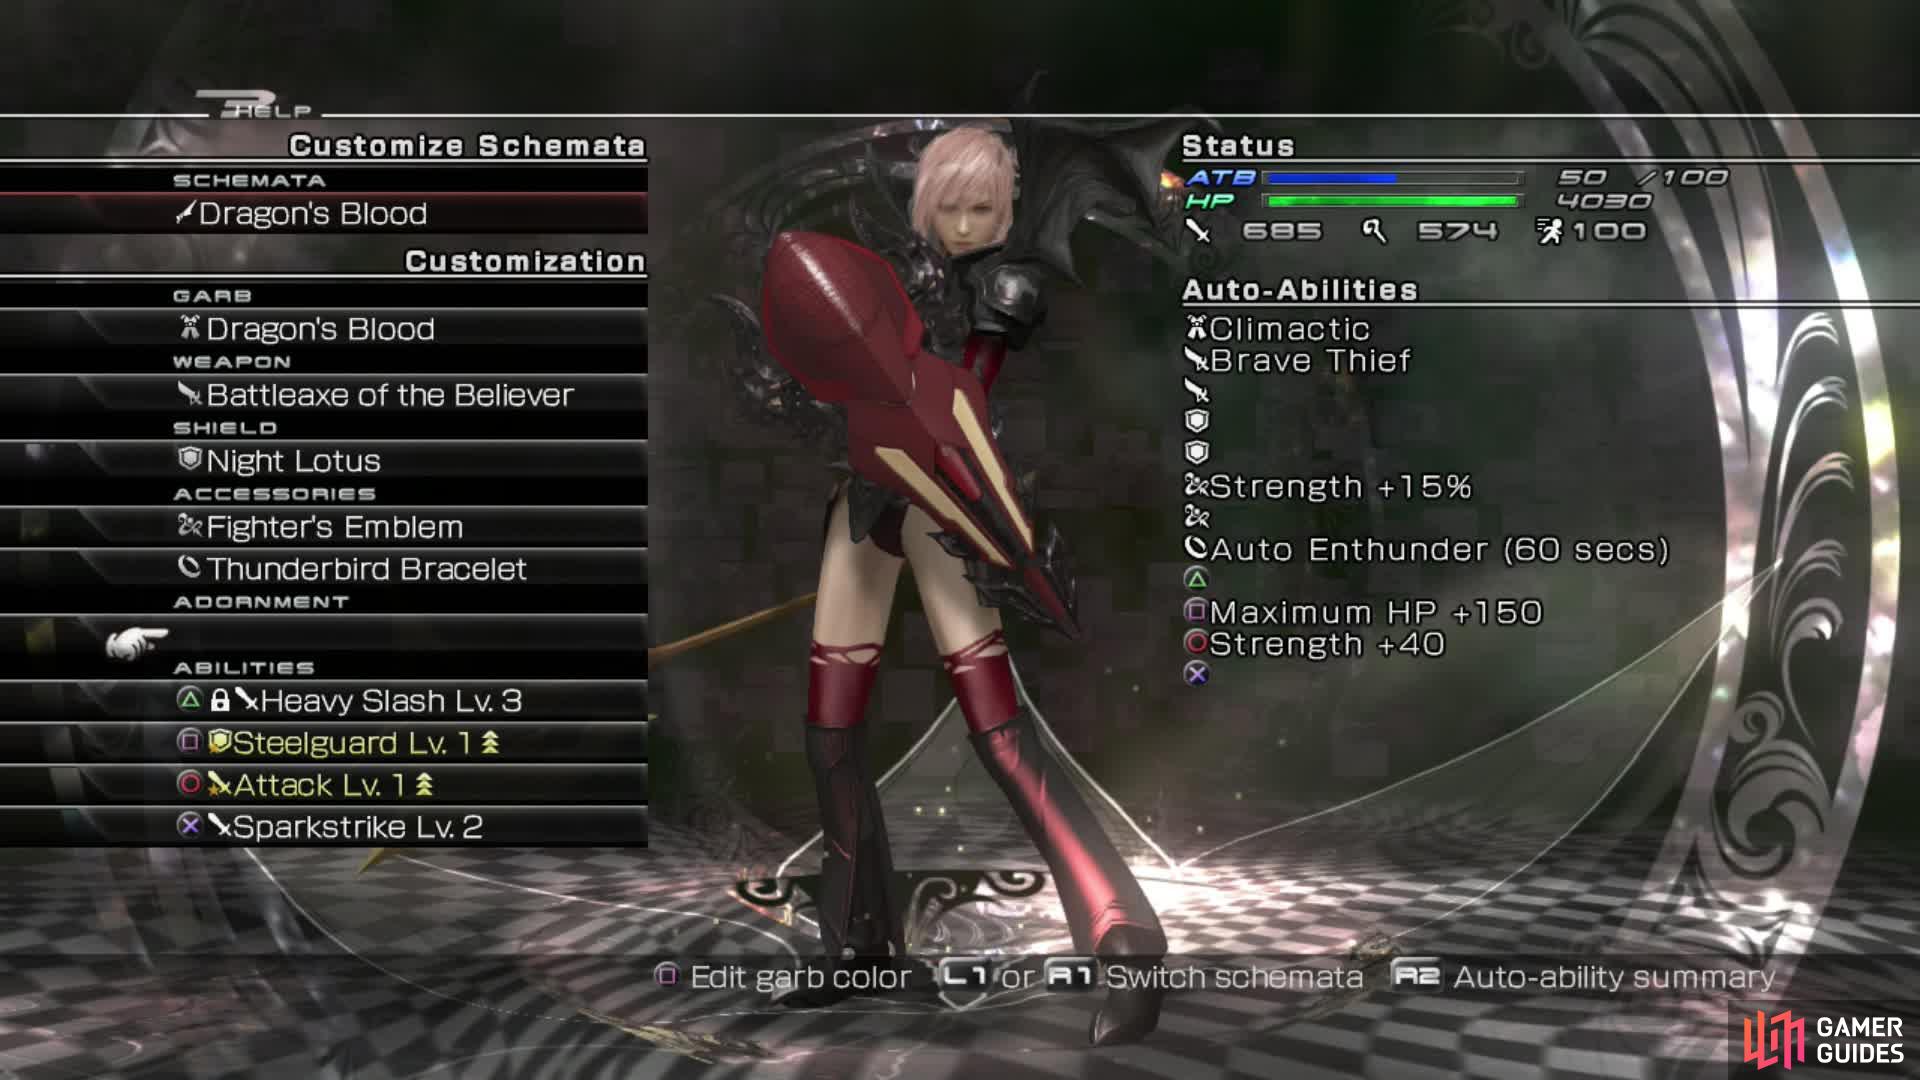
Dragon’s Blood
| **Weapon** : | Battleaxe of the Believer or a high strength weapon |
|---|---|
| **Shield** : | Night Lotus |
| **Accessories** : | Fighter’s Emblem, Thunderbird Bracelet |
| **Abilities** : | Heavy Slash Lv 3 (locked), Steelguard Lv 1, Attack Lv 1, Sparkstrike Lv 2 |
Dragon’s Blood will be used primarily after Noel has been staggered to really maximise any damage. It has the most damage-dealing potential and should be used as such. The Battleaxe of the Believer you just found is perfect for this schema and battle. It has a high strength stat. Add to this the Fighter’s Emblem and Enthunder from the Thunderbird Bracelet, you will do a ridiculous amount of damage per hit.
The Battleaxe of the Believer is essential for this battle.
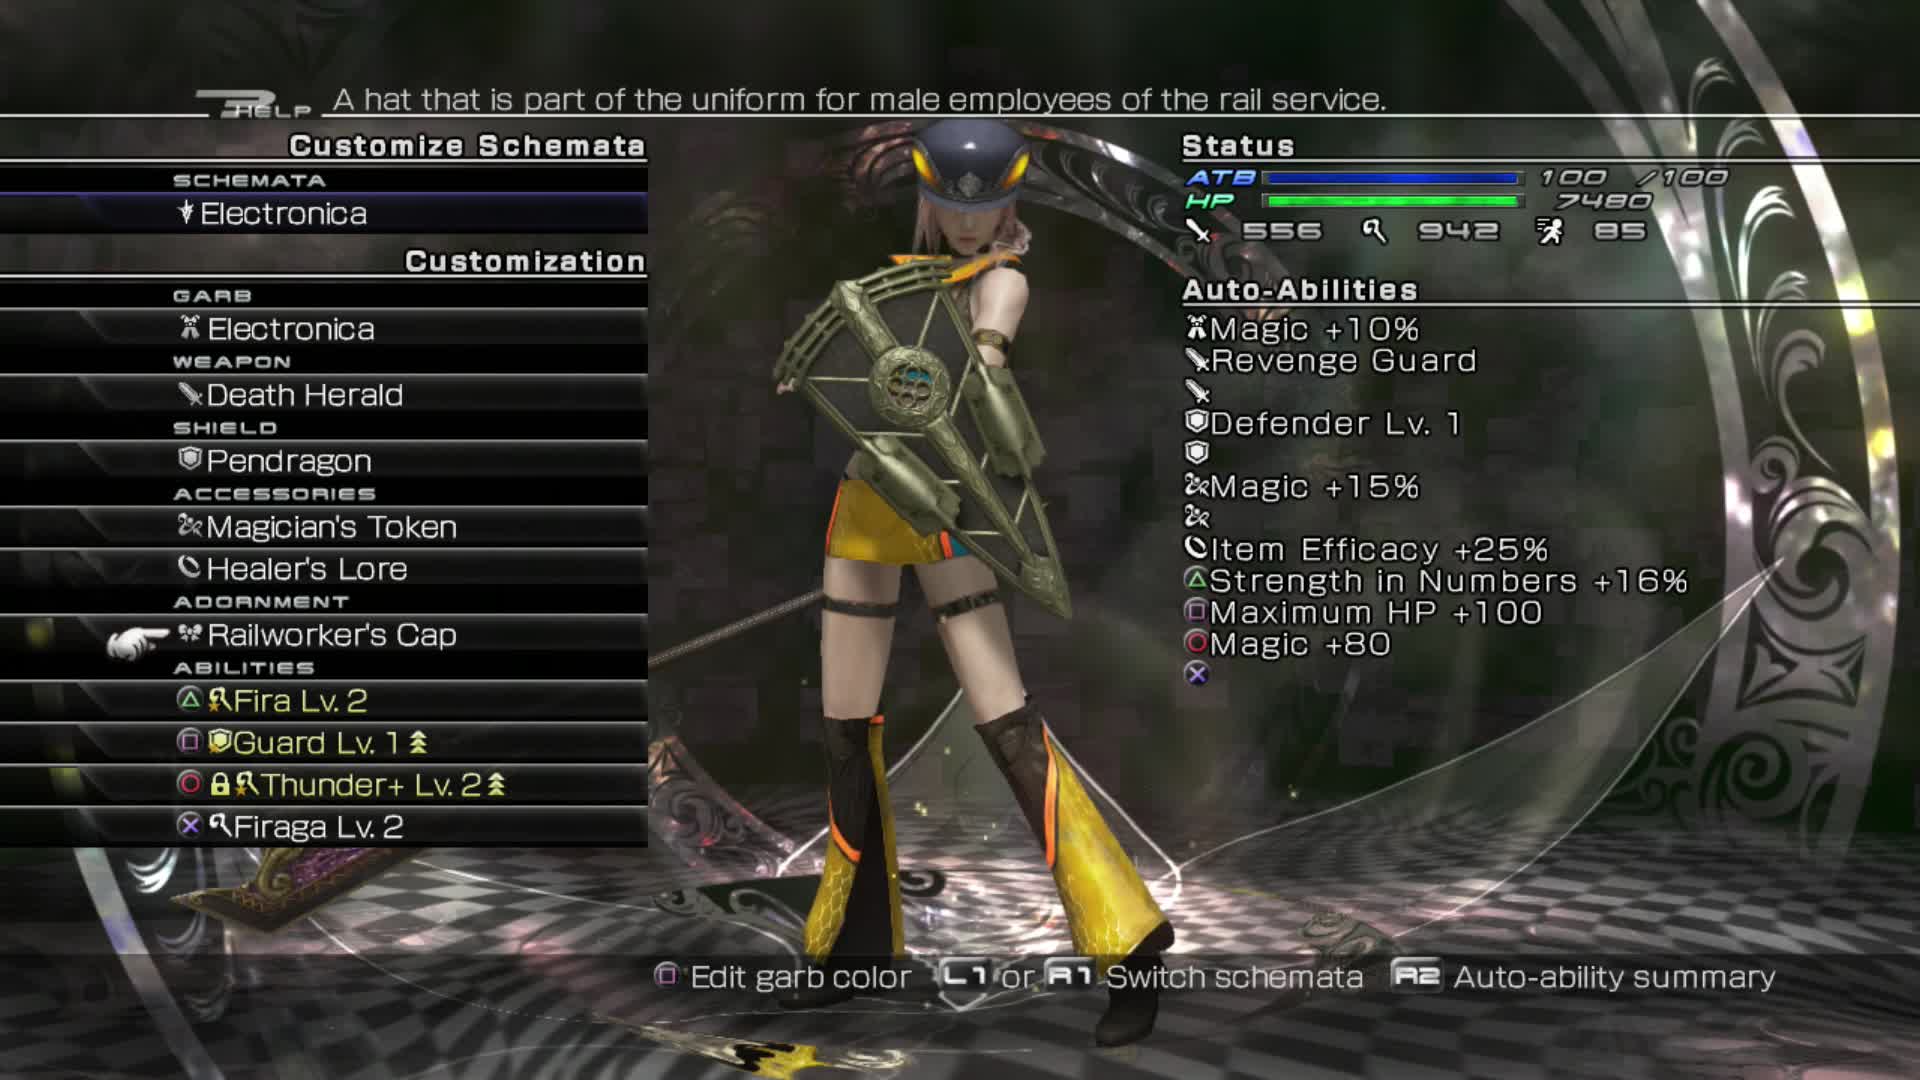
Electronica
| Weapon: | Death Herald or other weapon with a high magic stat |
|---|---|
| Shield: | Pendragon |
| Accessories: | Magician’s Token, Healer’s Lore |
| Abilities: | Fira Lv 2, Guard Lv 1, Thunder+ Lv 2 (locked), Firaga (or another strong spell that has a high stagger potential) |
This last schema will be your stagger building schema. Mixed in with Dragon’s Blood you should be able to stagger Noel easily. A good weapon can allow you to do a lot of damage with Thunder+ while the Pendragon will boost your HP, allowing you to focus on offense rather than defense. If you do need to use an item, the Healer’s Lore gives its effect a nice added boost.
A high magic weapon will make Thunder+ a very strong ability in this battle.
Strategy
You should not need many restoration items as we don’t plan on sticking around. In fact, with this setup, you should not need to heal at all so as long as you have a potion or two, you should be fine in terms of items.
Start by casting both Deprotect and Deshell because Noel is very vulnerable to both. You should maintain these debuffs throughout the battle but especially before you stagger him. Noel will always launch an attack with his weapon as soon as you have debuffed him so use Guard.
Switch to Electronica once his attack is over and set about building his Stagger Wave. Throw Thunder+ at him, interspersed with Sparkstrike and Thundara from the other two schemas. One round of each ability should see him staggered but make sure to stagger him using Sparkstrike for maximum effectiveness and also make sure Deprotect and Deshell remain active. As soon as he is staggered, switch to Dragon’s Blood if you aren’t already and unleash Overclock.
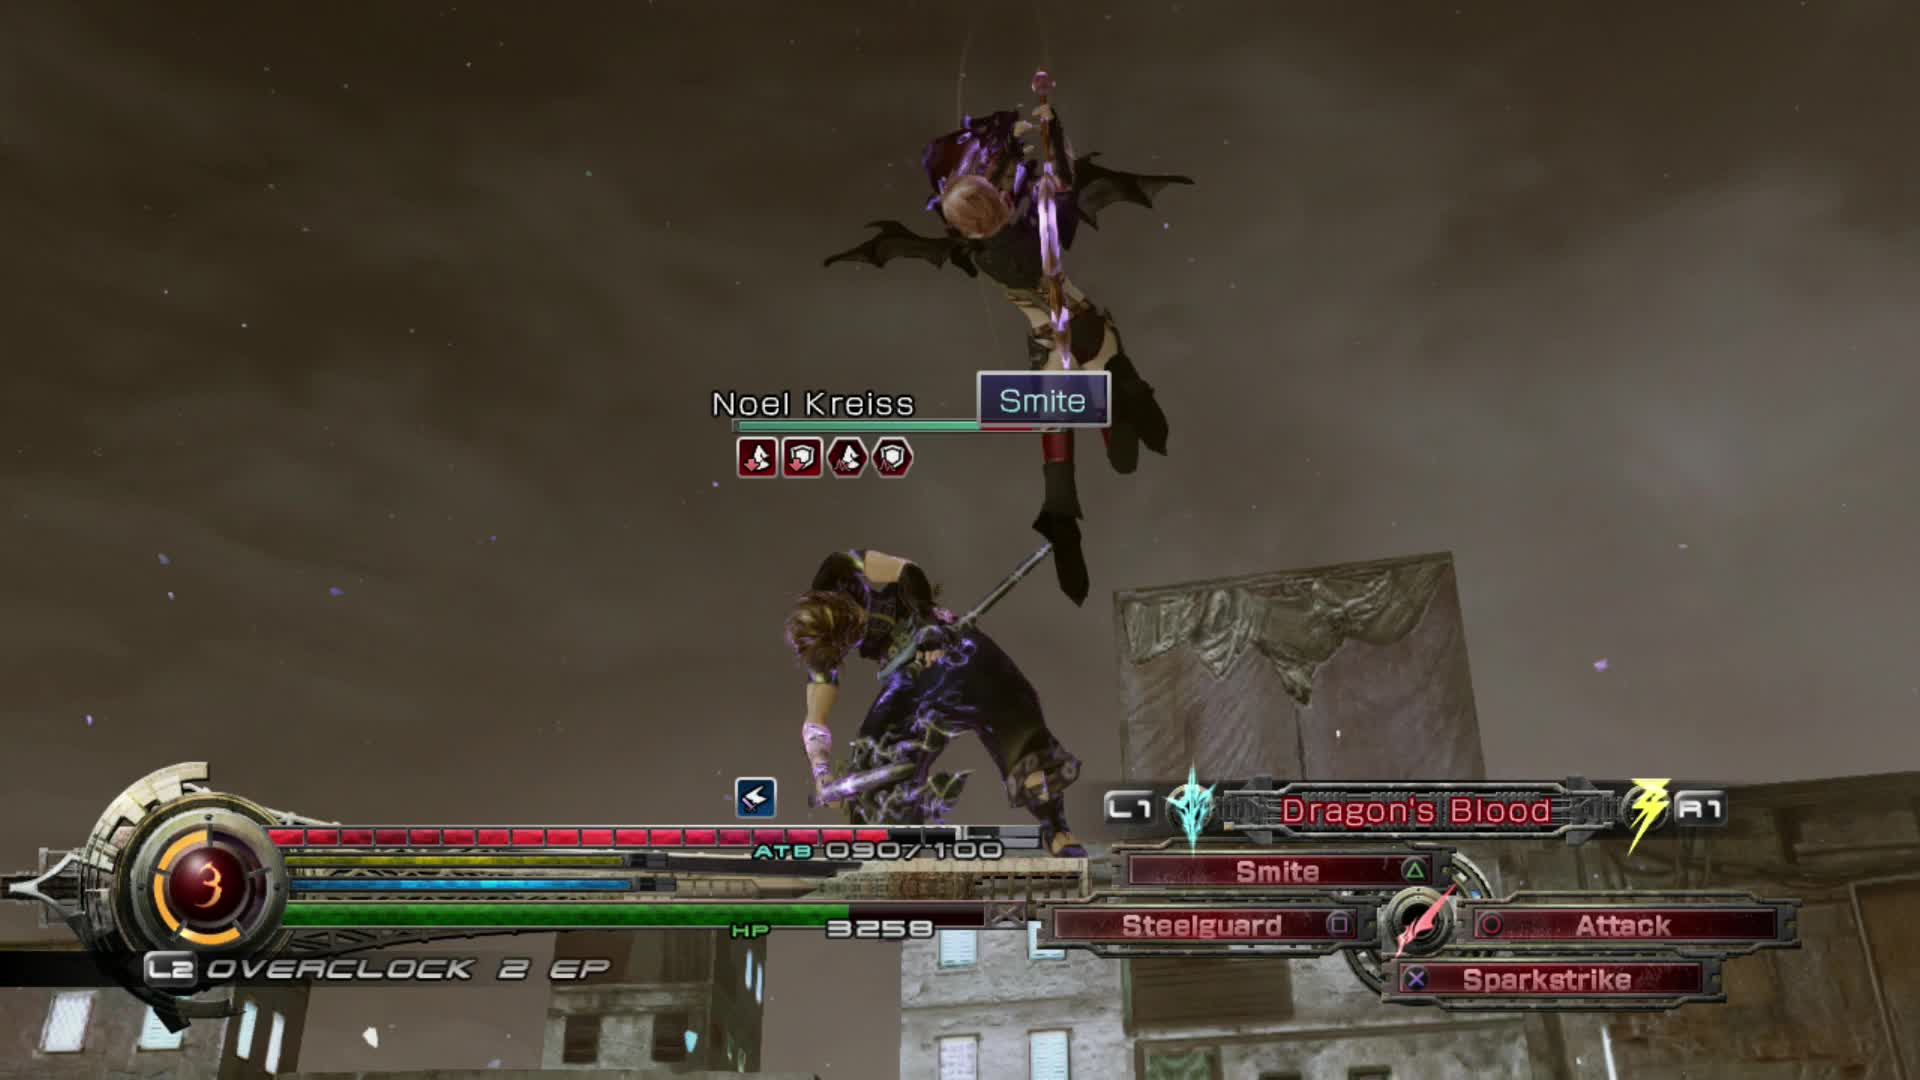
You can then launch a massive Sparkstrike assault on him to the point where his Wave turns red again. Eventually, your Attack option will change to Launch and when it does so, immediately Launch him into the air. With a full ATB bar (coming out of Overclock), and during Launch, the Heavy Slash ability on the Dragon’s Blood schema will turn into Smite . Smite as soon as you can for massive damage. Watch his HP bar plummet.
You can hit for well over 100000 using Smite here and almost kill him outright. You will also unlock the trophy/achievement “Fatal Impact” at the same time!
After that burst, simply return to basic attacks. He will always launch Meteor Javelin after a stagger so make sure to Guard while in the Passion Rouge schema to negate the worst of the damage. A last burst of Thunder+ should see him fall with the battle lasting well under a minute if you implement this strategy. Easy as pie!

The Hope of a Promise
Proof of one who has seen through the dark mysteries that lurked in Luxerion, bringing justice.

15
After the battle, you will receive a massive 10000 Gil, 5 EP, Max EP +1, HP +240, Max ATB +10, Strength +84 and Magic +70. The extra EP is very welcome and the boost to your stats will make the next day pass without too many hiccups. Pick up the Shadow Hunter weapon after the battle before you warp back to the Ark.


 Sign up
No Comments