Upon reaching Twilight Town, you will be introduced to the Lucky Emblems, which are Mickey Mouse-shaped drawings that you will find in most of the game’s worlds. It is also at this time that you will unlock the ability to take pictures with your Gummiphone, which will be necessary to take pictures of the emblems. Thankfully, none of the Lucky Emblems are missable, so you will be able to return to any world you’ve previously visited to snap their photos.
Not only are all the Lucky Emblems needed to obtain the Hidden Kings trophy/achievement, but they are also the thing needed to view the secret ending for the game. Unlike previous games, the emblems are the only requirement for the secret ending and the number needed depends on the difficulty played. If playing on Beginner, you will need to get all 90 emblems, while each subsequent difficulty requires 30 less (60 on Standard and 30 on Proud). In addition to the above, you will also receive rewards for reaching certain thresholds, with some of the items being quite good.
You will not be able to get any of the Emblems on your first visit to Olympus, so you need to return here after unlocking them in Twilight Town.
Lucky Emblem 1
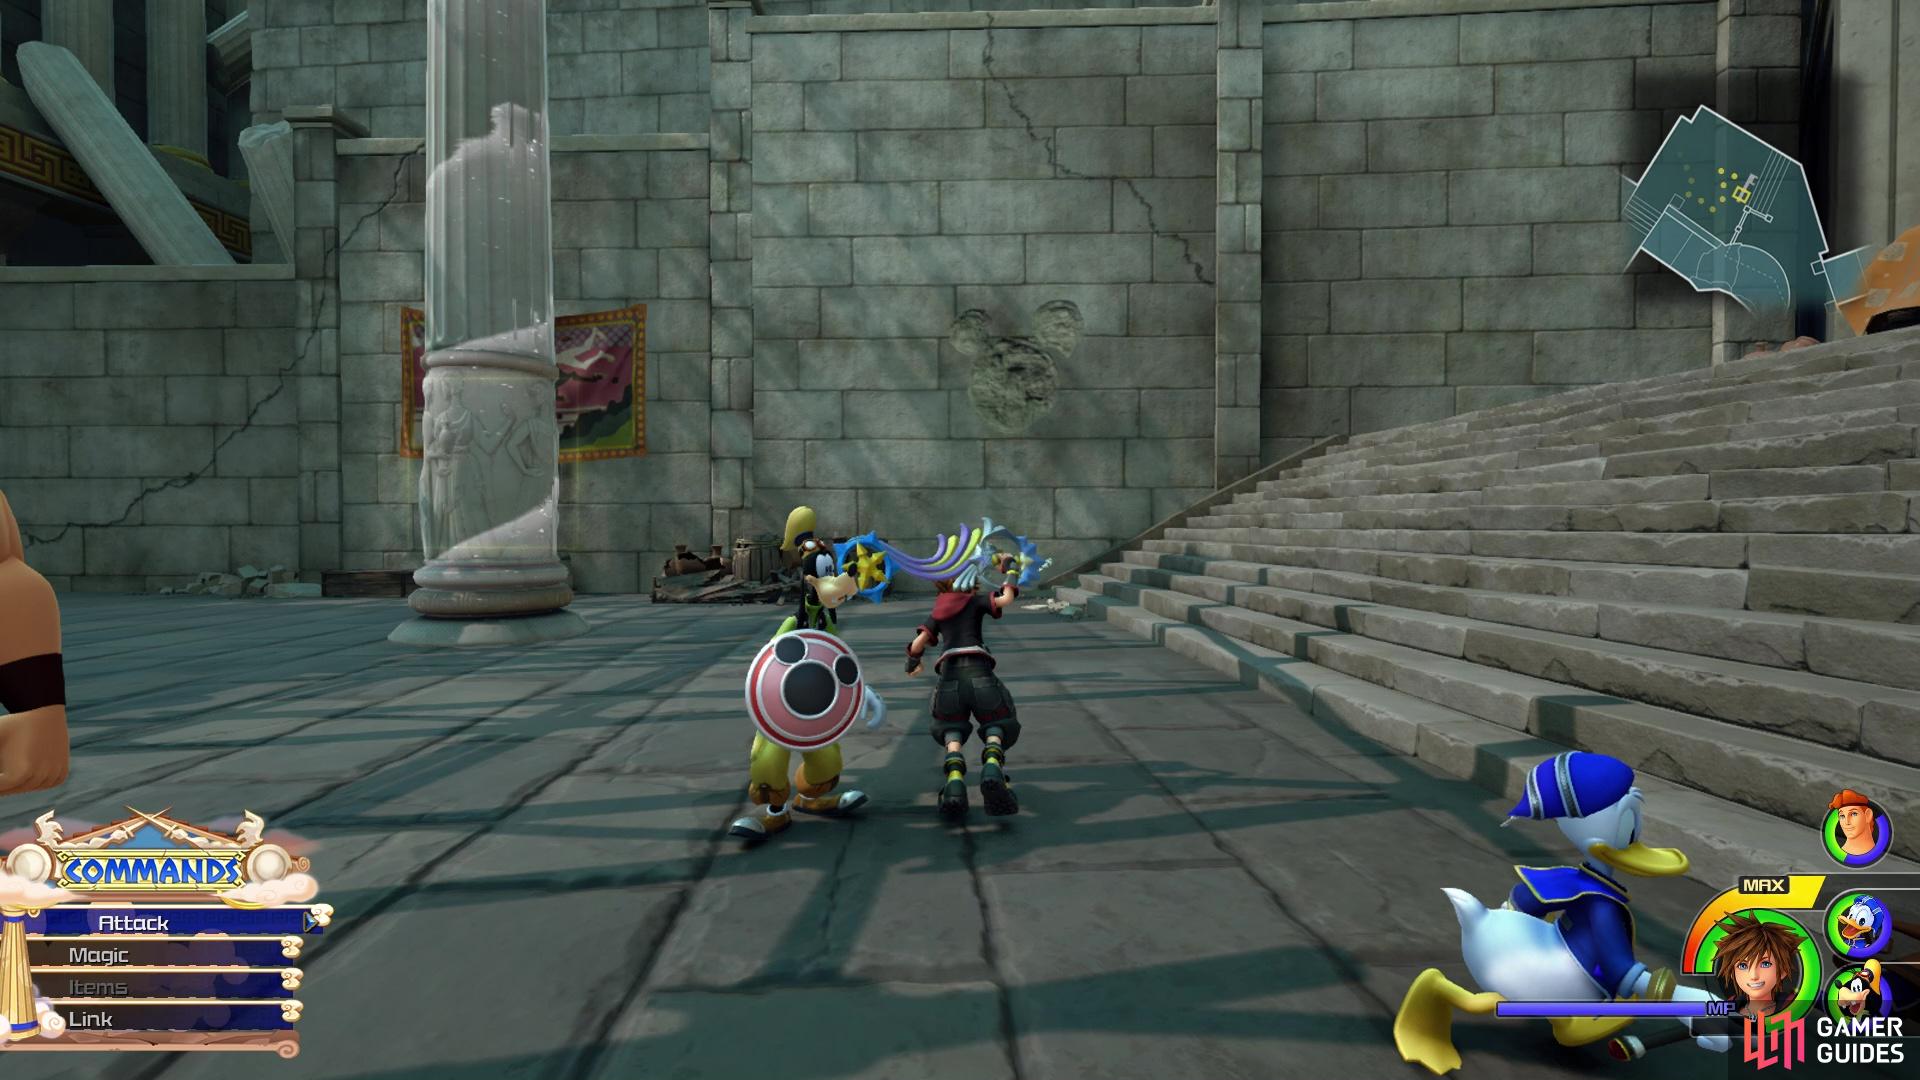
Head to the Thebes Overlook and follow the downward path until you get to the roof sliding section. When you can jump down to an area below, do that instead of floating down to the higher elevated platform. In the open area here, you will fight some Heartless, so it’s a good idea to clear them out, as the emblem is in the same area. You will find it on the northern wall, by the stairs leading to where you can first drop down.
Lucky Emblem 2
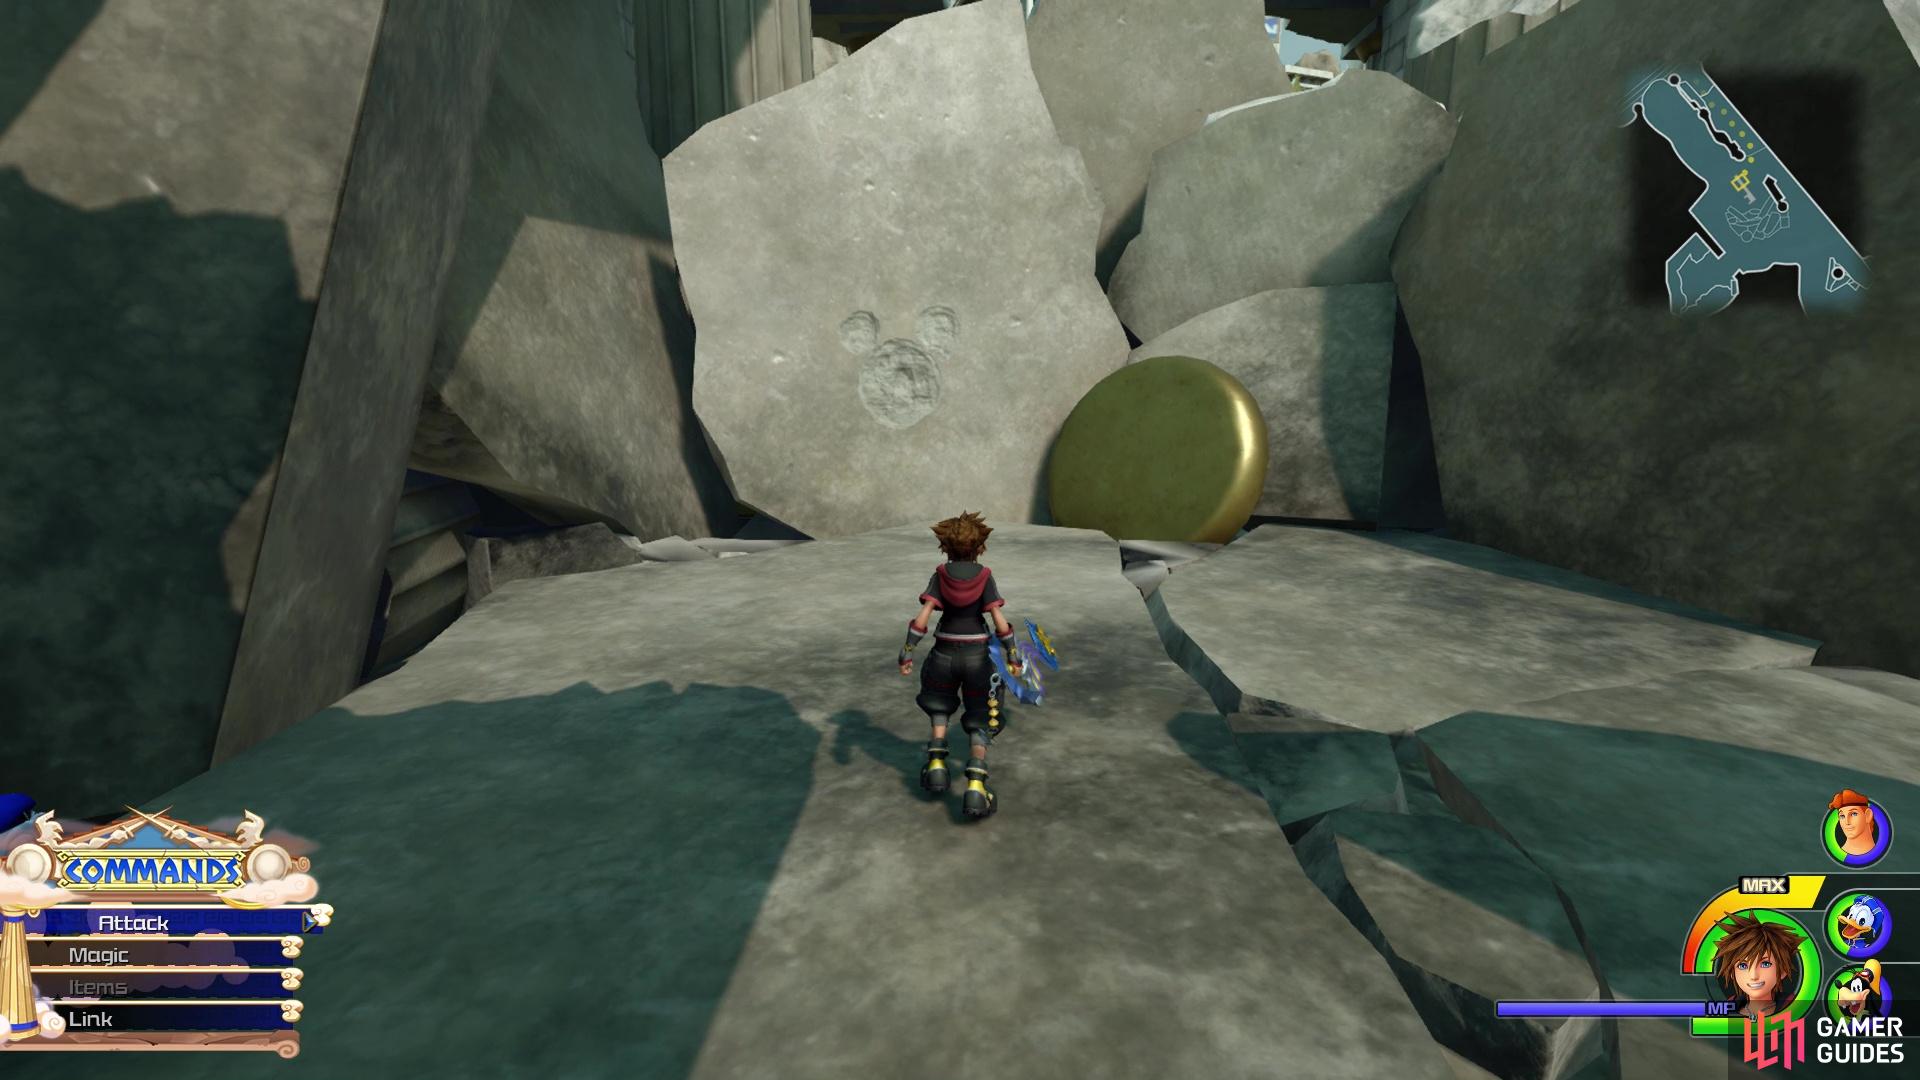
Go to the Thebes Garden save point and follow the path to the west, opting to eventually descend the stairs to reach The Big Olive section of the map. In the northern portion of this area is the Trinity Sled section, where the place was on fire the first time you came here to Olympus. You don’t need to use the sled this time, but travel this section and stop in the middle part, where you’ll find the emblem on the southern debris.
Lucky Emblem 3
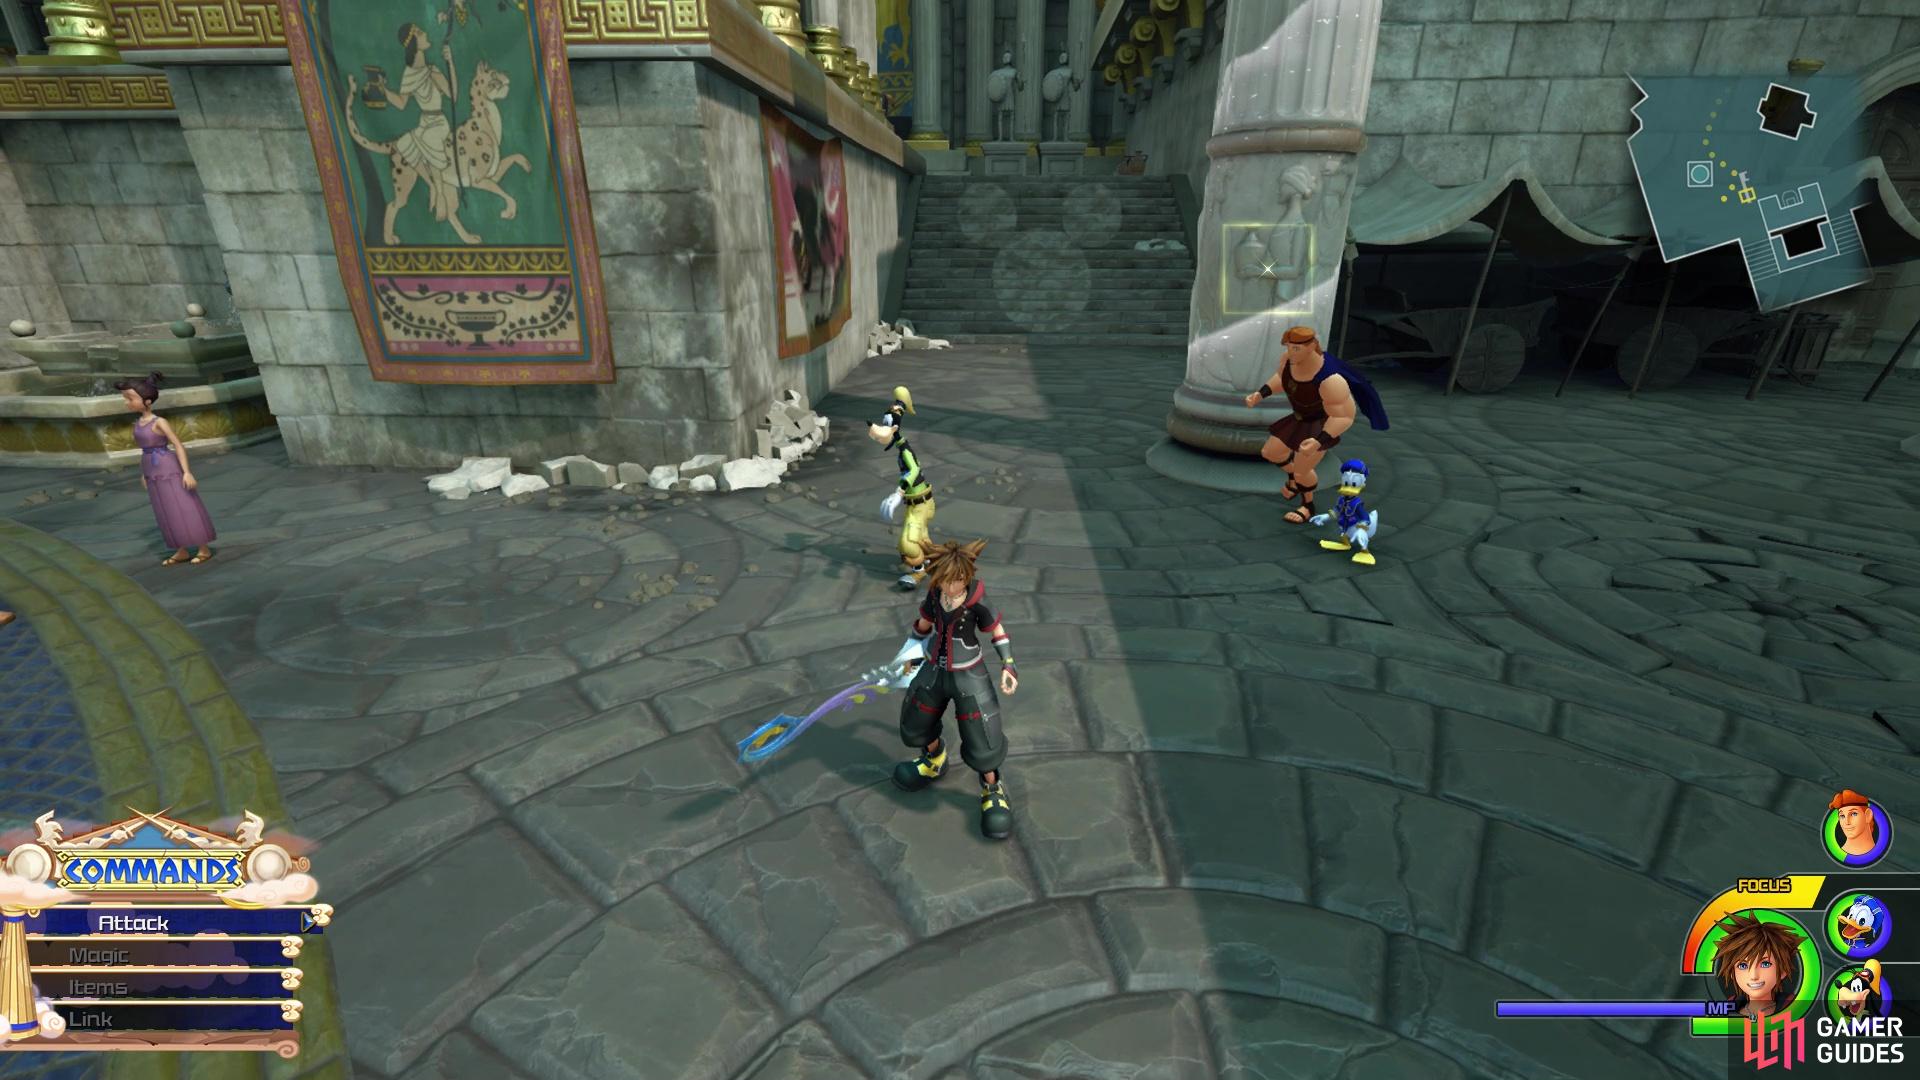
This one is close to the Thebes Agora save point, so head to that area. On the southern end of this area are two sets of stairs that connect to the same place (there’s a chest here). The emblem will be on the western set of stairs.
Lucky Emblem 4
(1 of 2) Head up the stairs by the Overlook save point
Head up the stairs by the Overlook save point (left), to find the Emblem on the wall (right)
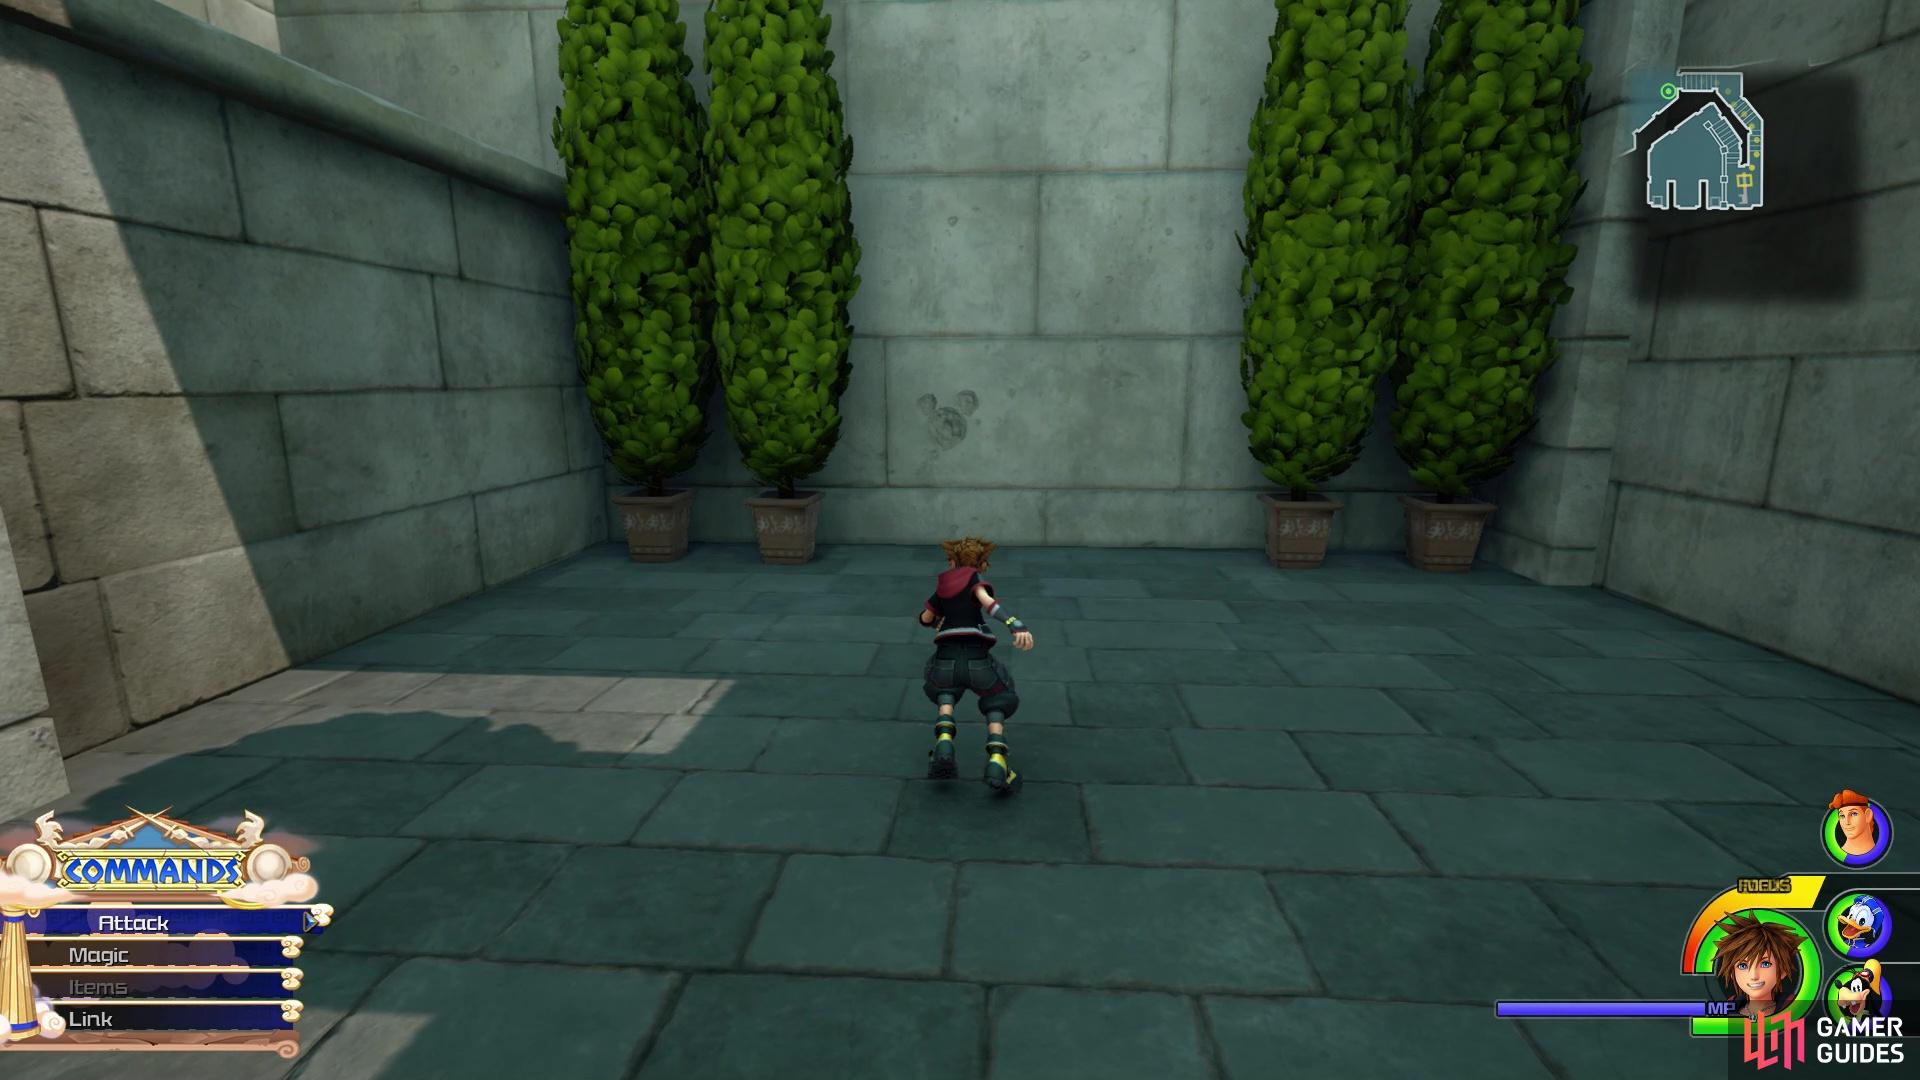
Teleport to the Thebes Overlook area and climb the stairs right next to the save point. Before the final set of stairs, look along the southern wall for the emblem, which will be between the plants.
Lucky Emblem 5
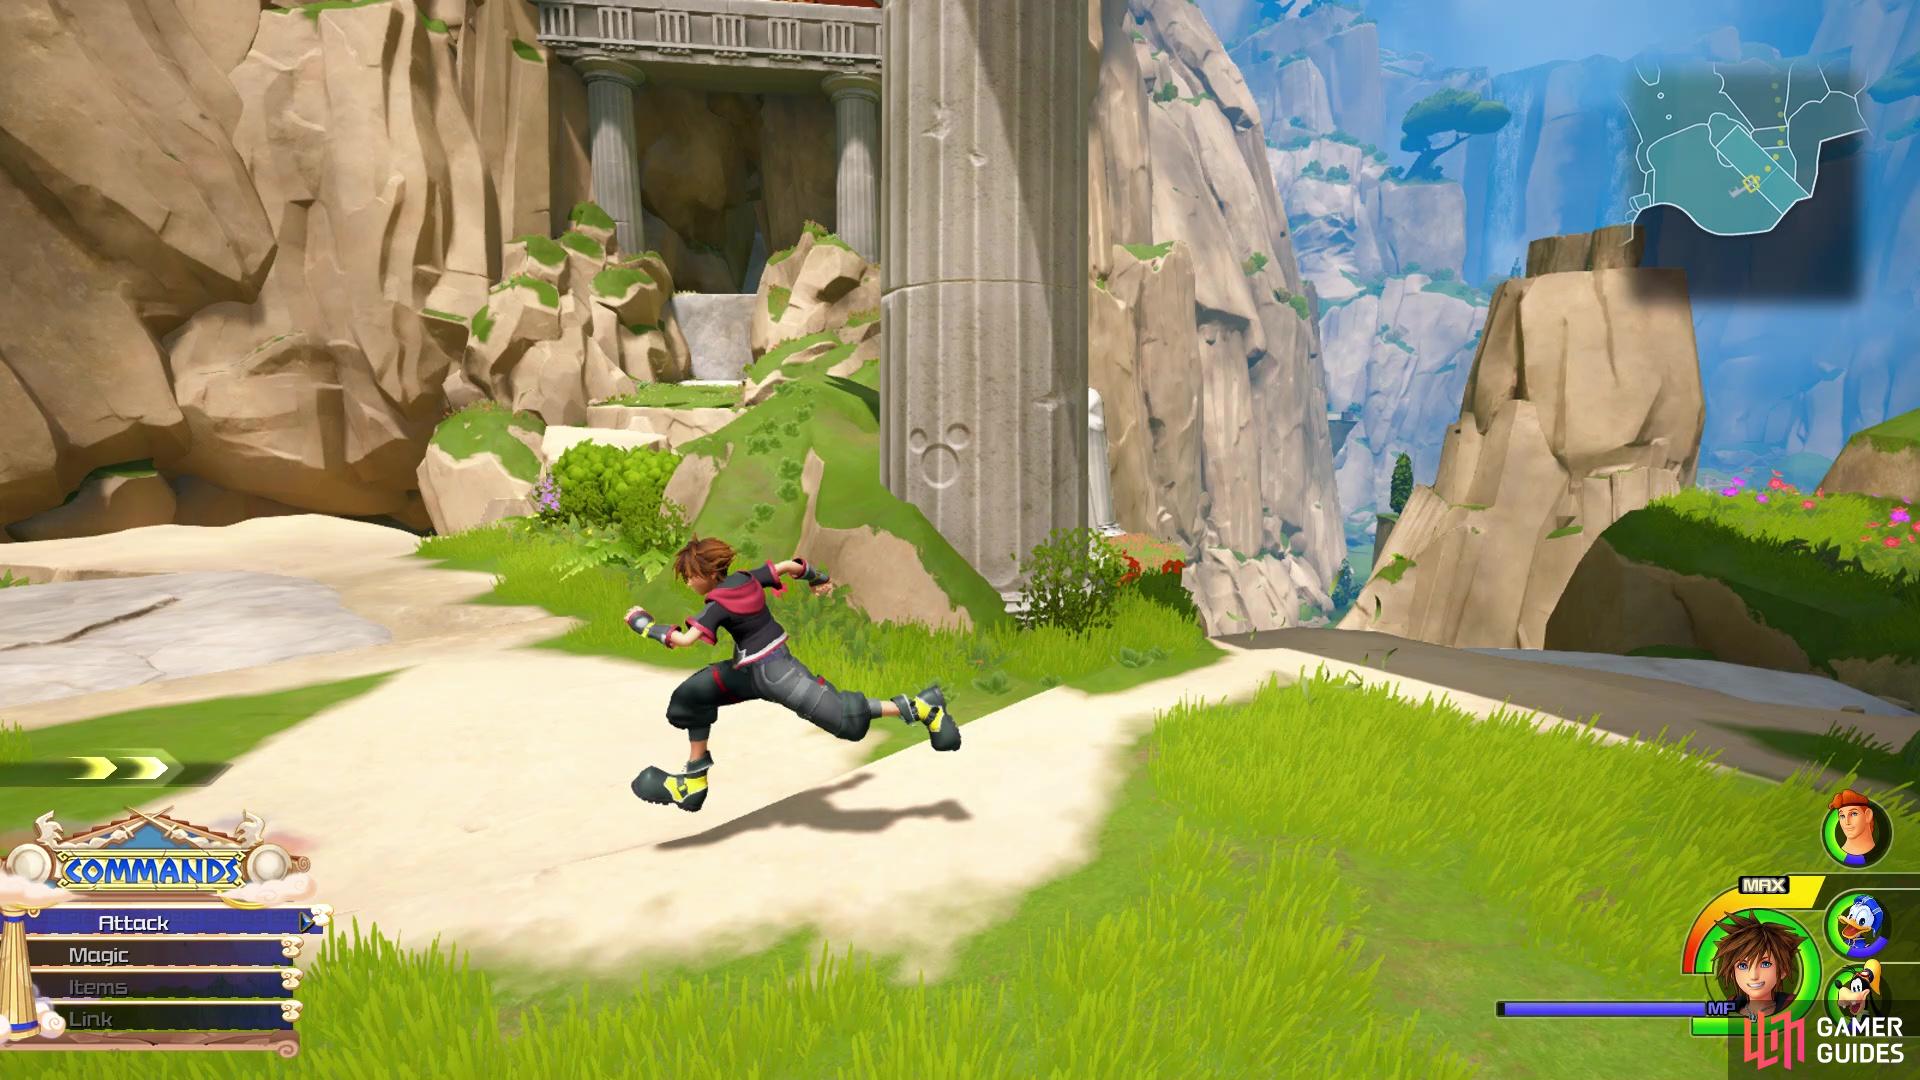
Three of the Lucky Emblems are located in the Cliff Ascent section of Mount Olympus, so just progress normally (can run past the Heartless), until you see those words pop up on your screen. When you get to the point where you have two different ways to go, venture south first. Run up the walls and when you pass under the large arch, look on one of the pillars for the emblem.
Lucky Emblem 6
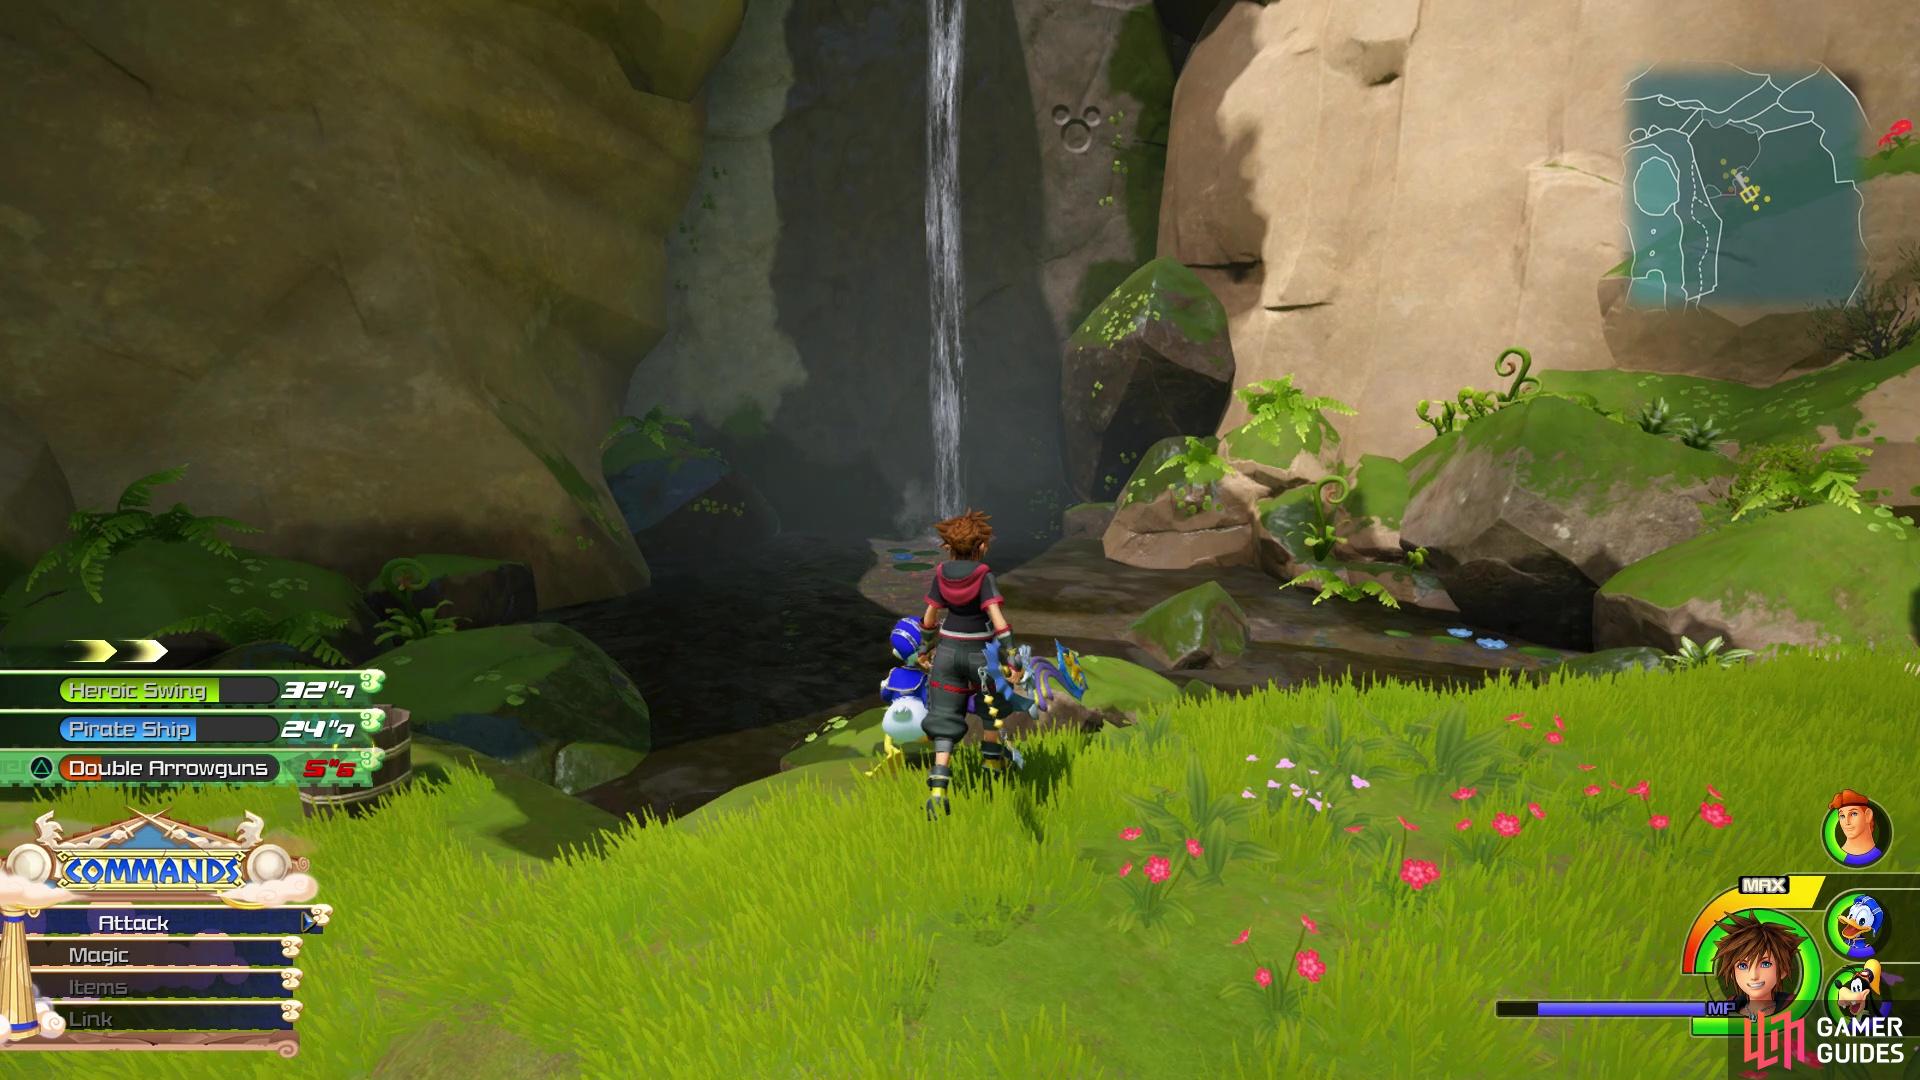
Three of the Lucky Emblems are located in the Cliff Ascent section of Mount Olympus, so just progress normally (can run past the Heartless), until you see those words pop up on your screen. When you get to the point where you have two different ways to go, venture north this time. You fought some Water Cores on your first visit, but now there are Shadows and Air Soldiers now. Clear the area, then look where the waterfall once was to see the emblem on the rock wall.
Lucky Emblem 7
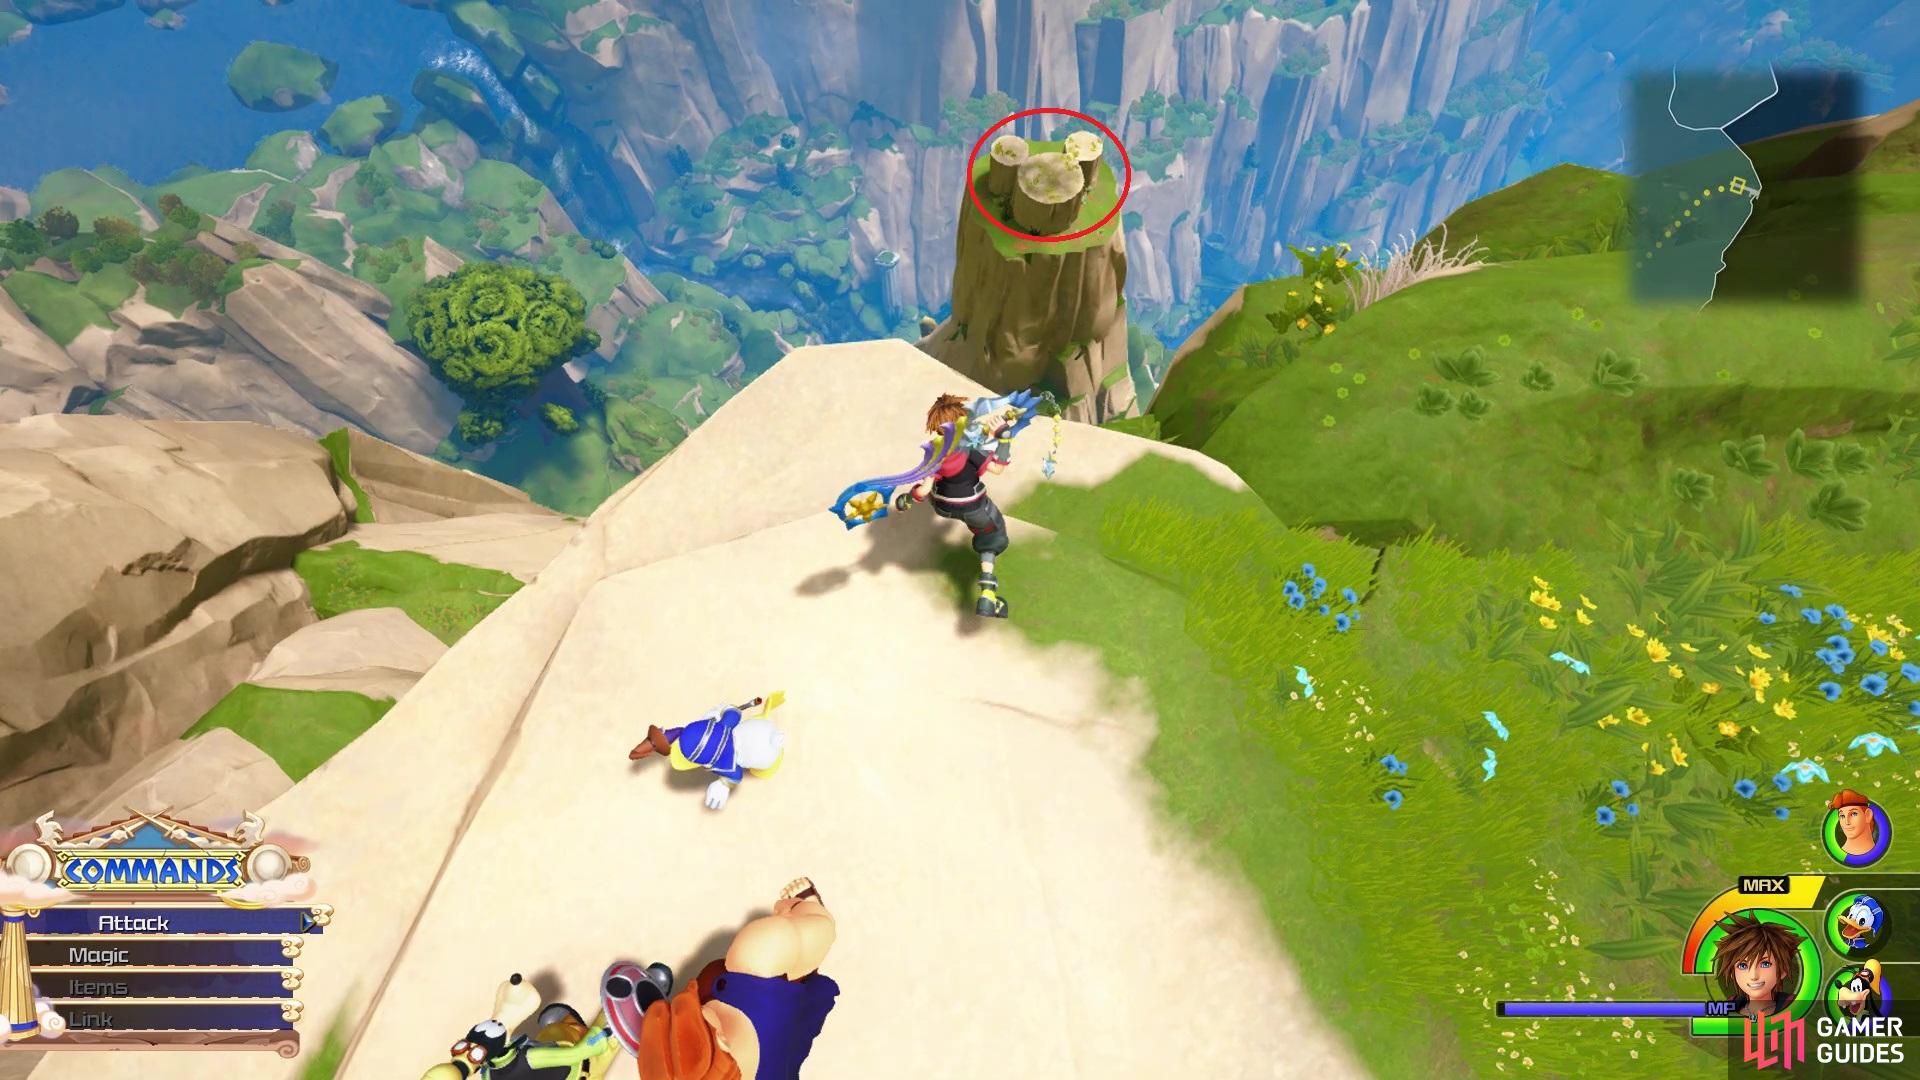
From the previous two emblems, continue climbing up the mountain, until you get to the cave where part of the floor was destroyed. Exit this cave to the south and look over the cliff’s ledge, where you should see a formation that strangely looks like an emblem on a plateau below you, so snap the picture of it.
Lucky Emblem 8
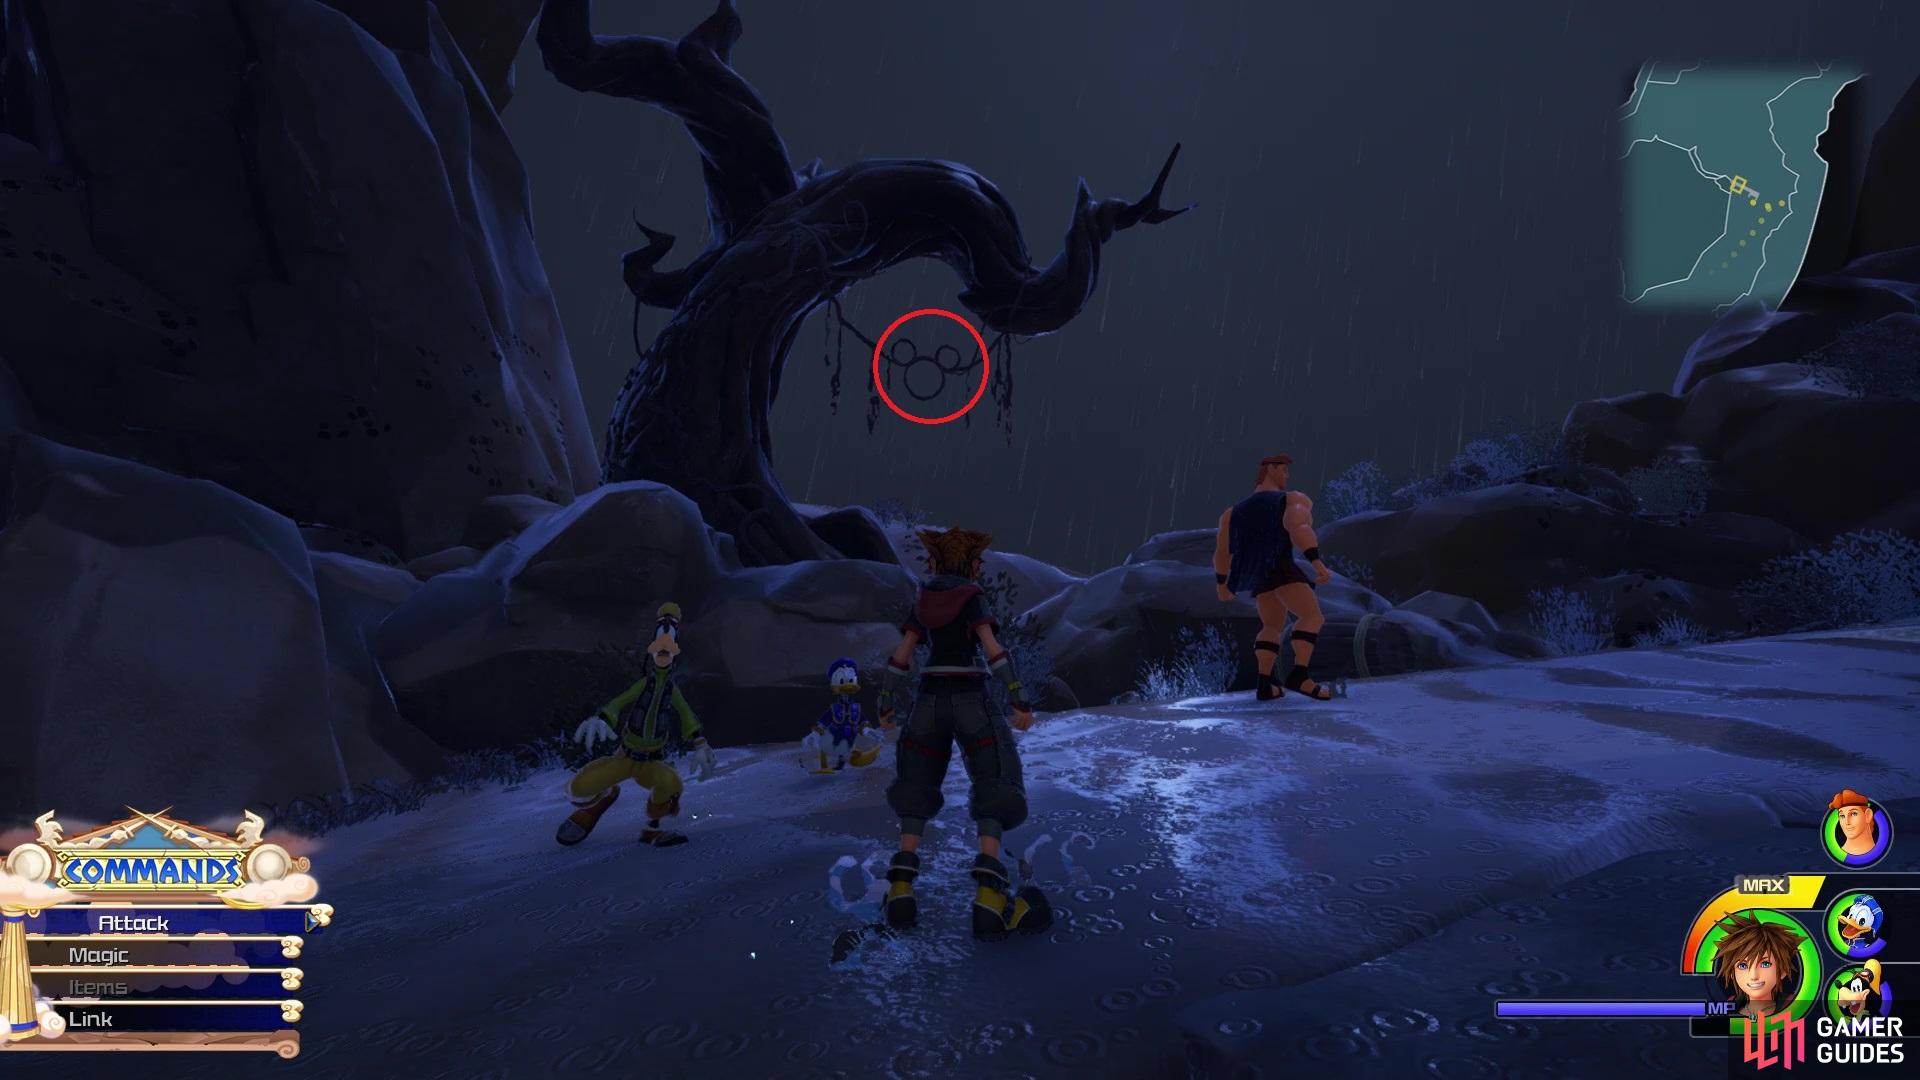
Continue climbing the mountain and when you reach the area where you first encountered the Rock Titan, you’ll notice that the sky begins getting darker. Keep going until you get into your first battle with Heartless in this area, which will be against some Air Soldiers and Shadows. Once you clear them out, look to the eastern edge of the map to spot a tree, which has some kind of vines or something that will be forming the emblem.
Lucky Emblem 9
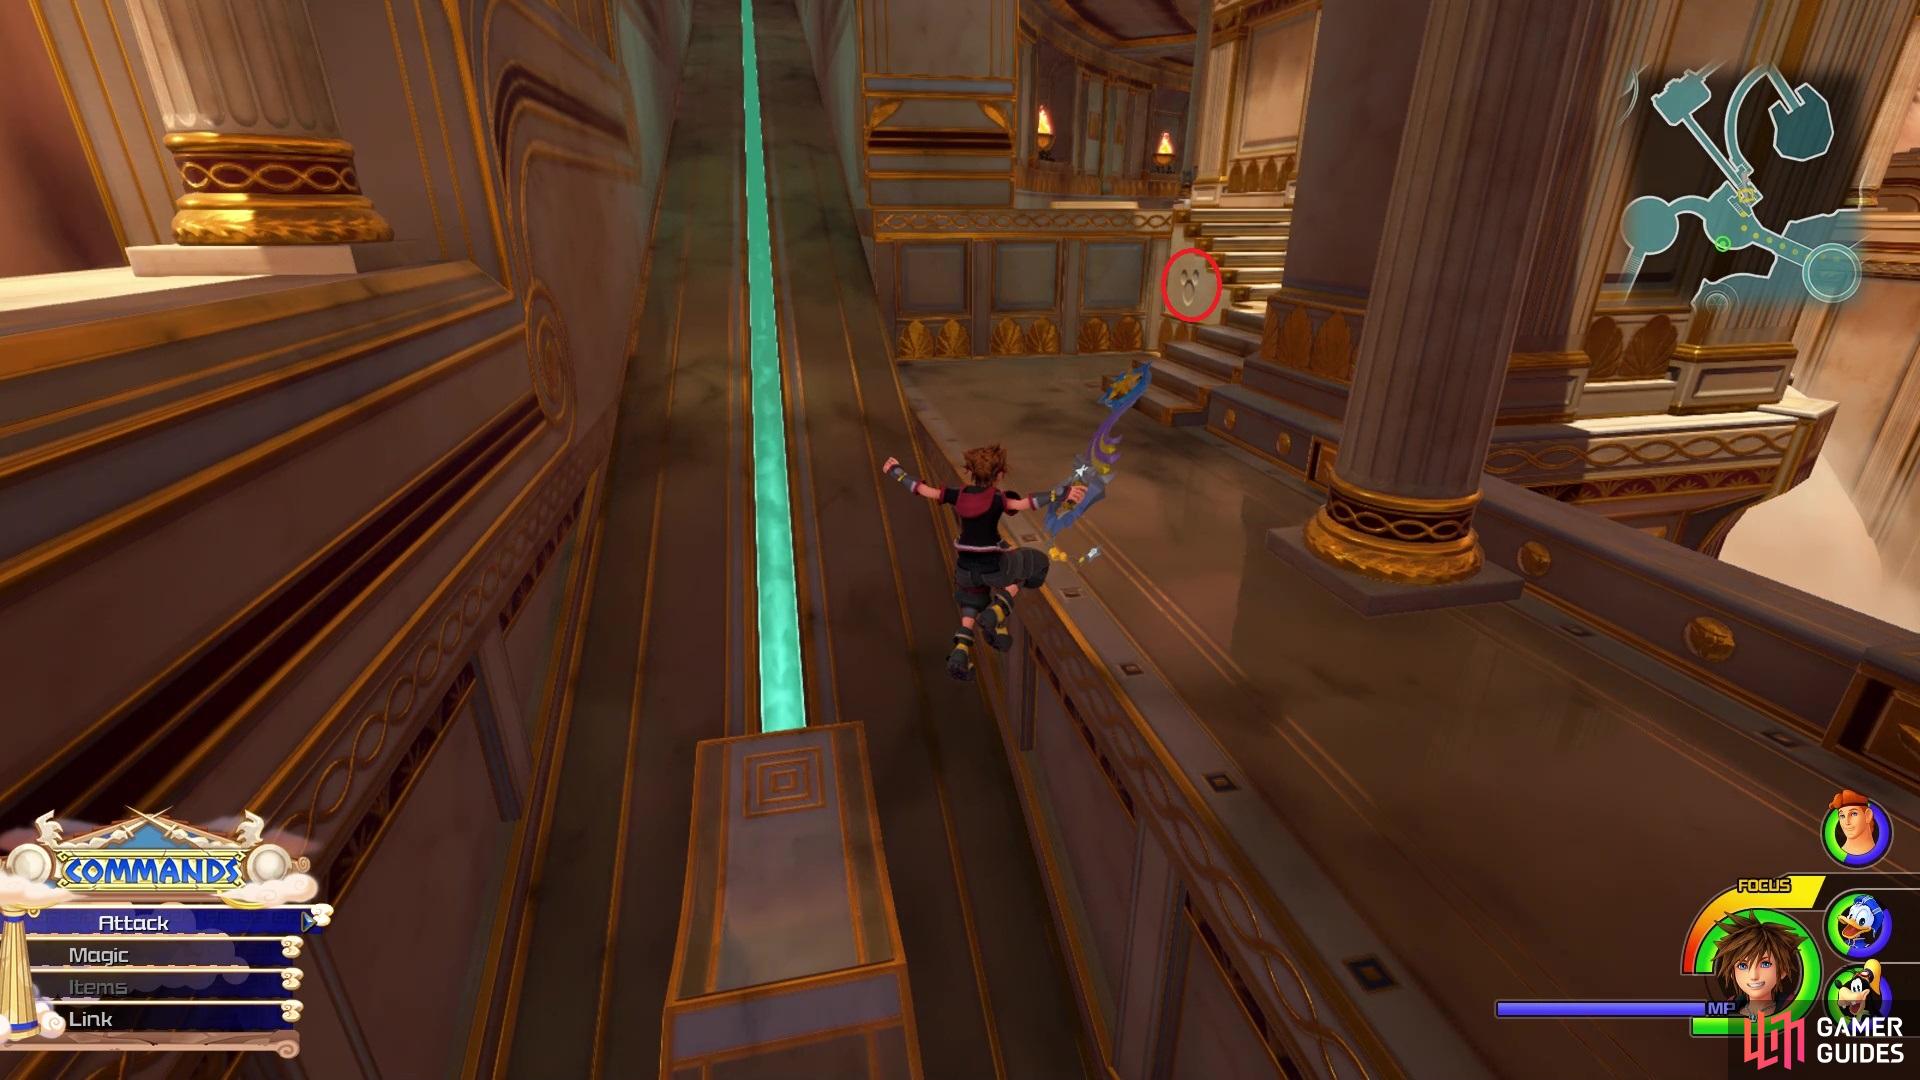
The last four emblems in Olympus will be in the Realm of the Gods area, so enter the gates found on the summit of Mount Olympus. Follow the path set out for you, past the first encounter in the area, until you reach the Corridors save point. Head up the stairs here and you should spot a line that you can slide on, with some more stairs to the right of it. The emblem will be on the wall near those stairs.
Lucky Emblem 10
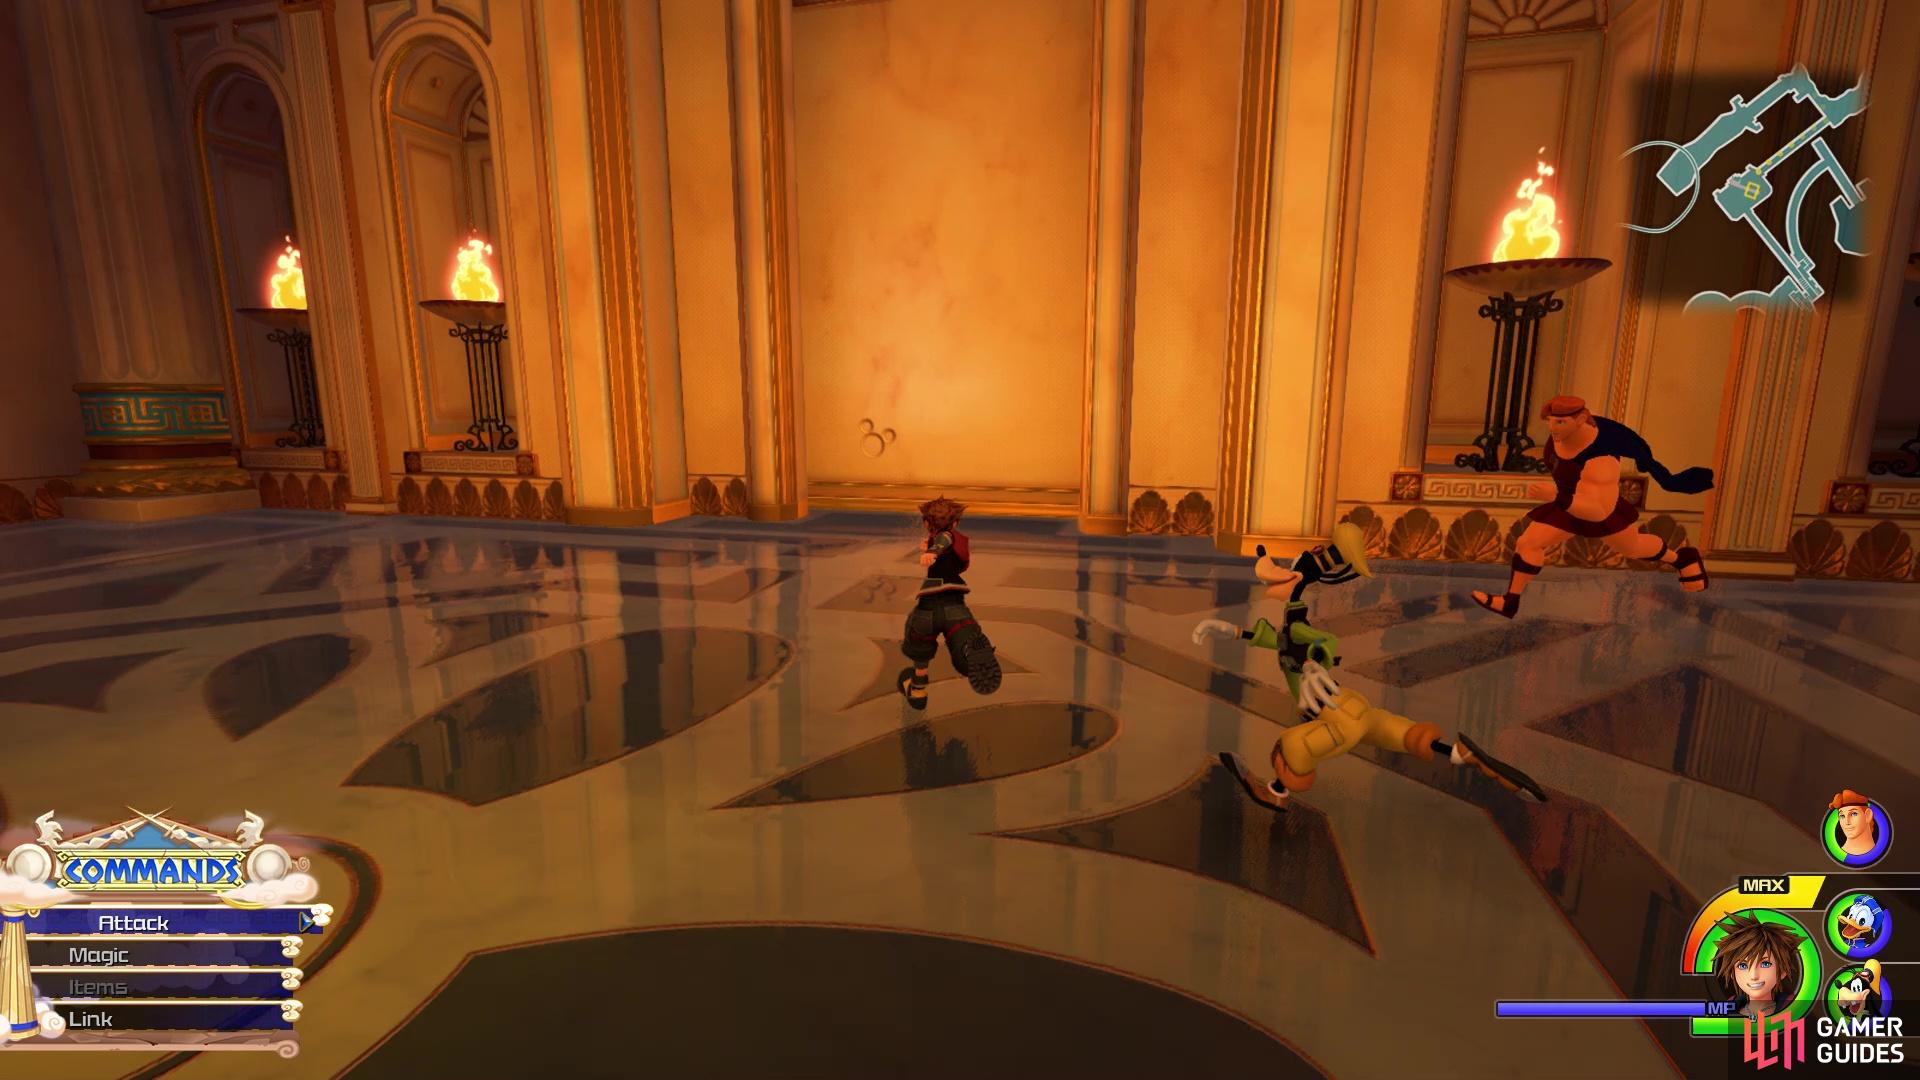
From the previous emblem, jump on the rail next to it and slide up to a room with some Heartless. Defeat them all, then look for two breakable pots along the one wall. The emblem will be behind one of the pots.
Lucky Emblem 11
(1 of 2) Let the water slide take you down a large pit
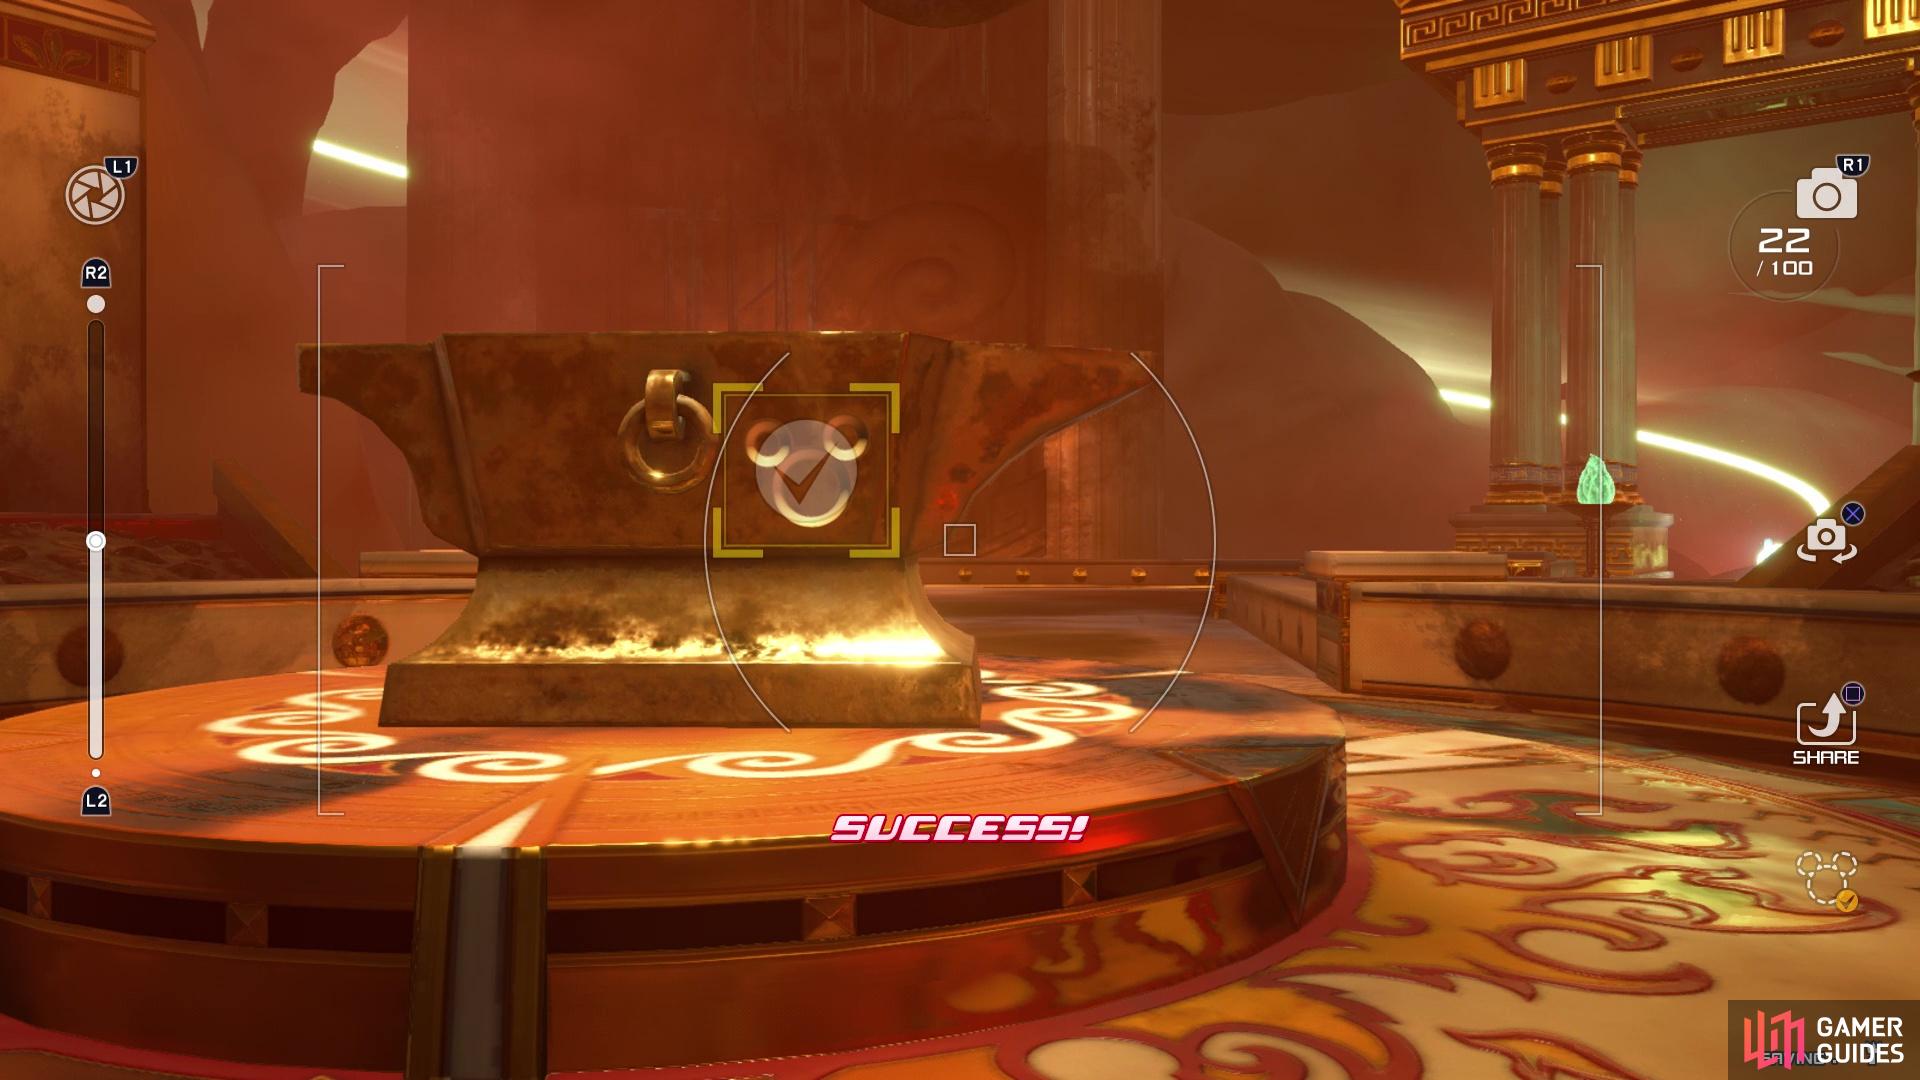
Let the water slide take you down a large pit (left), The emblem will be on the side of the anvil at the bottom (right)
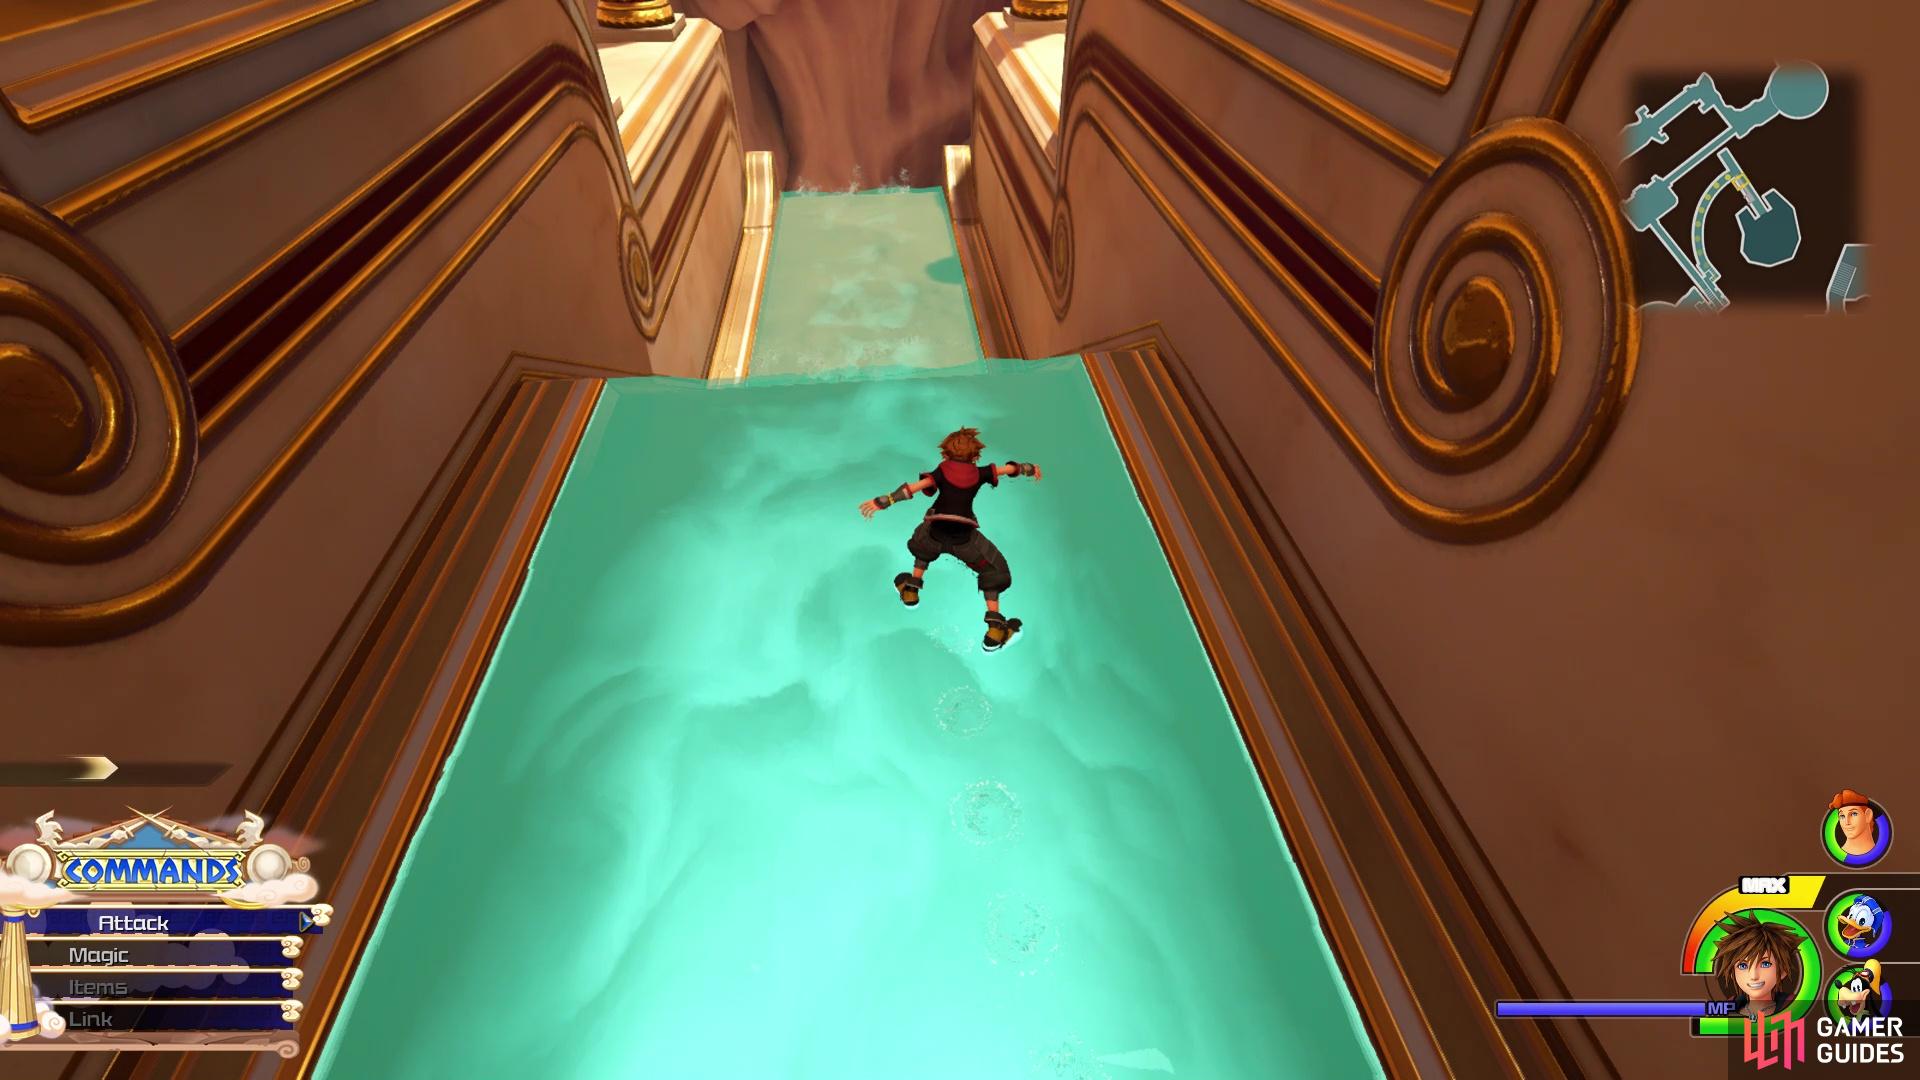
Return to emblem #9 and use the stairs to reach another rail, which will bring you to some water. Here, you will want to follow the water flow down, which will lead to a huge drop that puts you in the Secluded Forge section. Descend the stairs and look for the anvil in the center of the room, with the emblem being on the side of the anvil.
Lucky Emblem 12
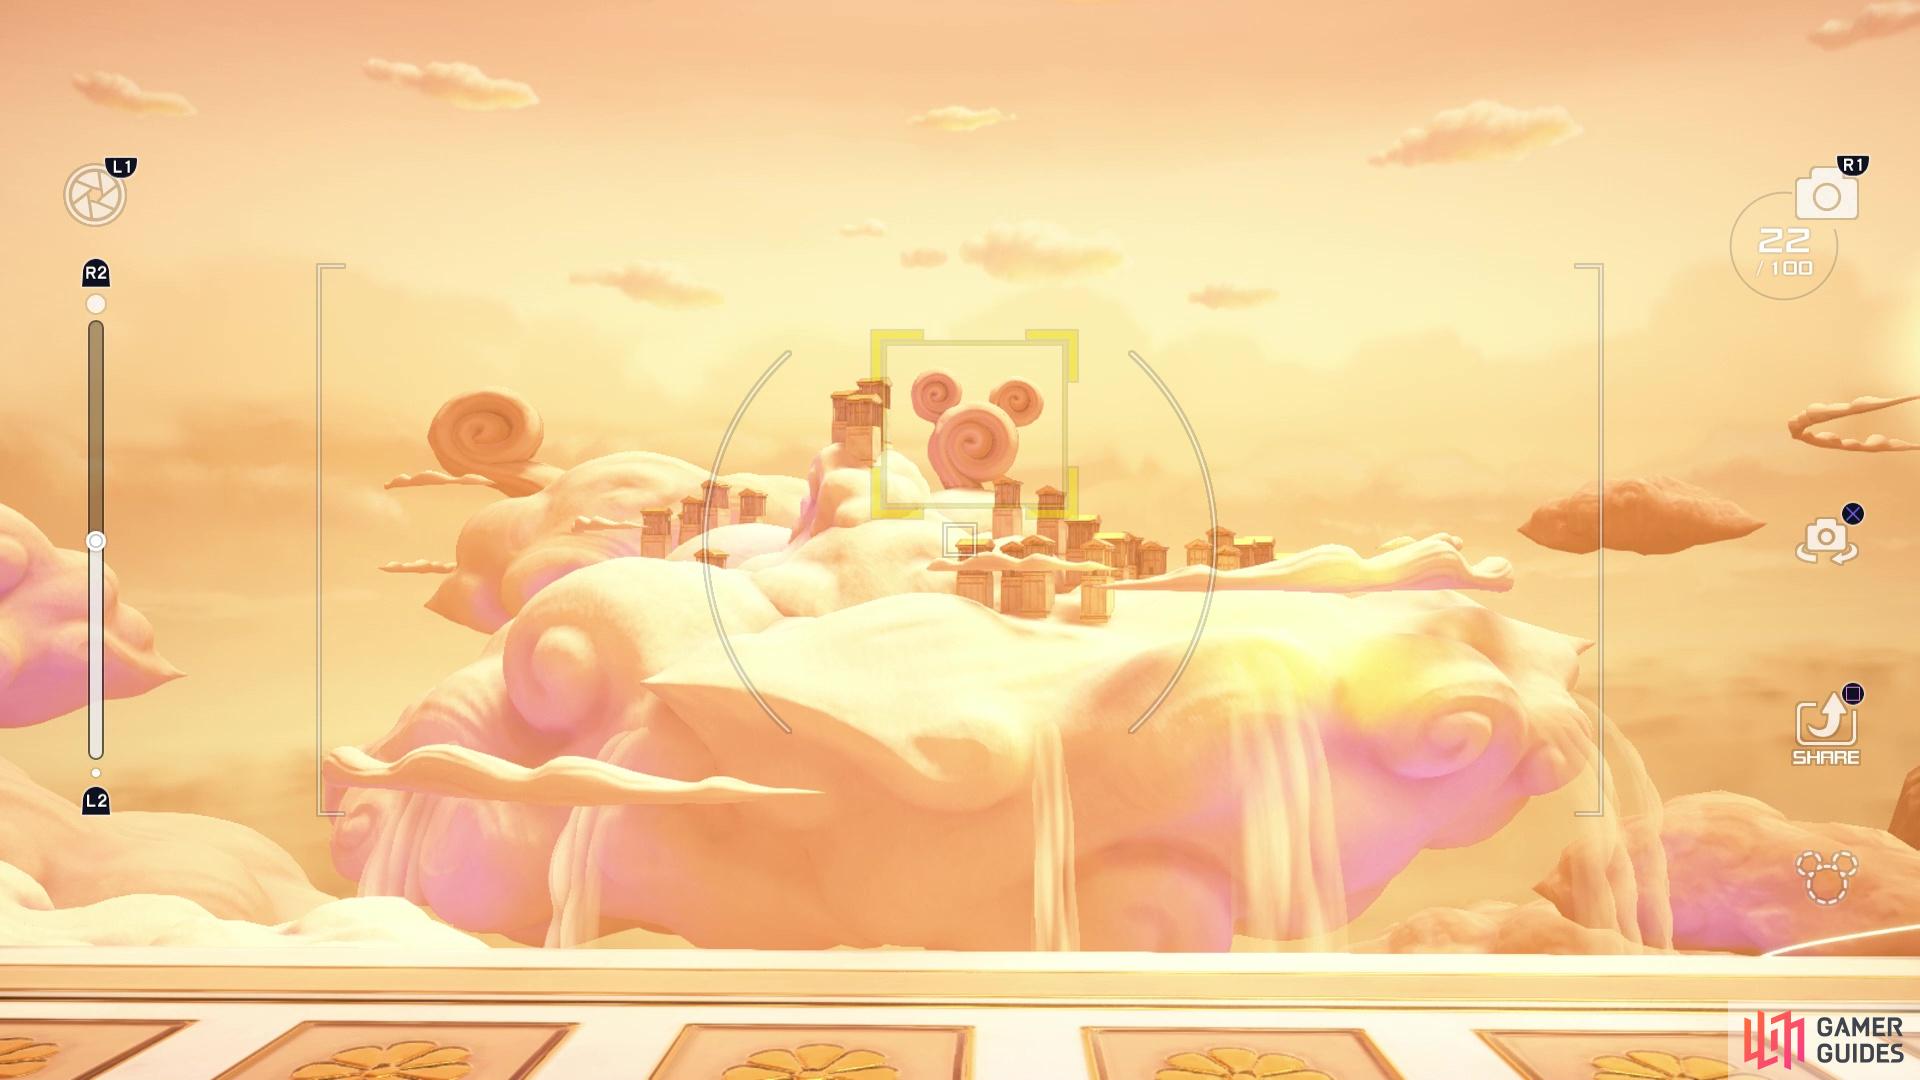
Return to the Corridor save point and go up the ramp this time, taking the rail at the end here. This is a long one, with enemies along it, so you’ll know you’re on the right one when you see those enemies. Once you reach the end, you should be in the Cloud Ridge section of the map. Climb the nearby stairs, clear the enemies away, then look out into the distance to the southeast. Although it may not look like it, but the structure off in the distance is actually the emblem.

 Sign up
No Comments