(1 of 3) Find the Centra Ruins in the Centra Crater region.
You can reach the Centra Ruins - and hence hunt for the Tonberry GF - anytime after the events at Fisherman’s Horizon, after you have control of a mobile Balamb Garden. The Centra continent is a shattered collection of landmasses on the south-central part of the world map. Specifically, the northern collection of these landmasses look as if they were sundered by some impact, and fittingly enough it’s known as the “Centra Crater” on your map. You’ll find the Centra Ruins on the western part of this Centra Crater landmass.
When you enter you’ll see a counter pop-up, and some being - Odin - will communicate with you. This place is home to two GFs, Odin and Tonberry, but to hunt Tonberry just ignore the counter and the taunts from Odin for now. The quest to defeat Odin will be discussed later, and has no bearing on how you should proceed with Tonberry.
The Tonberry Massacre
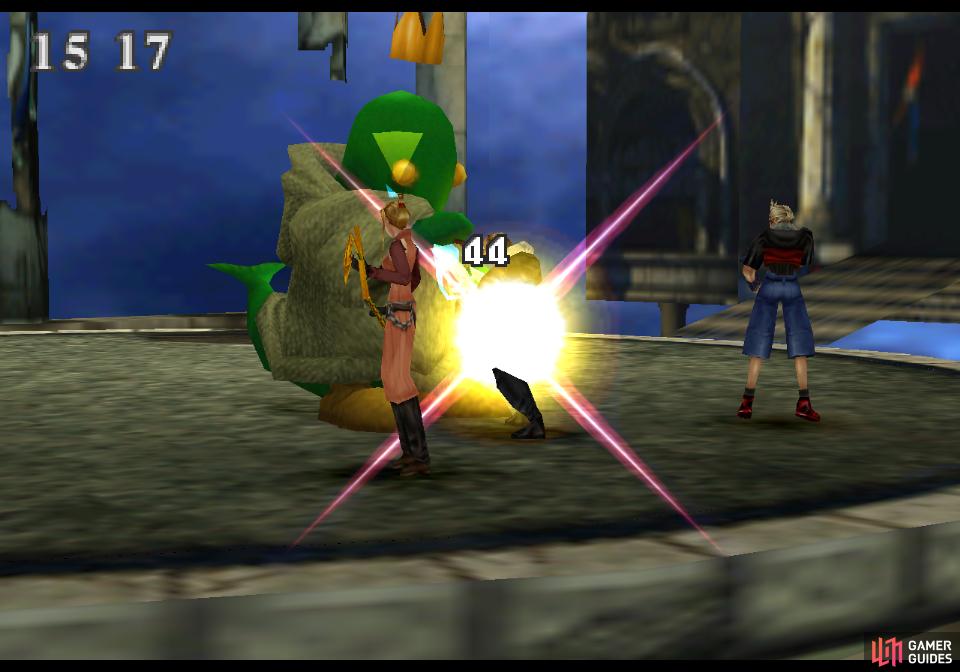
From the screen you start out in head up one screen to reach some ruins, including an arched doorway behind a “My Blue Heaven” sign. No need to decipher this or worry about the ruins just yet, just run around this screen until you find the exclusive creature that dwells here - the Tonberry. This critter is interesting enough, and you’ll have to fight enough of them, that it’s worth going over a bit.
| Tonberry | |
|---|---|
| Lv: | 1-100 |
| HP: (Lv10) | 17,000 |
| HP: (Lv20) | 19,000 |
| HP: (Lv30) | 21,000 |
| HP: (Lv100) | 35,000 |
| Weaknesses: | – |
| Resistances: | – |
| Status Resistances: | Immune to most status effects; Card 0% – LV Down 0% – LV Up 0% – The End 0% |
| EXP: | – |
| AP: | 1 |
| Draw: | Death |
| Mug: | Chef’s Knife x1 |
| Drop: | Chef’s Knife x1 |
Tonberrys are vicious creatures and Final Fantasy staples that are generally characterized by having high HP and an odd fighting style. In this case, their high HP is actually somewhat slanted against lower-level parties, as they start out with 15,200 HP and max out at 35,000 HP - a staggeringly low growth rate of x2.3 over 100 levels. They walk slowly forward, being incapable of quickly closing the distance between you, and when they are adjacent the the party they’ll go to work with their Chef’s Knife attack, which can grow to be fairly painful.
Their high HP helps them survive long enough to close this distance, but they’re also aided by their equally iconic counterattack - Everyone’s Grudge. When attacked there’s a random chance they’ll use this attack, which deals damage to a character equal to the number of foes they’ve defeated x20. If that character has defeated 100 foes, they’ll take 2,000 damage - no blocking, reductions or complications. How effective this attack is against characters will obviously vary, and you can check each character’s kill count via the Battle Meter.
They’re immune to almost every status effect in the game and have no elemental weaknesses, leaving you with two realistic options - gravity, and brute force. Demi works well, as will Diablos (if you leveled him, not so much if not). You can also leave your HP low and spam limit breaks - Squall, Zell and Irvine all work wonders, especially if Squall has his Lionheart.
Defeating Tonberrys is one thing, but what’s the point? Well, you need to kill around twenty Tonberrys to lure out the Tonberry King, which is the entire point of this trip. You need not kill them all in one go - you can return to the world map, even rest in Balamb Garden if you need to. You cannot, however, Card Tonberrys… not that you’d want to, as they give no EXP. Just run around the second screen in the Centra Ruins and if the timer runs out, pick “Try Again” to return to the world map. You’ll keep your Tonberry kill progress, and Odin’s timer and taunts are irrelevant to your goal of killing Tonberrys.
There’s no obvious counter for how many Tonberrys you’ve defeated, so you might want to keep your own tally, or better yet, start a GF learning a new skill at the start of this grind. One Tonberry, one AP, which should make it easy to track. There’s a range of kills that Tonberry can show up during, and he’ll appear after you kill a normal Tonberry, extending that fight rather than starting a new one. This being the case, you might want to exit to the world map when the timer hits 10:00 or so, just to prevent any complications.
(1 of 2) The Tonberry King is larger, but he’d not necessarily much more powerful than normal Tonberrys.
The Tonberry King is larger, but he’d not necessarily much more powerful than normal Tonberrys. (left), He, too, can be quickly cut down by spamming limit breaks. (right)
Boss - Tonberry King
After you defeat around twenty Tonberrys the Tonberry King will have a chance to show up every time you defeat another Tonberry. The fight with Tonberry King starts immediately after defeating the Tonberry, so you’ll need to be wary of the potential to be ambushed by this foe.
| Tonberry King | |
|---|---|
| Lv: | 1-100 |
| HP: (Lv10) | 25,000 |
| HP: (Lv20) | 50,000 |
| HP: (Lv30) | 75,000 |
| HP: (Lv100) | 250,000 |
| Weaknesses: | – |
| Resistances: | – |
| Status Resistances: | Immune to most status effects; The End 0% |
| EXP: | – |
| AP: | 20 |
| Draw: (Lv1-19) | Cure, Death, Life |
| Draw: (Lv20-29) | Cura, Death, Life |
| Draw: (Lv30+) | Curaga, Death, Full-Life |
| Mug: | – |
| Drop: | Royal Crown x1 |
Like the lesser Tonberrys, the Tonberry King has a healthy amount of HP, but unlike the lesser Tonberrys, Tonberry King’s HP scales more as he levels up. At level 10 he’ll have a mere 25,000 HP, which is a bit, but only roughly 50% more than your average Tonberry. A low level party with good spells junctioned can easily dispatch him with a few limit breaks. His HP doubles to 50,000 at level 20, and by level 100 Tonberry King will boast a whopping 250,000 HP - an increase of 2,500 HP per level. Suffice to say, he’s best fought early.
Otherwise, Tonberry King is very similar to other Tonberrys, being immune to almost every status effect (functionally all of them if you don’t have Selphie) while being weak nor resistant to no elements. If he’s a high level you may want to rely on Diablos, but even then Diablos will only deal max damage - 9,999 - per summon. Irvine, Squall and Zell will certainly do more damage with their limits, especially Squall’s Lionheart.
As for the Tonberry King’s attacks, he’s got his own variant of Everyone’s Grudge, called “It’s Sharp!”, which will deal damage equal to the number of enemies defeated x30… which will quite likely be a death sentence for your more combat-hardened characters. Tonberry King will also counterattack every several hits with “Junk”, which will cause a cascade of… well, junk, to fall on the party. Finally, the Tonberry King also has a physical attack, although his Strength is only slightly higher than a normal Tonberry.
While Tonberry King can be a nuisance with his high HP and “It’s Sharp!” attack, but he’s also got a generous selection of spells you can draw. These include curative magics - Cure (1-19), Cura (20-29) and Curaga (30+) the obligatory Death, and Life (1-29) and Full-Life (30+). If you’re a sufficient level, consider drawing full stocks of Full-Life from Tonberry King, as it’s a rare opportunity to fill up on a rare and potent spell.
Whittle down Tonberry King’s life and he’ll shrink in size and sheepishly join you as a new GF - Tonberry.


 Sign up
No Comments