The Missing: Steve Lost & Found quest in Dead Island 2 can be acquired from the information board at the Serling Hotel, in Ocean Avenue. Once you have it, you’ll need to make your way to Monarch Studios using a fast travel map. You’ll spawn just outside the gates to the studios, and from here you can begin your search for Steve.
“Steve’s been reported missing! He was working with screenwriter and friend, Sergio, on their sitcom sensation before the outbreak, but failed to evacuate with the rest of the cast at Monarch Studios. Is there any chance he’s still there?”
Where to Find Steve at Monarch Studios - Dead Island 2
As you make your way through the initial buildings at Monarch Studios, you’ll soon find yourself in the courtyard with the giant spider set. Take the path through the gates to the southwest (you may need to kill all the zombies in the area before they will open for you), then continue southwest into Stage 3. You can now begin the search by looking through the sets here.
Scour the Sets of Signs of Steve
There’s a lot to sift through on the sets in Stage 3, but you only need to interact with one specific item here to progress the quest at this point. Go to the northern set with the bedroom, and look on the right side of the bed for a note named “Steve’s to-do list”. Once you’ve acquired this, you can continue to search through the sets for other signs of Steve’s presence. In particular, you need to check the kitchen to the southwest and inspect the following items:
- Soap and toothbrush
- Water bottles
- Box of food
- Answering machine
The first three items can be found near the fridge, while the answering machine is located on the steps to the right of it. An audio log will play once you interact with the answering machine, and your next task will be to check for any signs of Steve at Jimmy’s trailer.
Where to Find Jimmy’s Trailer
To reach Jimmy’s trailer, head through the door to the south which brings you outside from Stage 3. There will be a ![]() Screamer waiting for you here so be ready to deal with it, and kill the other zombies in the area while you’re at it. Turn west (right) from where you encountered the screamer, then left (north) at the first turn down an alley. There’s a high concentration of zombies here, so you’ll need to kill them before you make your way further north. At the end of this alley, turn left and then take the immediate right turn, where you’ll see Jimmy’s trailer in the distance, down an alley with green paint at its entrance.
Screamer waiting for you here so be ready to deal with it, and kill the other zombies in the area while you’re at it. Turn west (right) from where you encountered the screamer, then left (north) at the first turn down an alley. There’s a high concentration of zombies here, so you’ll need to kill them before you make your way further north. At the end of this alley, turn left and then take the immediate right turn, where you’ll see Jimmy’s trailer in the distance, down an alley with green paint at its entrance.
Once you reach Jimmy’s trailer, you’ll notice some explosive growths all around it. Take out a gun and shoot each of these before approaching them, or throw some melee weapons at them if you have no ammunition. After you’ve destroyed all of the growths, enter the trailer and go through the door to your right. You’ll find a zombie in here named Sergio, who you need to kill. You can then pick up his phone on the ground to advance the quest.
(1 of 4) Interact with Steve’s to do list on the bed.
Follow Steve to Beverly Hills
After killing Sergio on Jimmy’s trailer and picking up his phone, you’ll be prompted to travel to Beverly Hills to continue your search for Steve. To get there quickly, go through the gates immediately to the south of Jimmy’s trailer, then head west towards a gap in the wall. You can turn left here and follow the path to the next set of gates, through which you can fast travel to Beverly Hills.
Look for Steve in his Beverly Hills Apartment
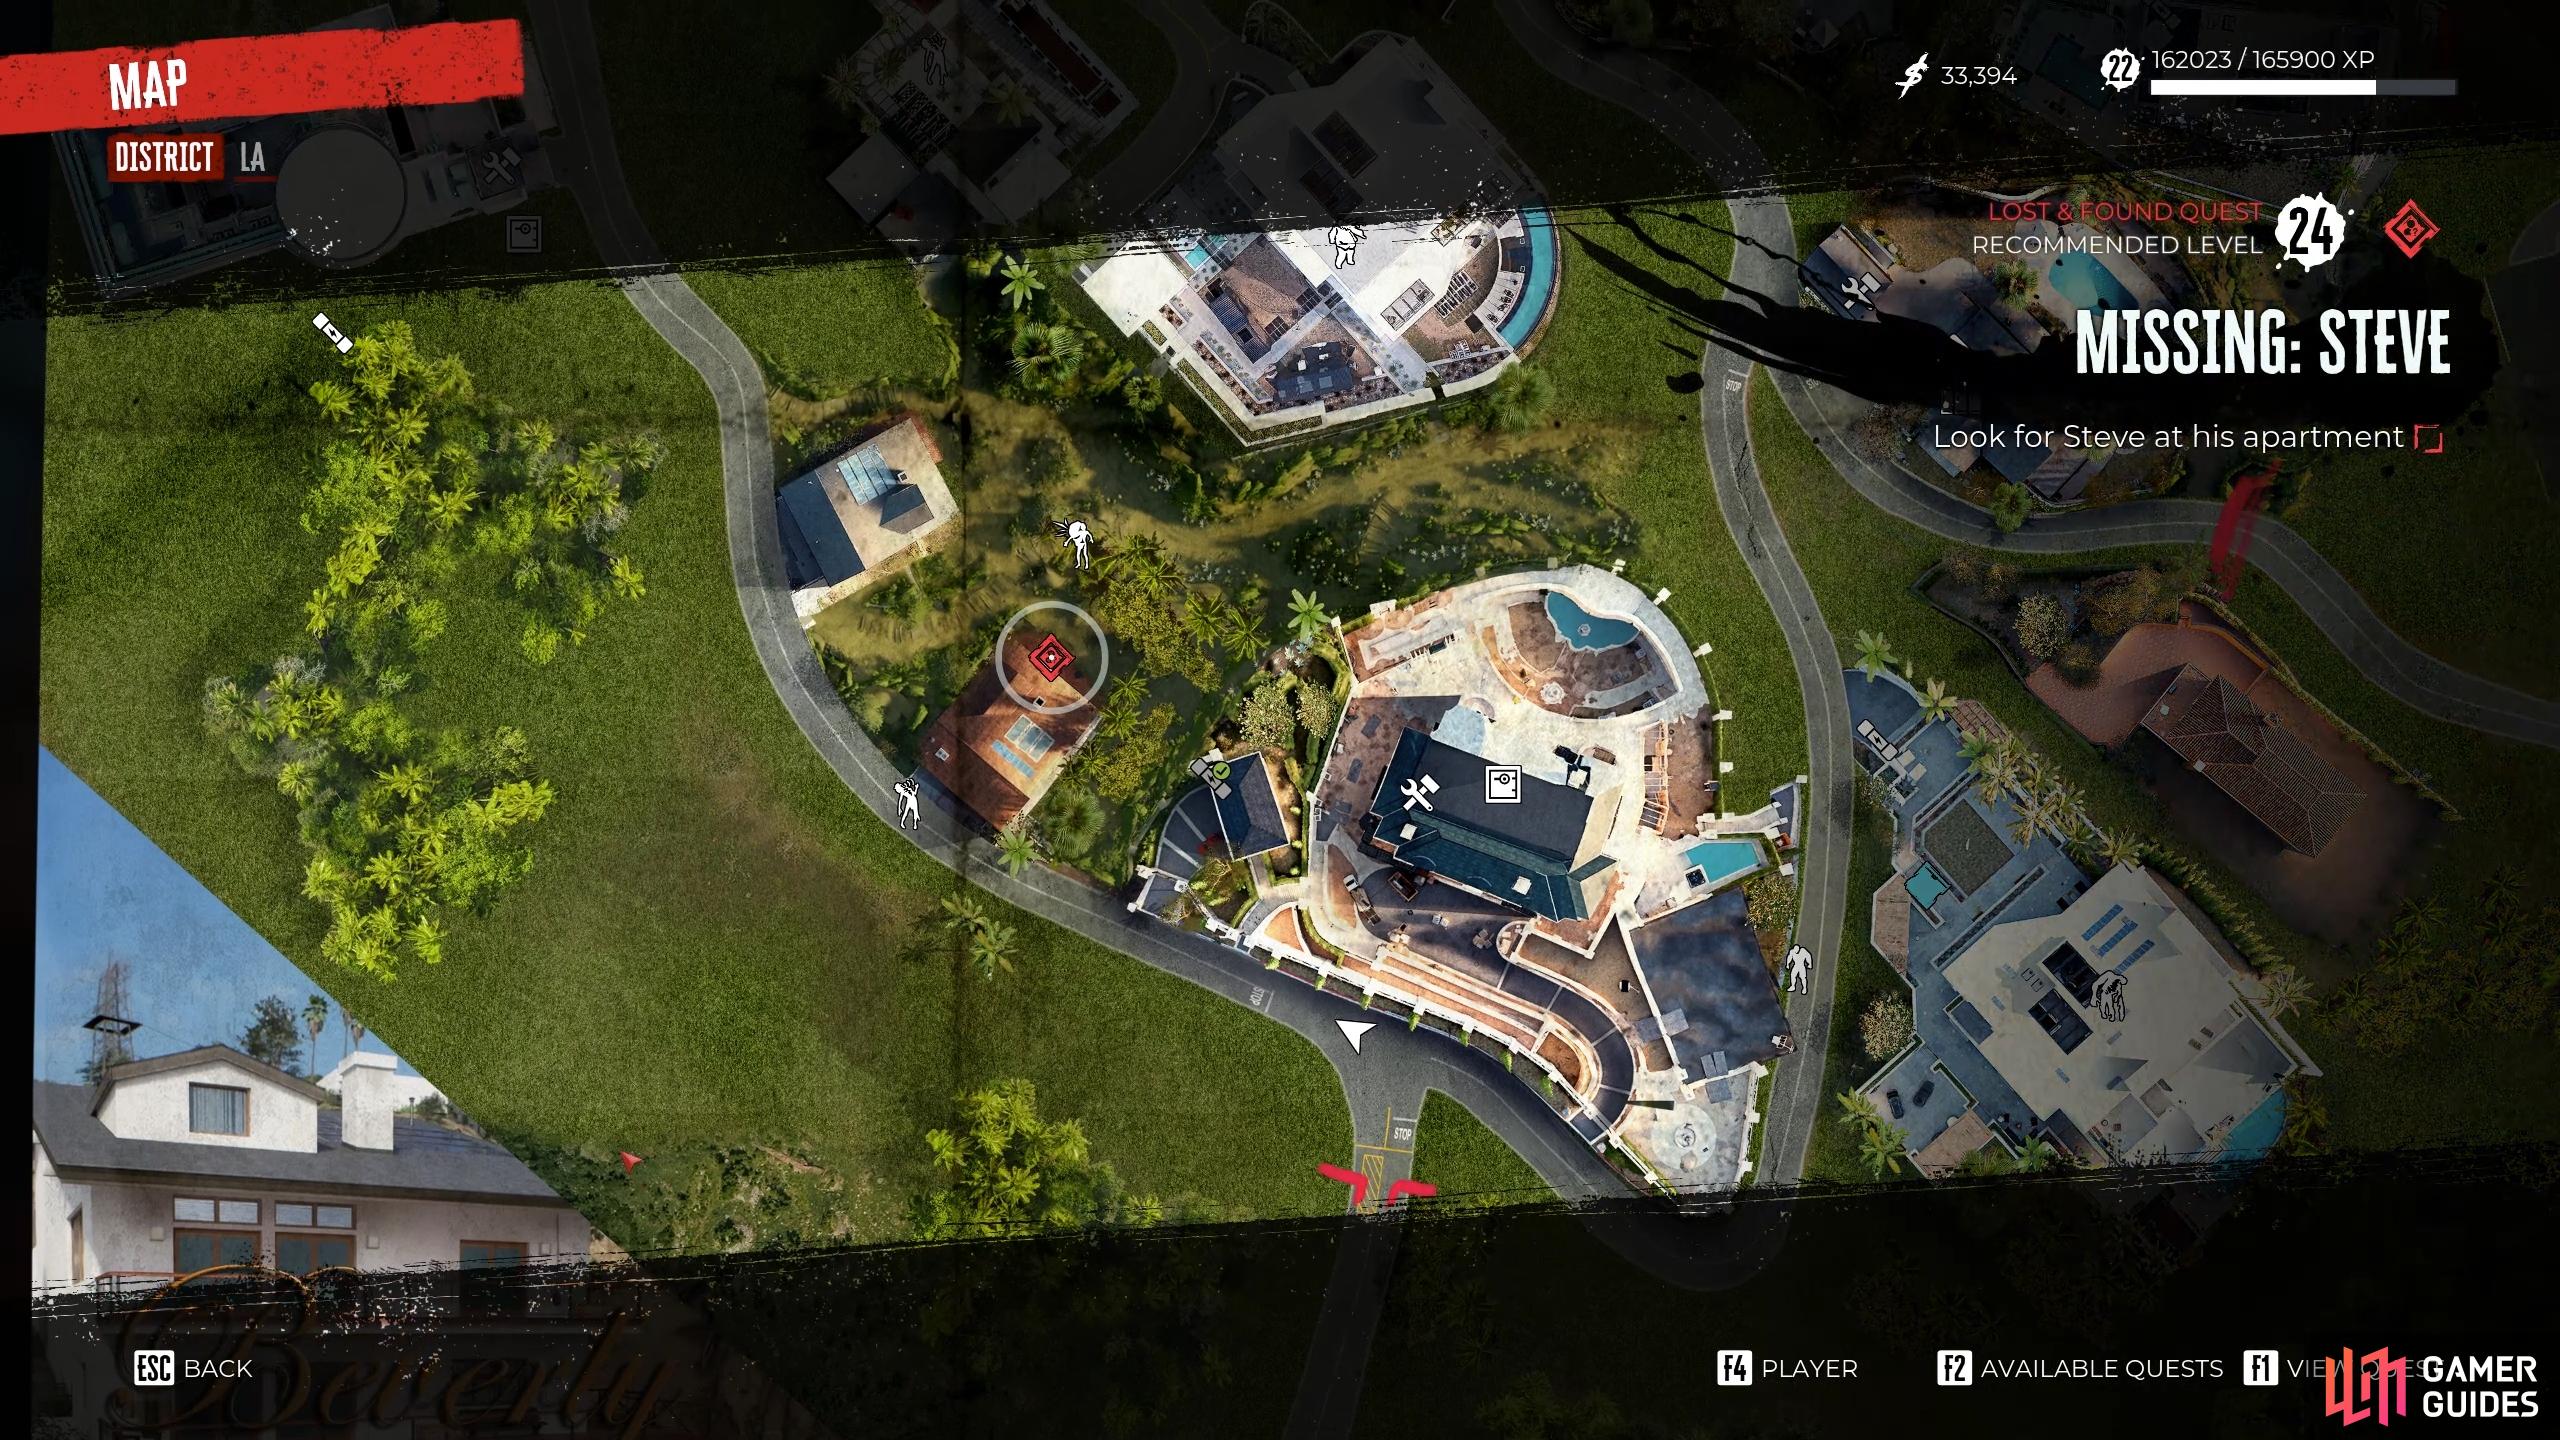
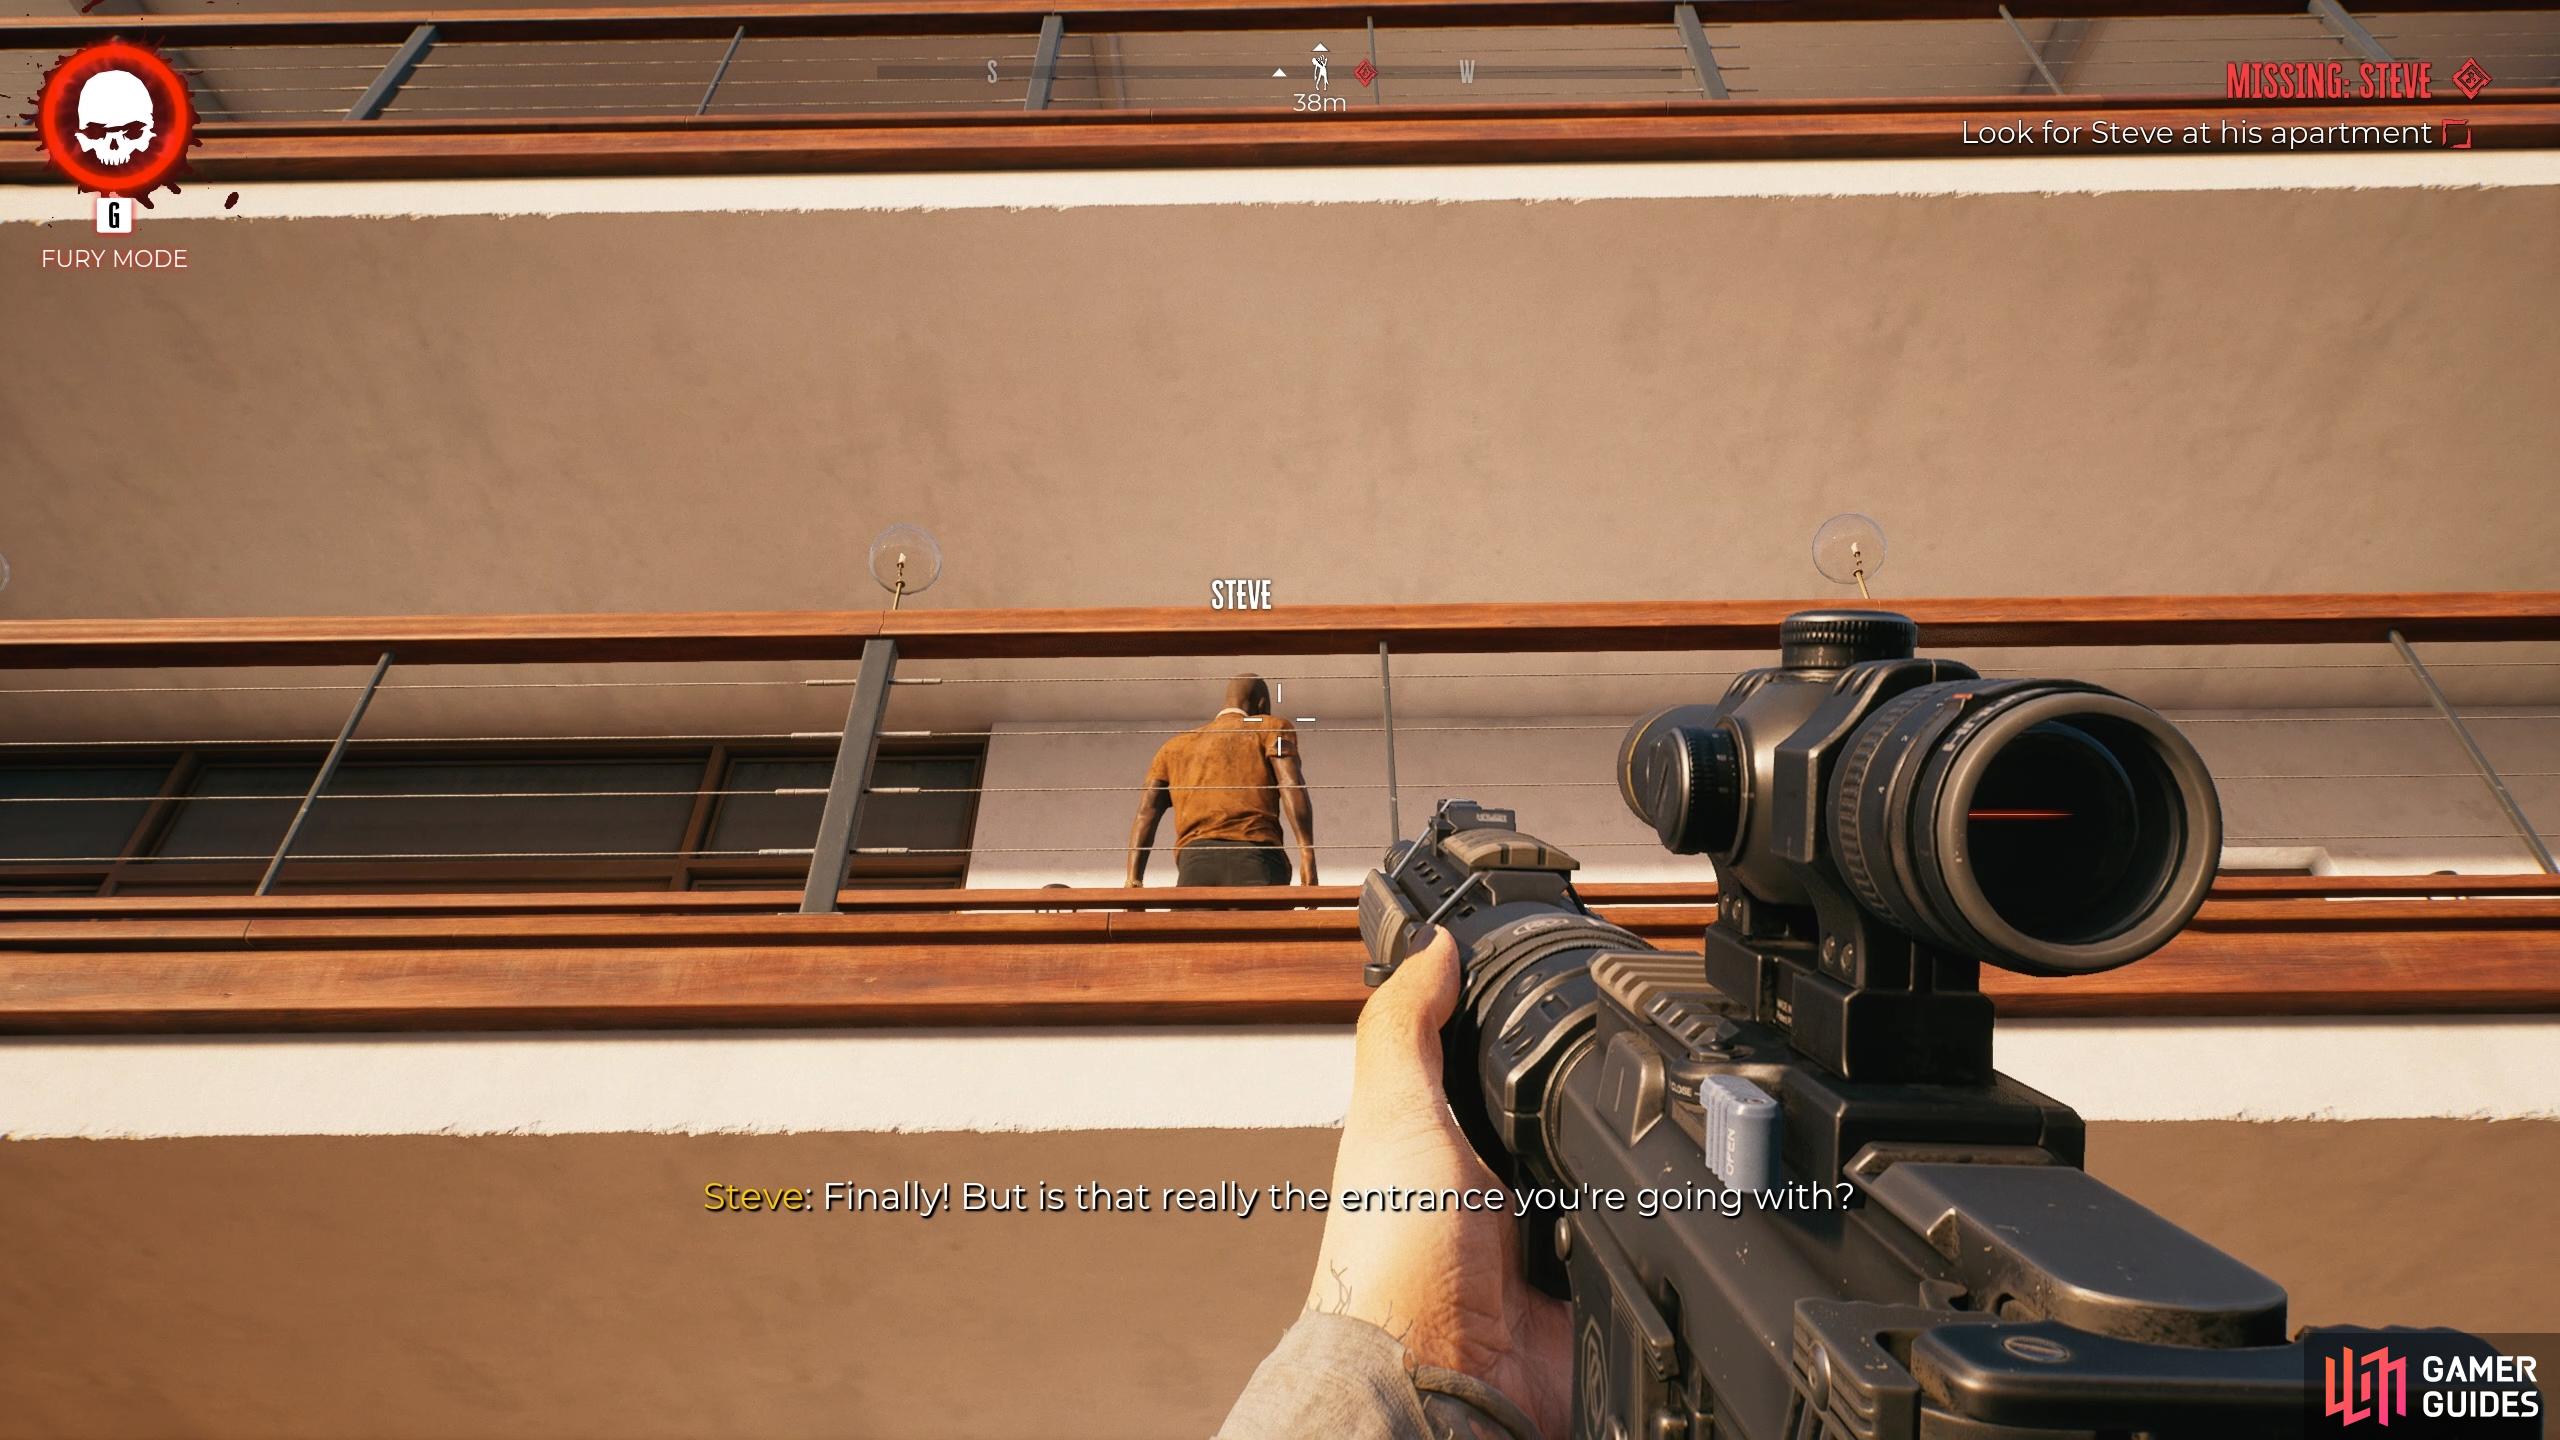
Now that you’re in Beverly Hills, you need to look for Steve at his apartment in the southwest of the map. You can see the exact location in the screenshot below. Once there, look for Steve on the balcony above, and speak with him to learn about a new task that he’ll request from you. He wants you to find three different types of zombie, bring them to him, and then kill them in front of him. You need to find a villain, a hunk, and a hero zombie. We’ll start with the villain.
(1 of 2) The location of Steve’s apartment in Beverly Hills.
The location of Steve’s apartment in Beverly Hills. (left), Look for Steve on the balcony of his apartment. (right)
Where to Find a Perfect Villain Zombie
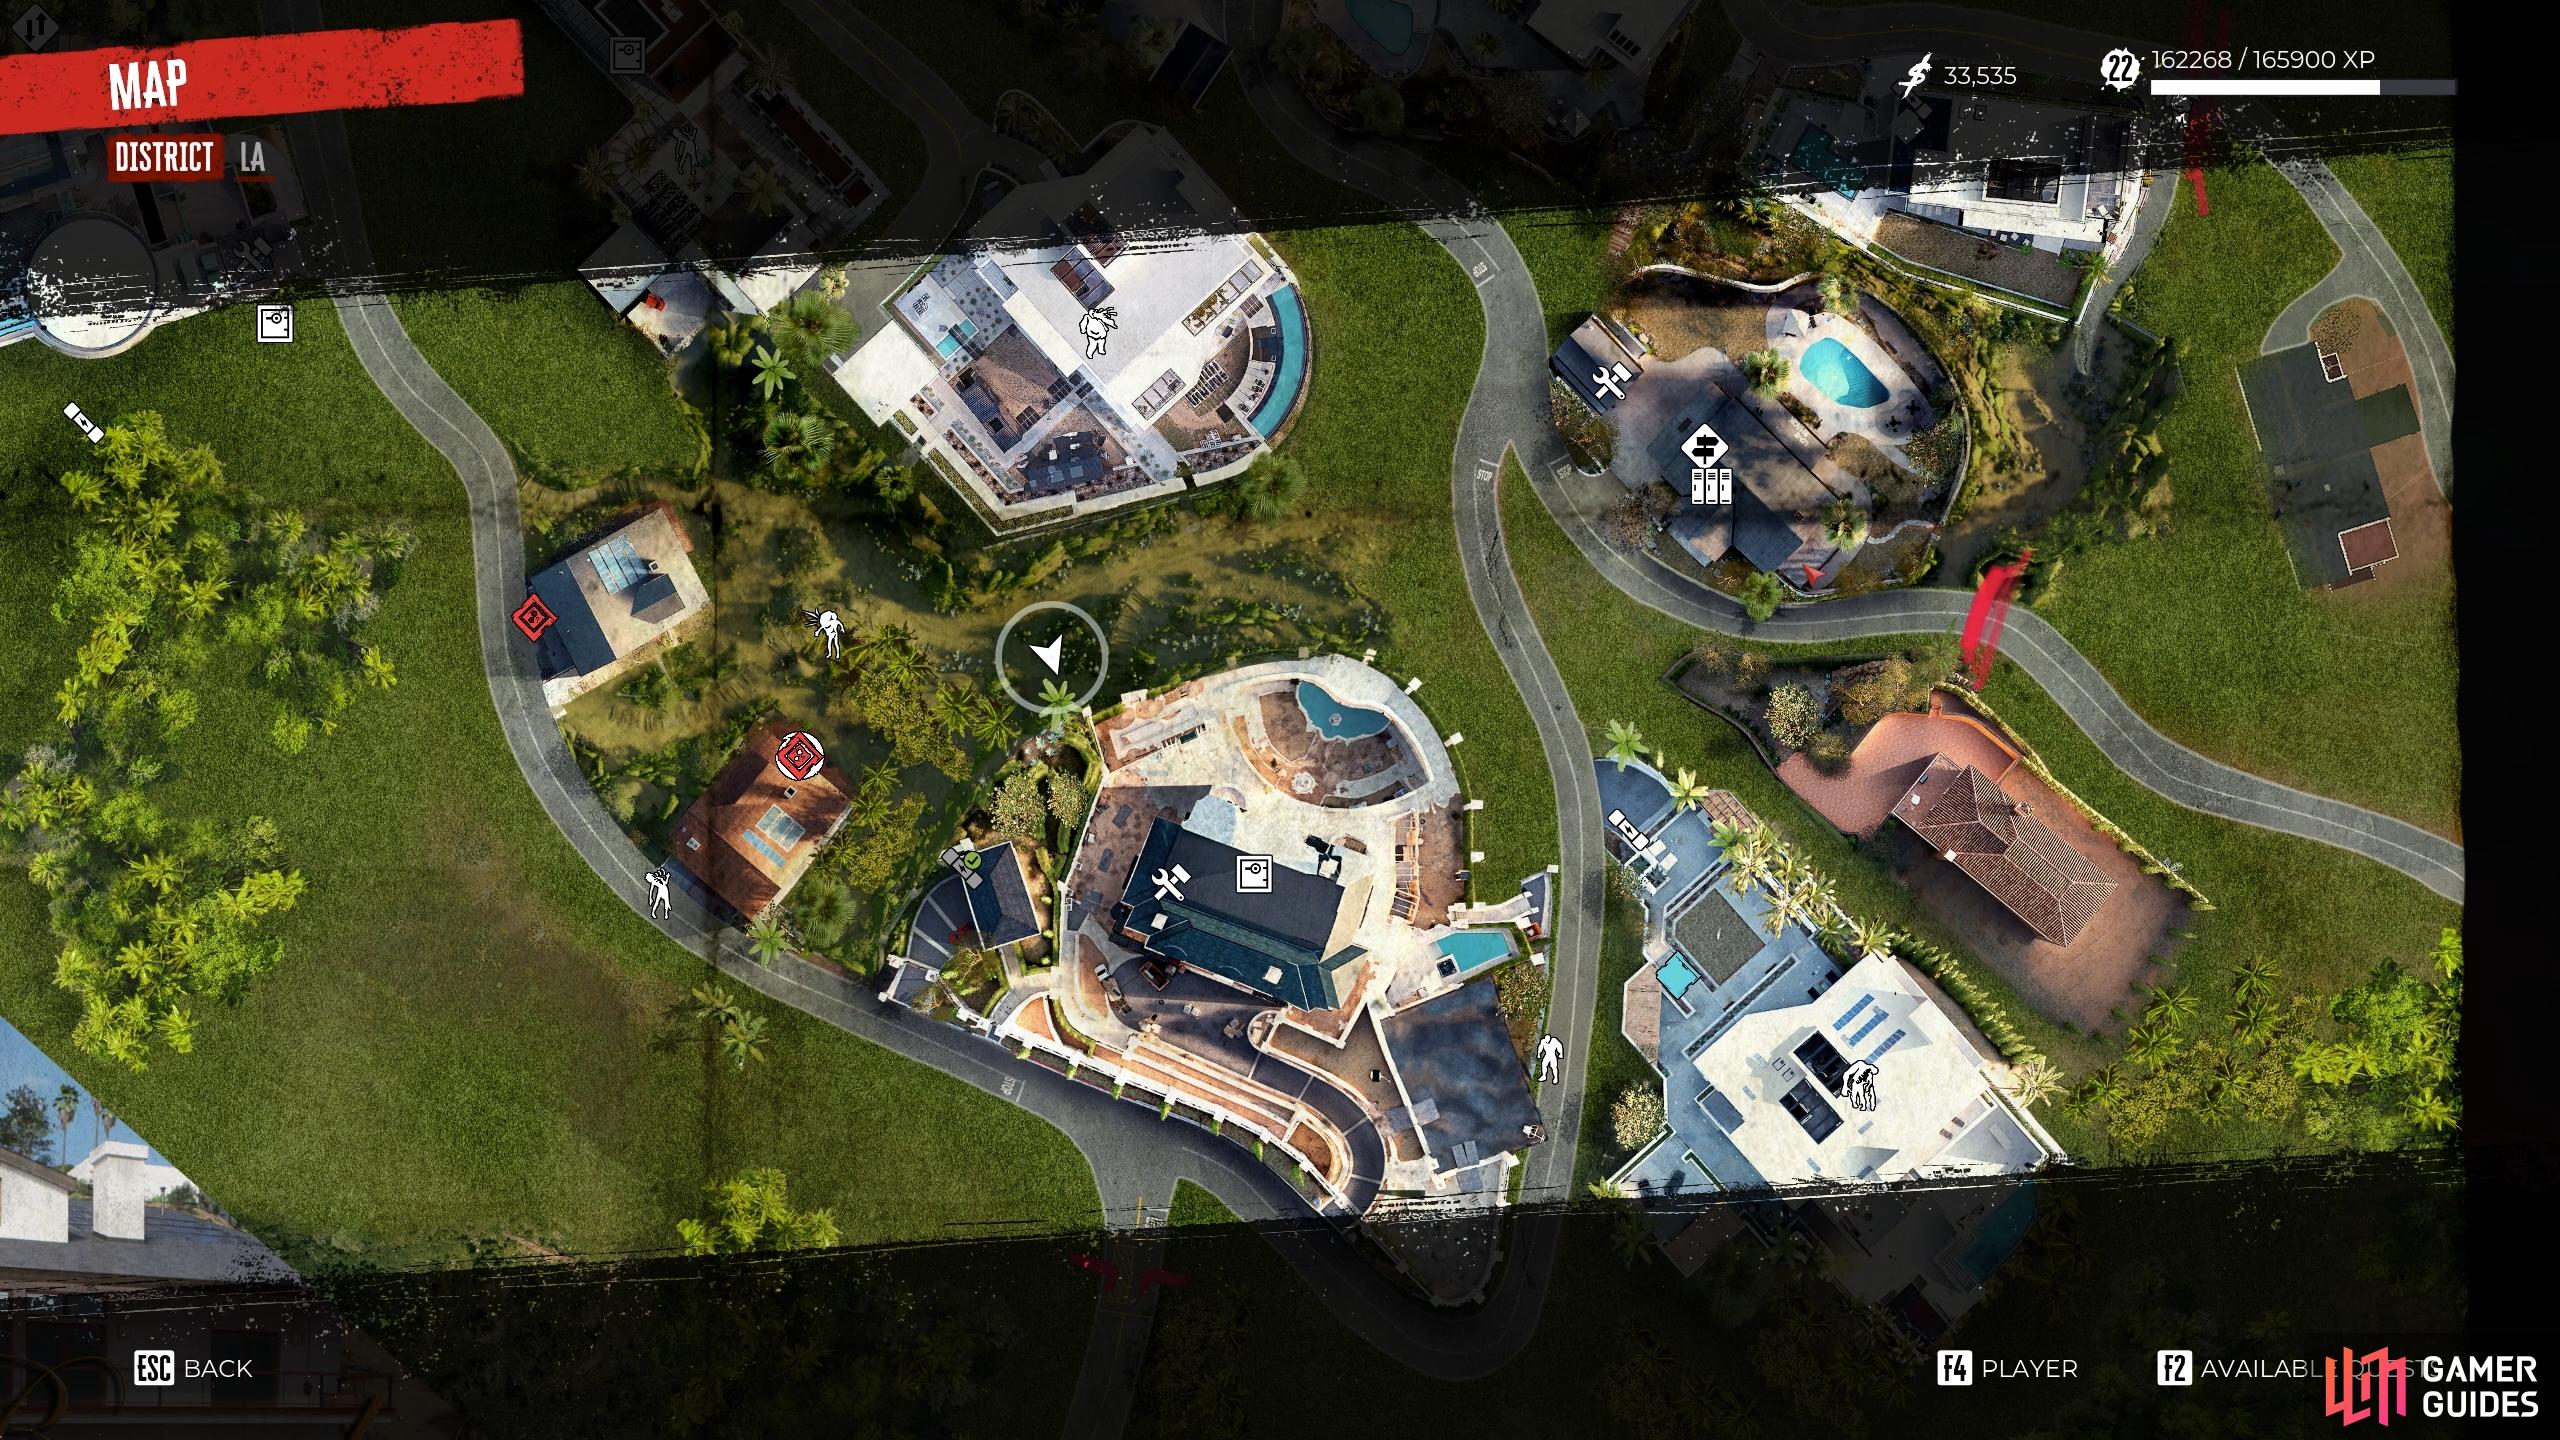
To find the perfect villain zombie, head southwest up the steps to the road above. Keep following it a brief way to the east, and turn left (northeast) to find the gates to another house. You need to open these gates to access the perfect villain zombie, you can be found munching on something just beyond. Get the attention of the zombie, then goad it back to where you first met Steve. You can then kill it once you’ve heard Steve recognize its presence.
(1 of 2) The location of the Perfect Villain zombie in Beverly Hills.
The location of the Perfect Villain zombie in Beverly Hills. (left), Open the gate and goad the perfect villain zombie back to Steve’s apartment. (right)
Where to Find a Hot Hunk Zombie
To find a Hot Hunk zombie, start from the position where Steve is located and run down the steps to the southeast. You should be able to see a large crusher-like zombie to your right here, and it will burst into flames when it sees you. As with the perfect villain, you need to bring this back to the balcony where Steve is, and kill the hunk here once Steve has acknowledged its presence. The Hot Hunk zombie is much slower than the villain, so take your time as you head back and be ready to kill other zombies that pop up along the way.
(1 of 2) The location of the Hot Hunk zombie in Beverly Hills.
The location of the Hot Hunk zombie in Beverly Hills. (left), Get the attention of the Hot Hunk zombie, then goad it back to Steve’s apartment. (right)
Where to Find the Brave Hero Zombie
The last zombie you need is a Brave Hero. Head down the steps from Steve’s apartment, but this time turn left and go up the steps to the west until you reach the road. Turn right at the top and look for a zombie in a faded hi-vis vest. This one is quicker than the hunk so you should be able to run all the way back to Steve’s apartment with it, but be sure to kill some of the zombies along the way. There will be more that attempt to ambush you on this route.
(1 of 2) The location of the brave hero zombie in Beverly Hills.
The location of the brave hero zombie in Beverly Hills. (left), Get the attention of the brave hero and run back to Steve’s apartment with it. (right)
Once you’ve killed all three types of zombie at Steve’s apartment, the quest will be complete. This quest will award you the Krakatoa legendary weapons too, so good job rescuing all these people.


 Sign up
No Comments